To choose the best rubber flooring for a personal training studio, you must evaluate your training style, equipment weight, and subfloor type. Opt for high-density 10mm to 12mm rubber for versatility, or 20mm+ tiles for heavy lifting to ensure maximum shock absorption and floor protection.
Choosing the right flooring is a technical decision that impacts your studio’s long-term success. I often see owners focus solely on price, but they later regret the choice when their subfloor cracks or neighbors complain about noise. Unlike rubber flooring designed for large group fitness studios, personal training studios require more focused protection in smaller, high-traffic spaces. You have higher traffic in a smaller footprint. This means every square inch must perform perfectly. My experience shows that the floor acts as the foundation for your professional brand. If the floor looks cheap or smells like chemicals, clients notice immediately. It is not just about looks. It is about protecting your investment in expensive equipment and, more importantly, protecting your clients’ joints from impact. You need a surface that balances firm stability for heavy lifts with enough "give" for functional movements.
Selecting the wrong material can lead to costly repairs and unhappy clients, but the following guide will help you navigate the technical specifications like a pro.
Why Does Your Choice of Flooring Define Your Personal Training Studio?
The right flooring creates a safe, professional, and durable environment that separates high-end personal training studios from budget garages. It must handle high-intensity impact in small spaces while maintaining a clean, premium look that justifies your training rates and builds trust.
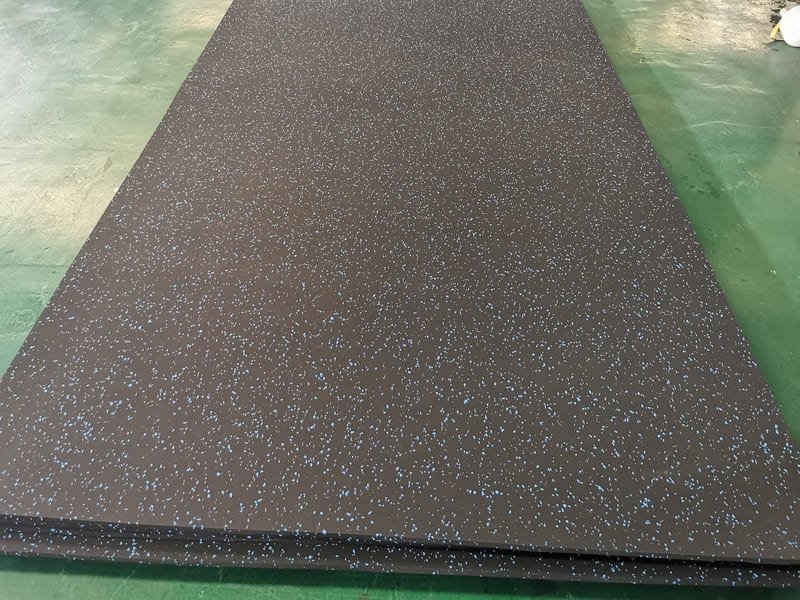
In my years of managing custom flooring projects, I have noticed that PT studios face unique physical stresses. Unlike massive gyms where weight is spread out, a PT studio often sees repeated heavy drops in the same spot. This requires a higher density of rubber. I once worked with a studio owner who used thin mats; within three months, the concrete underneath began to pit and dust. We replaced it with 15mm high-density tiles, which solved the issue. Professionally, your floor is also your biggest branding tool. Using EPDM color flecks that match your logo can make the space feel cohesive. From a functional standpoint, the right rubber material reduces "rebound" during heavy deadlifts. This keeps your equipment from bouncing into walls or other gear. It also provides the acoustic insulation necessary if you operate in a commercial building with neighbors nearby.
| Feature | PT Studio Requirement | Commercial Gym Requirement |
|---|---|---|
| Traffic Density | Very High (Small footprint) | Moderate (Spread out) |
| Impact Protection | Focused/Severe | General/Distributed |
| Aesthetics | High Brand Customization | Standard/Uniform |
| Installation | Precision/Small Scale | Bulk/Fast |
Understanding the Impact on Equipment and Joints
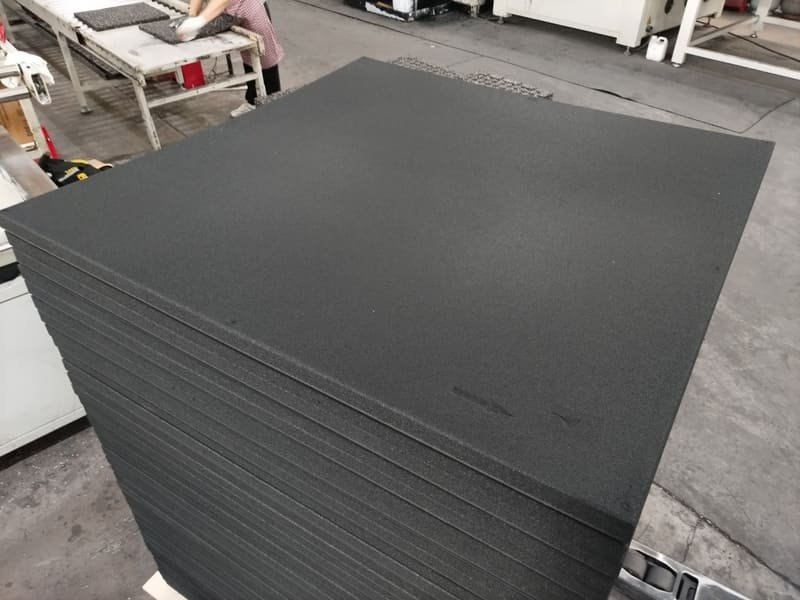
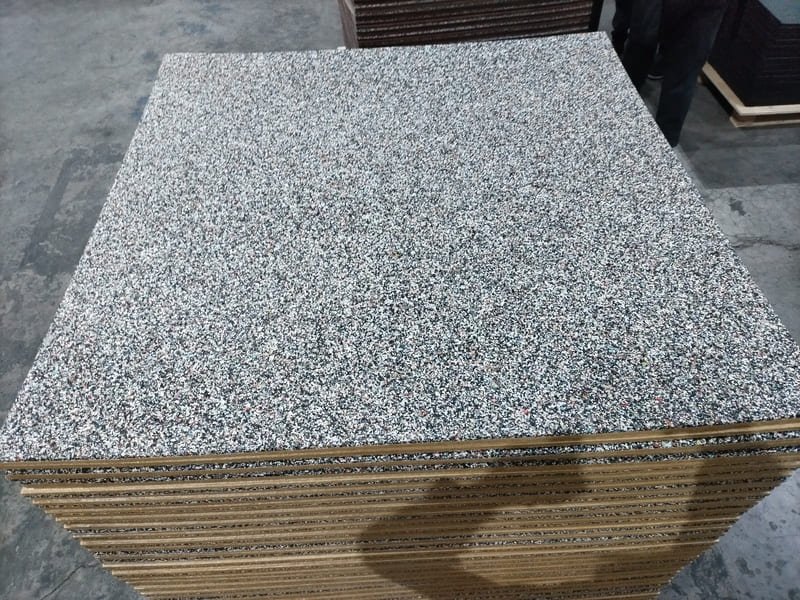
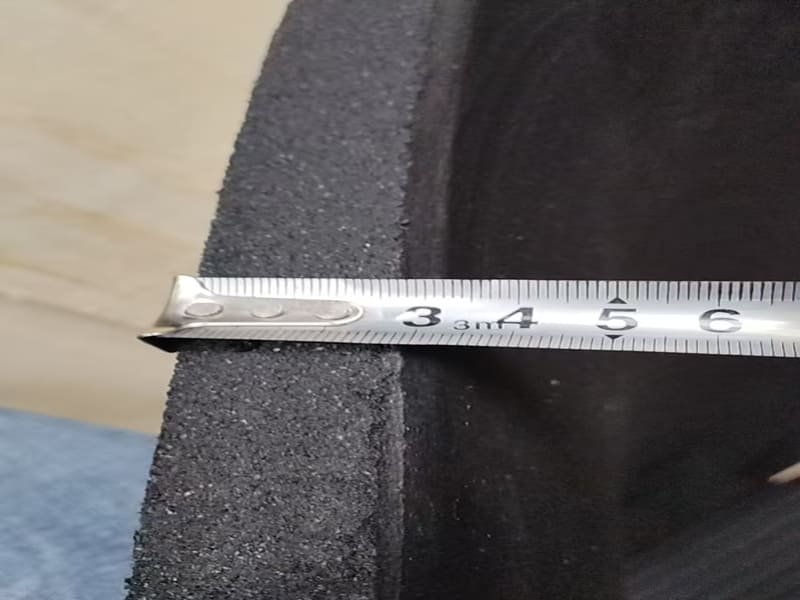
When we talk about material science in flooring, we look at the Shore A Durometer rating. For a PT studio, you want a rating between 60 and 65. If the rubber is too hard, it offers no shock absorption. If it is too soft, your clients will feel unstable during squats or lunges. High-quality recycled SBR rubber provides a sustainable and cost-effective base, but adding a virgin EPDM top layer improves skin comfort for floor work. I recommend looking for "cold-pressed" tiles. These have a higher density than "heat-pressed" versions. They won’t crumble at the edges even after years of HIIT sessions. This technical detail ensures your studio stays looking new.
A solid foundation is the first step, but you must also understand the specific needs of your training modalities to avoid mid-project mistakes.
How Do You Identify Your Studio’s Specific Technical Needs?
Identifying your needs involves assessing your training style (lifting vs. HIIT), measuring space constraints for zone transitions, and testing your subfloor for moisture or unevenness. You must choose a thickness and texture that supports your most frequent and intense activities.
The discovery phase is where most mistakes are avoided. If your studio focuses on powerlifting, shock absorption is your top priority. If you do more HIIT or yoga, grip and skin comfort matter more. I have seen many studios struggle with transitions. For example, if you want a turf area for sled pulls next to rubber for weights, you must ensure the heights match. A 10mm rubber floor next to a 30mm turf creates a trip hazard. We often solve this by using specialized underlayment to bring the rubber up to the same level. Subfloor evaluation is also vital. Concrete is the best base, but it must be level within 3mm over a 3-meter radius. If you have wood floors, you need a thicker rubber—at least 12mm—to prevent the wood from acting like a drum and amplifying noise.
Customizing Based on Modality and Space
For multi-use gym flooring layouts, dividing the studio into dedicated work zones improves both organization and safety. You can use different colors to mark out paths or drill areas. This helps with organization.
| Training Type | Recommended Thickness | Recommended Surface Texture |
|---|---|---|
| Powerlifting | 20mm – 30mm | High-Density Impact Tile |
| HIIT / Functional | 8mm – 12mm | Anti-Slip / Smooth |
| Sled Runs / Agility | 25mm+ | Artificial Turf |
| General PT | 10mm | SBR with EPDM Flecks |
Once you know what you need, the next step is choosing the specific type of rubber product that fits your installation skills and budget.
Which Rubber Flooring Type Is Best for Your Installation?
Rubber rolls offer a seamless, professional look for large areas but require professional installation. Interlocking tiles are best for DIY setups and small spaces, while high-density impact tiles provide the ultimate protection for heavy lifting and superior sound dampening.
In my experience, rubber rolls are the gold standard for aesthetics. They make a small studio look much larger because there are fewer lines. However, they are heavy. A single roll can weigh over 100kg. If you are doing a DIY project, interlocking "puzzle" tiles are a better choice. They are easy to cut with a simple utility knife and don’t need glue. But be careful: cheap interlocking tiles can pull apart during lateral movements like side lunges. For my high-end clients, I always suggest impact tiles for the "drop zone." These are usually 50x50cm squares that are much thicker than rolls. They use a pin-hole system to stay together. They cost more, but they are the only thing that will truly stop the sound of a 100kg barbell from vibrating through the entire building. They are also much easier to replace if one piece gets damaged.
Comparing Durability and Ease of Use
If you choose rolls, you must use a full-spread adhesive for the best results. This prevents the rubber from expanding or contracting with temperature changes. Interlocking tiles are "loose-lay," which means you can take them with you if you move locations. This is a huge benefit for trainers who are renting their first space.
| Product Type | DIY Friendly? | Best For | Maintenance Level |
|---|---|---|---|
| Rubber Rolls | No | Large, permanent spaces | Low (Easy to mop) |
| Interlocking Tiles | Yes | Small studios / Renters | Moderate (Seams can trap dust) |
| Impact Tiles | Yes | Weightlifting areas | Low (Highly durable) |
Choosing the type is one thing, but you also need to understand the technical numbers to ensure you get the quality you pay for.
What Do the Technical Specifications and Numbers Mean for Quality?
Technical specs like thickness (6mm to 25mm+) and density determine the floor’s lifespan. Choose 10mm-12mm for standard PT work, verify the Shore A Hardness is around 60-65, and prioritize low-VOC materials to avoid the "recycled rubber smell" in small spaces.
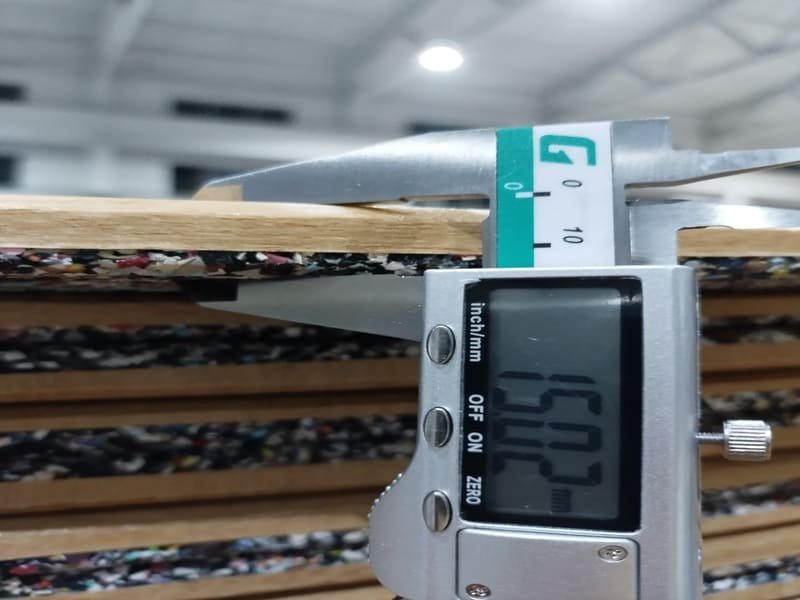
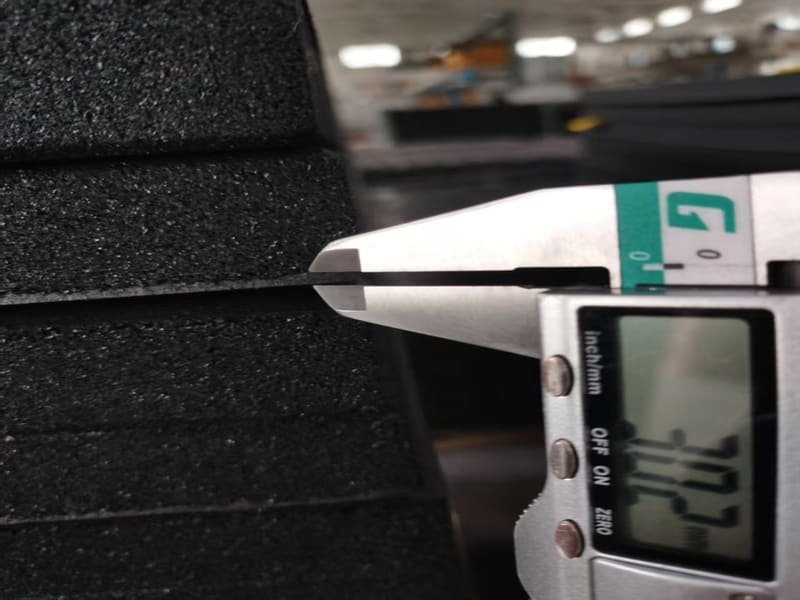
The most common question I get is about thickness. I always say: "If you can see the floor through the rubber when you press down, it is too thin." For most PT studios, 10mm is the sweet spot. It is thick enough to protect the floor from dumbbells but light enough to install easily. If you have a dedicated lifting platform, go up to 20mm or 25mm. Density is the next factor. You want a high-density product—usually around 900kg/m³ to 1000kg/m³. If the density is low, the floor will feel "mushy." This is dangerous for balance. You also need to ask about the material. Recycled rubber is great, but it can smell. Virgin EPDM doesn’t have that "tires" smell and is much easier to clean. For an indoor studio with poor ventilation, low-VOC certification is a must. It ensures the air quality remains safe for your clients during heavy breathing.
Material Quality and Performance Data
We use specific tests to verify these numbers. For example, look for the ASTM D2240 test for hardness. This ensures the batch of rubber you receive meets the standards of the sample you liked.
| Specification | Target Value | Benefit |
|---|---|---|
| Hardness | 60 – 65 Shore A | Stability + Comfort |
| Density | 950 kg/m³ | Long-term durability |
| Elongation at Break | > 150% | Won’t tear under stress |
| Fire Rating | Class 1 (Bfl-s1) | Building code compliance |
Understanding the specs helps you buy correctly, but you also need to plan for the long-term maintenance and common issues that gym owners face.
How Can You Solve the Most Common Rubber Flooring Pain Points?
Solve common pain points by choosing low-VOC rubber to eliminate odors, using high-density underlayment for noise reduction, and implementing a non-toxic cleaning routine with a pH-neutral cleaner to prevent sweat buildup and maintain hygiene standards.
The "rubber smell" is the number one complaint from new studio owners. My tip: don’t just buy the cheapest recycled mats you find online. Those are often made with low-grade binders that off-gas for months. Look for sulfur-free or polymer-bonded rubber. If you already have a smell, a deep clean with a mixture of water and green apple soap works wonders. The second pain point is noise. If you are on the second floor, the rubber alone might not be enough. We often suggest a 5mm rubber underlayment underneath your main floor. This creates an air gap that breaks the sound wave. Finally, maintenance. Avoid using bleach or oil-based cleaners. They break down the rubber and make it sticky. A simple micro-fiber mop and a specialized gym floor cleaner will keep the surface anti-slip and looking professional.
Hygiene and Long-Term Care
Hygiene is a major selling point for PT studios. Clients pay a premium for a clean space. High-quality rubber is non-porous, meaning sweat stays on the surface where it can be wiped away. This prevents the growth of bacteria and mold.
| Pain Point | Solution | Result |
|---|---|---|
| Strong Odor | Low-VOC / Virgin EPDM | Fresh air quality |
| Noise Complaints | Underlayment + Thick Tiles | Happy neighbors |
| Sticky Surface | pH-Neutral Cleaner | Safe, non-slip grip |
Once the technical and practical issues are solved, you can focus on the fun part: making your studio look amazing through customization.
How Do Aesthetics and Customization Improve Your Branding?
Aesthetics improve branding by using EPDM color flecks to match your logo and using different textures or colors to define functional zones. Custom markers for agility or training areas can be inlaid directly into the rubber for a permanent, professional look.
In the fitness world, people buy with their eyes. A black floor is functional, but it can look dark and uninviting. I always recommend at least a 10% to 20% color fleck. This hides dust, footprints, and wear much better than pure black. You can also get creative with textures. A "hammer" texture looks rugged and provides extra grip, while a smooth finish is easier to clean. One of my favorite projects involved a studio that used blue rubber for their stretching area and grey for the weights. This small change made the space look like it was designed by an architect. You can even have your logo laser-cut into the rubber. This is a high-end touch that makes a huge impression on new clients when they walk through the door.
Designing a High-Performance Layout
Think of your floor as a map. You can use lines to show where equipment should go. This keeps your studio tidy even after a busy day of sessions. It also helps with safety by keeping high-traffic paths clear of dumbbells.
| Customization Option | Purpose | Impact |
|---|---|---|
| Color Flecks | Hide dirt / Branding | Professional look |
| Inlaid Logos | Brand recognition | Premium feel |
| Multi-Color Zones | Organization | Better flow of movement |
Before you start your project, you must consider the final costs and the checklist for choosing a reliable manufacturing partner.
What Are the Best Installation and Budgeting Strategies?
The best strategy is to balance initial costs with long-term ROI by choosing the right thickness for your needs. Factor in shipping weights and transition strips, and decide between a DIY "loose-lay" for flexibility or a glued-down installation for permanent durability.
Budgeting for flooring is about more than just the price per square meter. I always tell my clients to factor in shipping. Rubber is heavy, and shipping can sometimes cost 20% of the total order. Also, don’t forget the "extras." You will need transition strips for doorways and potentially adhesive. If you are on a tight budget, spend your money on a thick "impact zone" and use thinner rubber for the cardio areas. This saves money without sacrificing protection. In terms of ROI, cheap flooring is a bad investment. If you have to replace your floor in two years because it is crumbling, you have paid twice. A high-quality rubber floor should last 10 to 15 years in a personal training studio. That is a very low cost per day when you spread it out over a decade.
The True Cost of "Cheap" Flooring
I have seen owners buy stall mats from farm stores to save money. These often have uneven thicknesses and a very strong smell. This can drive away high-end clients. Investing in professional gym rubber is an investment in your client retention.
| Expense Item | Estimated Cost Impact | Priority |
|---|---|---|
| Rubber Materials | 60% | High |
| Shipping / Delivery | 15% – 20% | High |
| Adhesive / Tape | 5% | Low |
| Professional Labor | 10% – 20% | Optional (DIY possible) |
Before you sign any contract, make sure you have the right questions ready for your manufacturer.
What Should Be on Your Final Buyer’s Checklist?
Your final checklist should include requesting samples, verifying fire ratings (Class 1/Bfl-s1), confirming the warranty for commercial use, and asking about shipping logistics for small-scale studios to ensure a smooth delivery and a high-quality product.
As a project specialist, I always advise my clients to ask for a sample first. Don’t just trust a photo. You need to feel the density and smell the rubber yourself. Ask about the fire rating; most commercial buildings require a Class 1 or Bfl-s1 rating. If you don’t have this, the fire marshal could shut you down. Also, check the warranty. Is it for residential or commercial use? A personal training studio is a commercial environment. Finally, ask about the "unloading" process. Most shipping companies only do curbside delivery. Since rubber is so heavy, you might need a forklift or several friends to help move the pallet inside. Being prepared for these small details will save you a lot of stress on delivery day.
Questions to Ask Every Supplier
- Can I see the technical data sheet (TDS) for this batch?
- Is the rubber sulfur-cured or polyurethane-bonded?
- Do you offer volume discounts for studio expansions?
- What is the lead time from order to delivery?
Selecting the right floor is the first step in building your dream studio.
Conclusion
Choose 10mm+ high-density rubber to protect your studio investment effectively.
Ready to customize a unique flooring solution for your gym? Whether you need high-density rubber mats or personalized turf, I am here to provide professional advice and competitive factory pricing. Send me a private message today and let’s build your ideal training space together!