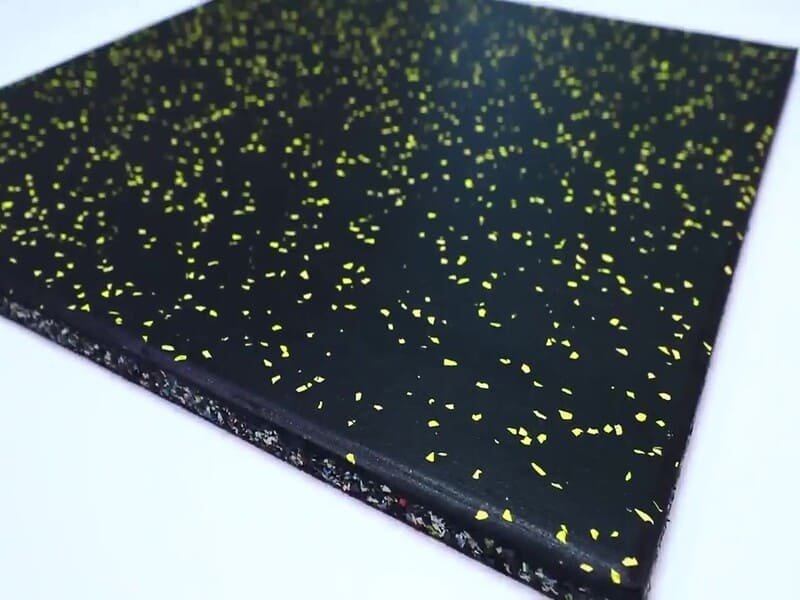
The best rubber flooring for free weight areas is high-density vulcanized rubber with a minimum thickness of 8mm for light use and 20mm or more for heavy lifting. It must provide excellent shock absorption to protect the subfloor while maintaining enough firmness for lifter stability and safety.
In my years as a custom project specialist, I have seen many gym owners overlook the physics of impact. When a 50kg dumbbell hits the floor, the energy does not just disappear. It travels. Without the right rubber barrier, that energy goes straight into the concrete subfloor, causing cracks that are very expensive to fix. We focus on "impact attenuation," which is the ability of the material to soak up that force.
I often tell my clients that the "best" floor is a balance of density and thickness. If the rubber is too soft, your feet will sink, which is dangerous for your ankles during a heavy squat. If it is too thin, it is useless. We use technical data to match the floor to the weight load. For example, a professional facility needs high Shore A Durometer ratings to ensure the surface stays flat and supportive under thousands of pounds of pressure.
Now that we understand the basic needs of a weight area, let us look at the specific risks of using the wrong materials.
Why Do Free Weight Areas Require Special Flooring?
Free weight areas need special flooring to manage high-impact energy that can crack concrete subfloors, destroy expensive dumbbells, and create loud noise complaints. High-quality rubber acts as a sacrificial layer that absorbs shock, prevents equipment bounce-back, and ensures a stable, non-slip surface for the lifter during heavy movements.
Understanding the Impact Force
The main problem is high-impact energy. When you drop a barbell, the force is concentrated on a small surface area. I once worked on a project where a client used standard 5mm rubber in their power rack area. Within three months, the concrete underneath had turned to dust. This is the risk you face: cracking subfloors and destroying expensive equipment.
Balancing Performance Factors
Our goal is to find the perfect balance between three key pillars:
- Shock Absorption: Protecting the building.
- Stability: Ensuring the athlete does not wobble.
- Durability: Making sure the floor lasts ten years, not two.
Technical Performance Metrics
| Feature | Impact on Gym | Benefit |
|---|---|---|
| High-density rubber flooring | Prevents "bottoming out" | Superior subfloor protection |
| Energy Return | Reduces equipment bounce | Safety |
| Acoustic Damping | Lowers decibel levels | Noise Control |
Once you realize you need protection, the next big question is always about how thick the rubber should be.
How Do You Choose the Right Thickness vs. Impact Level?
A good rule of thumb is 1mm of rubber for every 1kg to 10kg of weight used in the area. For home gyms with light weights, 8mm to 10mm is enough, but commercial zones need 12mm to 15mm. For free weight and CrossFit training areas, you must use 20mm to 30mm rubber flooring thickness to handle repeated heavy impacts safely.
Thickness Guidelines for Different Lifts
I always advise my partners to look at their heaviest possible lift. If a person is deadlifting 200kg, an 8mm mat will fail. Thicker is not always better for the whole gym, though. A very thick, soft floor can cause ankle instability because it feels like standing on a sponge.
Recommended Specifications
- 8mm – 10mm: Best for light dumbbells and general fitness.
- 12mm – 15mm: This is the industry standard for commercial free weight zones.
- 20mm – 30mm+: Necessary for "drop zones" and Olympic platforms.
The Density Factor
We measure rubber hardness using the Shore A Durometer scale. For free weights, we aim for a rating between 60 and 70. This ensures the material is hard enough to support a heavy rack without permanent indentation but flexible enough to absorb a drop.
| Thickness | Best Use Case | Impact Level |
|---|---|---|
| 10mm | Home Gyms / Yoga | Low |
| 15mm | Commercial Dumbbell Area | Medium |
| 25mm | Deadlift Platforms | High |
After choosing your thickness, you need to decide on the physical format: rolls, tiles, or mats.
Should You Choose Rubber Rolls, Tiles, or Heavy-Duty Mats?
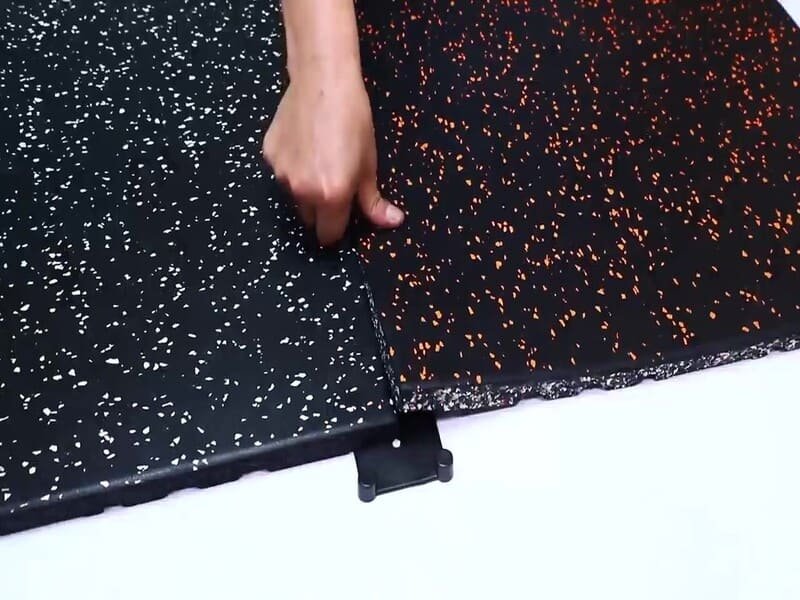
Rubber rolls are best for large commercial spaces because they have fewer seams and a professional look. Interlocking tiles are great for DIY home gyms and odd-shaped rooms because they are easy to install. Heavy-duty stall mats are the best for specific high-impact spots like deadlift platforms due to their density.
Comparing the Formats
In my factory experience, I see different needs for different layouts. Rolls are cost-effective for 500+ square meter projects but require professional installation. If you have a small room with many corners, tiles are much faster to fit.
Pros and Cons
- Rubber Rolls: These give a seamless look. I recommend these for the main walkway and machine areas.
- Interlocking Tiles: If one tile gets damaged by a sharp edge, you can just replace that one piece. It is very flexible for growing gyms.
- Stall Mats: These are usually made from vulcanized rubber. They are the "tanks" of the industry. They are budget-friendly but can have a strong rubber smell for the first few weeks.
Format Comparison Table
| Format | Best For | Installation Ease | Durability |
|---|---|---|---|
| Rolls | Large Facilities | Professional | High |
| Tiles | Home / Boutique | Easy (DIY) | Medium |
| Mats | Power Racks | Moderate | Extreme |
The format is the "look," but the technical specs are the "engine" that makes the floor work.
What Technical Specifications Matter Most for Durability?
The most important technical specs are density, hardness (Shore A), and the manufacturing process (Vulcanized vs. Urethane-Bonded). Vulcanized rubber is non-porous and easier to clean, while urethane-bonded rubber is more cost-effective. Slip resistance is also a key safety requirement to ensure grip during heavy lifts.
Vulcanization vs. Bonding
I often explain to engineers that vulcanized rubber is "cooked" under heat and pressure. This makes it non-porous. It will not soak up sweat or bacteria. Urethane-bonded tiles use glue to hold rubber crumbs together. They are great for air-flow but can be harder to deep clean if they are very porous.
Shore A Durometer and Friction
A higher density is crucial to prevent "bottoming out." If the weight hits the floor and the rubber compresses 100%, the subfloor still takes the hit. We also look at the Coefficient of Friction. Even when the gym is humid or the lifter is sweating, the floor must remain grippy. We test this to ensure the safety of the athletes.
Material Science Overview
| Material Type | Porosity | Cleanability | Cost |
|---|---|---|---|
| Vulcanized | Low | Excellent | Higher |
| Urethane-Bonded | Medium | Good | Lower |
| Recycled Crumb | High | Moderate | Budget |
Even the best technical specs cannot solve every problem if you do not consider the "hidden" concerns like smell and noise.
How Can You Solve Noise, Odor, and Subfloor Compatibility?
To solve noise and vibration, use high-density rubber to block sound waves from traveling through the building. To manage odor, choose low-VOC (Volatile Organic Compounds) products and allow for air circulation. For subfloor compatibility, ensure the concrete is level and dry before laying the rubber directly on it.
Noise and Vibration Mitigation
Noise is the number one complaint for gyms in multi-story buildings. It is not just the sound of the drop; it is the vibration through the floor. I suggest using a "dual-layer" system for these cases—a softer underlayment with a hard top layer.
Dealing with the "Rubber Smell"
All rubber has a scent, but high-quality manufacturing reduces this. We focus on low-VOC materials. If you have a basement gym, I always recommend letting the mats "off-gas" in an open area for 48 hours before installation.
Subfloor Preparation
You do not always need plywood. If your concrete is flat, you can go direct. But if there is moisture in the slab, you need a vapor barrier. I have seen many floors fail because moisture got trapped under the rubber and created mold.
Solutions for Common Issues
- Noise: Use 20mm+ high-impact tiles.
- Odor: Look for REACH or RoHS certified rubber.
- Subfloor: Leveling compound is cheaper than replacing the rubber later.
Now that you have the right product, you must install and maintain it correctly to protect your investment.
What Are the Best Practices for Installation and Maintenance?
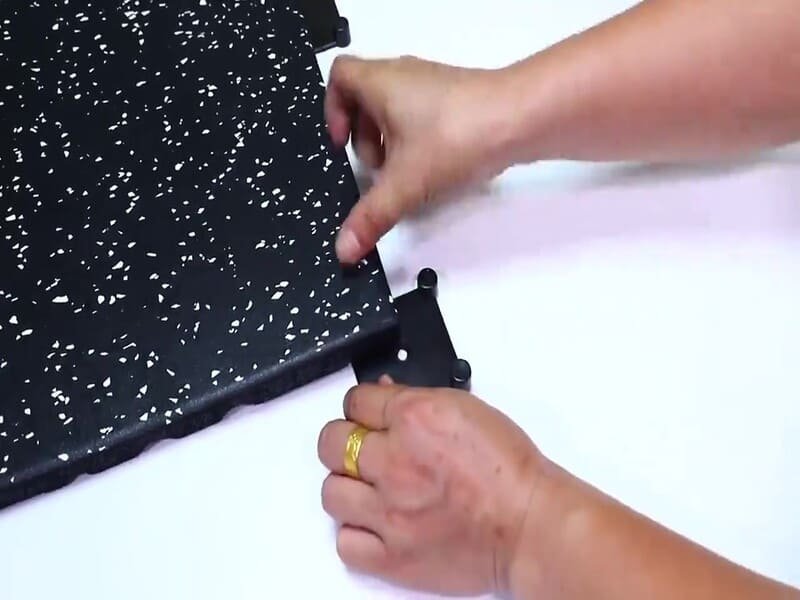
Use glue-down installation for high-traffic commercial gyms to prevent shifting, and loose-lay for home gyms. Clean the rubber regularly with pH-neutral cleaners and avoid harsh chemicals like bleach which can break down the rubber binders. Manage seams carefully to prevent separation in high-impact zones.
Glue-Down vs. Loose-Lay
In a professional setting, people are moving fast and sliding weights. Glue is a must. For a home user, the weight of the mats and the furniture usually keeps them in place. I always tell my clients to plan their seam layout first to minimize waste.
Maintenance and Cleaning
Rubber is tough but not invincible. If you use petroleum-based cleaners, the rubber will become "gummy" and start to fall apart. Simple soap and water or a specialized rubber floor cleaner are best.
Seam Management
Over time, seams can open up. This is usually caused by temperature changes. In our factory, we produce tiles with very tight tolerances to minimize this. If you use rolls, using a high-quality seam sealer will make the floor look like one solid piece of stone.
Maintenance Checklist
- Daily: Vacuum to remove grit and dust.
- Weekly: Damp mop with pH-neutral soap.
- Monthly: Inspect seams for any lifting or gaps.
To help you make the final choice, let us look at the cost vs. the long-term value.
How Do You Balance Initial Cost with Long-Term Lifecycle Value?
The initial investment in high-quality 20mm rubber is higher, but it saves thousands of dollars in future concrete repairs and equipment replacement. For home gyms, 10mm tiles offer the best value. For commercial performance, 12mm rolls are best. For heavy powerlifting, 30mm mats are the smartest long-term investment.
The Cost of Cheap Flooring
I have worked with many gym owners who tried to save money by buying thin mats. They ended up spending double because they had to replace the floor and fix the subfloor within a year. You must look at the "lifecycle cost."
Top 3 Best Buy Categories
- Home Gym Value: 10mm Interlocking Tiles. They are easy to move if you change houses.
- Commercial Performance: 12mm Rubber Rolls. They provide the best balance of price and professional appearance for large areas.
- Heavy Lifting: 30mm High-Impact Mats. These are essential for any area where weights over 100kg are dropped regularly.
Comparison Table: ROI
| Product | Lifespan | Subfloor Protection | Total Value |
|---|---|---|---|
| Budget Mat | 1-2 Years | Low | Poor |
| 12mm Roll | 7-10 Years | High | Excellent |
| 30mm Tile | 10+ Years | Extreme | Best for Lifting |
Choosing the right floor does not have to be a guessing game if you follow a simple checklist.
Conclusion
The best rubber floor depends on your weight load and space. Match thickness to weight and choose density over price.
If you are planning a gym project and need custom thickness or density advice based on your specific equipment, please send me a private message. I can help you with technical specs and bulk pricing for your facility.