![Rubber Mat 202509051652291 (14)[1]](https://meettfit.com/wp-content/uploads/2025/09/rubber_mat_202509051652291_141.jpg)
You vet them by treating it as an engineering project. First, create a technical requirements document for your facility. Second, demand verifiable data and material samples. Finally, use a weighted scorecard to compare suppliers on total value, not just the initial price.
As a Quality Control Engineer for performance flooring, I am often called in when things go wrong. Most of the time, the failure isn’t in the product itself, but in the selection process. A gym owner chose a floor based on a slick brochure or a low price, not on a rigorous evaluation. This guide is my attempt to share the internal process I use, so you can make an informed, data-driven decision from the start. This is not about finding the cheapest supplier; it’s about finding a reliable technical partner whose product will protect your members, your equipment, and your investment for years to come.

The process starts long before you ever speak to a salesperson. It begins with a deep, honest assessment of your own operational needs. A supplier can’t give you the right solution if you haven’t defined the problem.
How Do You Define Your Actual Flooring Requirements?
You define them by conducting a zone-by-zone audit of your facility and assigning specific, measurable performance metrics to each area. This moves beyond generic terms like "durable" and into quantifiable engineering standards for impact resistance, slip resistance, and acoustics.
I once audited a beautiful new gym where members in the yoga studio below the weightlifting area constantly complained about the noise. The owner had installed a "high-quality" 8mm rubber floor, but had never defined an acoustic requirement. The floor was fine for impact, but it didn’t have the necessary Impact Insulation Class (IIC) rating to dampen sound transmission. This was a costly, avoidable mistake. Your requirements document is your primary tool to prevent such errors. It must be detailed and based on how each square meter of your facility will be used.
Your Action Item: The Zone-by-Zone Audit
Map out your floor plan. For each distinct area, define its function and the resulting flooring demands.
- Free Weight Zone: The primary function is protecting the subfloor from heavy, repeated impacts. Your key metric here is a combination of thickness and density. For heavy lifting, I rarely recommend anything below 10mm. The material’s Shore A Durometer rating is also critical; a higher rating (e.g., 80-90) means a denser, less-forgiving surface that protects the subfloor but offers less shock absorption for athletes.
- Functional Fitness/Turf Zone: The main function is supporting activities like sled pushes and agility drills. You need a surface with high durability and the right coefficient of friction. A common mistake is choosing turf with fibers that are too long, which creates too much drag for sleds—a key consideration in how should organizers choose gym turf suppliers.
- Group Fitness Studio: This area demands a balance of grip for dynamic movements and cushion for joint protection. A key metric is the Force Reduction value (often per ASTM F2772), which measures how much impact the floor absorbs.
- Locker Rooms & Wet Areas: The absolute priority is safety. Demand a product with a high slip-resistance rating, specifically under wet conditions. In the US, look for products that meet the ANSI A326.3 standard for measuring the Dynamic Coefficient of Friction (DCOF).
From Audit to Technical Specification
Once your audit is complete, you can build a simple technical specification sheet. This document should list each zone and the required metrics (e.g., "Free Weight Zone: Min. Thickness 10mm, Min. Shore A Hardness 75"). This now becomes the basis of your conversation with any potential supplier. You are not asking them what you should buy; you are giving them a set of technical requirements that their products must meet.

With your technical requirements document in hand, you are now prepared to engage with suppliers. You have shifted the power dynamic and are positioned to lead a technical, fact-based discussion.
What Specific, Verifiable Proof Should You Demand from a Supplier?
Demand three things: product specification sheets with verifiable data from third-party testing, a list of recent, relevant client references you can actually call, and physical production samples for your own hands-on testing. Anything less is a red flag.
A supplier’s claims are marketing until they are backed by verifiable proof. As a QC engineer, I operate on a simple principle: "trust, but verify." A reputable manufacturer will have no issue providing this information because they invest in quality control and testing to ensure their products perform as advertised. Hesitation to provide any of these three items is a serious warning sign that their marketing claims may not hold up to scrutiny. I have seen suppliers try to pass off internal testing as a certified standard; it is not the same.
The Data: Technical Specification Sheets
Do not accept a simple marketing brochure. You need the official technical data sheet for the exact product being quoted.
- What to look for: Look for specific, numerical values for density (kg/m³), tensile strength, slip resistance (with the test method cited), and force reduction. The sheet should also clearly state the material composition (e.g., 100% recycled SBR rubber, EPDM granules).
- Why it matters: This data allows for a true apples-to-apples comparison. I once helped a client compare two "identical" rubber tiles. The data sheet revealed one had 15% lower density, which explained its lower price but also meant it would degrade much faster under heavy use.
The Proof: Client References
Ask for references for projects completed in the last 18 months that are similar in scope to yours.
- What to ask the reference: Don’t just ask if they are happy. Ask specific questions: "Was the project completed on time? Were there any unexpected costs? Have you had any issues with the flooring since installation, like seams separating or color fading? How did the supplier handle these issues?"
- Why it matters: A problem-free installation is great, but learning how a supplier resolves an unexpected issue is often more telling. Good partners fix problems; bad ones disappear.
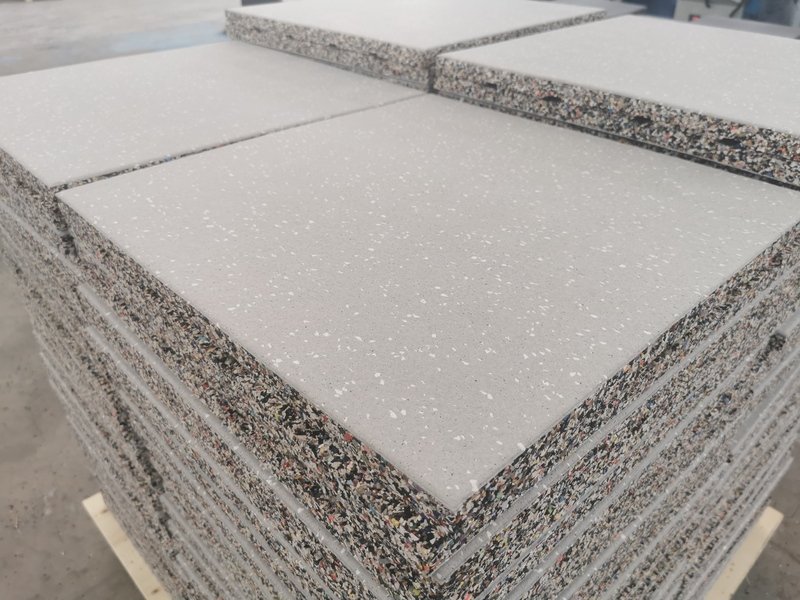
The Reality: Physical Samples and How to Test Them
A digital photo is not enough. You must see and feel the product. Once you have the samples:
- The Dumbbell Test: Drop a moderately heavy dumbbell (e.g., 20 kg / 45 lbs) from waist height onto the sample. Does it permanently indent or deform?
- The Scratch Test: Try to scratch the surface with a key. How easily does it mark? This simulates the daily abuse from equipment being dragged across the floor.
- The Cleaning Test: Spill some coffee or a sports drink on it. Let it sit for an hour, then try to clean it. Does it stain or leave a sticky residue?
- The Seam Test: If you have multiple tiles, push them together. Do the seams fit tightly and evenly? Gaps are a major trip hazard and dirt trap.
This hands-on testing provides invaluable insight into the product’s real-world durability that you will never find on a spec sheet.
After gathering all this data and testing your samples, you are ready for the final step. It is time to synthesize the information and make a final, evidence-based decision that you can stand behind.
How Do You Make the Final, Data-Driven Decision?
You use a weighted scorecard. This tool forces you to move past the single data point of price and evaluate suppliers based on a holistic view of quality, service, and long-term value. It is the most effective method for making an objective and defensible choice.
The single biggest mistake I see clients make is getting fixated on the initial per-square-foot cost. A supplier might offer a 10% lower price, but if their warranty is only half as long and they use uninsured subcontractors for installation, they present a much higher long-term risk. A scorecard helps you quantify these risks and compare the true value proposition of each potential partner. It is a simple but powerful tool for translating your research into a clear, logical decision.
Building Your Weighted Scorecard
List your key criteria in a spreadsheet. Then, assign a "weight" to each one based on its importance to you before you start scoring. For a gym on an upper floor, for example, "Acoustic Performance" might have a very high weight.
| Criterion | Weight (1-5) | Supplier A Score (1-5) | Supplier A Total (Weight x Score) | Supplier B Score (1-5) | Supplier B Total (Weight x Score) |
|---|---|---|---|---|---|
| Product Quality (Specs/Sample) | 5 | 4 | 20 | 3 | 15 |
| Warranty & Guarantees | 4 | 4 | 16 | 2 | 8 |
| Total Cost of Ownership | 4 | 3 | 12 | 5 | 20 |
| Supplier Reputation (Refs) | 3 | 5 | 15 | 3 | 9 |
| Installation Plan & Team | 3 | 4 | 12 | 2 | 6 |
| Grand Total | 75 | 58 |
Analyzing the Results
In the example above, Supplier B was cheaper (higher score on Total Cost), but Supplier A offered a better product, a stronger warranty, and a more reliable installation plan. The weighted scorecard clearly shows that Supplier A represents the better overall value and is the less risky choice, despite the higher initial cost. This data-driven conclusion is much stronger than a gut feeling.
The Final Check: The Contract
Once you have made your choice, ensure the contract reflects all the specifications and promises. The product model number, thickness, warranty terms, installation timeline, and payment schedule must be explicitly stated. From a quality control perspective, the contract is the final specification document. Read every line before you sign.
Conclusion
This rigorous process—defining technical needs, demanding verifiable proof, and using a weighted scorecard—is your best defense against poor quality and broken promises. It transforms you from a buyer into an informed stakeholder.
If you are ready to move from uncertainty to a data-backed decision for your gym floor, my engineering team can help. Contact us for a technical consultation or to receive specification-matched samples for your own hands-on testing.