![1.13地毯0221 1024x683[1]](https://meettfit.com/wp-content/uploads/2025/05/1.13地毯0221-1024x6831-1.jpg)
To properly install rubber roll flooring, first clean and prepare the subfloor, measure and mark placement lines accurately, cut the rolls precisely, apply suitable adhesive or tape evenly, and use a roller to secure the flooring firmly, ensuring a professional, durable, and visually appealing result. Learn more about what rubber gym roll flooring is to better understand the material before installation.
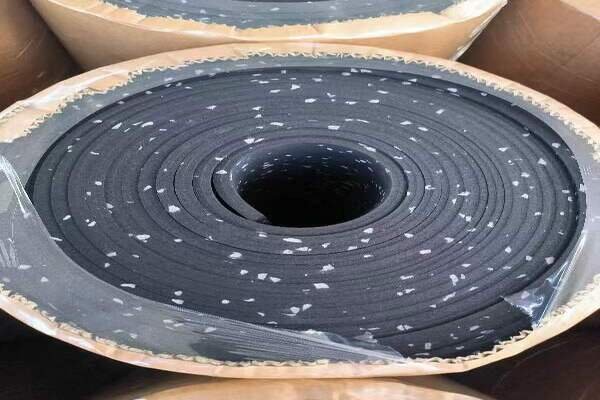
Installing rubber roll flooring is straightforward but needs careful attention to detail. From my experience as a production manager at a rubber gym mat factory, the key is always proper preparation. First, allow the rubber flooring to acclimate by unrolling and letting it rest for at least 12-24 hours in the installation area. Thoroughly clean the subfloor, making sure it is flat, dry, and free of debris. Repair any holes or uneven areas exceeding 1/8 inch. Maintaining a consistent room temperature (at least 65°F or 18°C) during installation ensures the rubber lays flat and avoids curling. After marking guidelines with chalk, position rolls precisely, overlapping seams slightly, and then gently pressing them together to eliminate gaps. Choose the right adhesive or double-sided tape based on your floor’s usage needs—this step significantly affects durability. Finish by trimming edges neatly and firmly rolling the entire surface.
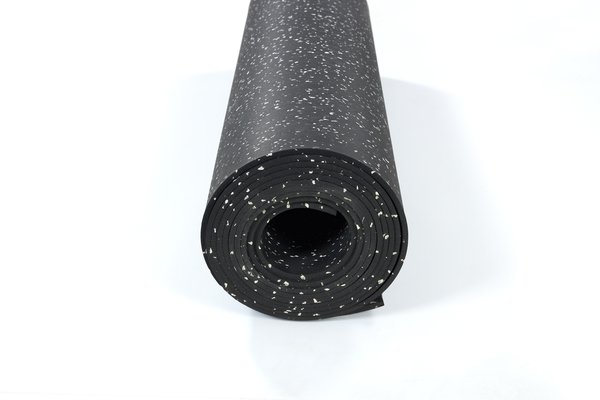
Proper installation ensures that your rubber flooring remains safe, durable, and visually appealing for many years. Keep reading to master every aspect of rubber flooring installation and maintenance.
What are the best tools to use for cutting rubber flooring rolls?
The best tools to cut rubber flooring rolls include a sharp utility knife, a straightedge or metal T-square, and a measuring tape to ensure accurate, clean cuts every time.
In my role managing production at a rubber flooring factory, I’ve found that precise cuts dramatically affect the final installation quality. Here’s a simple breakdown of the most effective tools:
Essential Tools for Cutting Rubber Flooring Rolls
| Tool | Purpose | Notes for Best Results |
|---|---|---|
| Sharp Utility Knife | Cutting through rubber cleanly | Replace blades often to maintain sharpness. |
| Metal T-square | Ensuring perfectly straight lines | Provides guidance for accurate, neat cuts. |
| Measuring Tape | Precise measurement | Ensures minimal waste and precise fitting. |
From experience, using a dull blade will result in jagged edges, which can cause gaps or uneven seams during installation. Therefore, change blades frequently to maintain sharpness. Also, always measure twice and cut once. Use the metal T-square or straightedge to keep cuts perfectly straight, particularly at seams or around obstacles, providing a seamless and professional finish.

Having the right tools ensures your flooring installation is neat and professional. But what about sealing the seams effectively? Keep reading for expert advice.
How do I ensure the rubber flooring rolls are properly sealed?
To properly seal rubber flooring rolls, align seams carefully, apply automotive-grade masking tape over the seams, then roll thoroughly to bond and remove the tape only after adhesive fully cures.
Proper sealing of rubber flooring seams ensures longevity and prevents dirt accumulation or lifting edges. Based on my extensive experience, careful preparation is vital. First, place seams with a slight overlap (less than 1/16 inch) and press them together to eliminate gaps.
Steps to Properly Seal Rubber Flooring Rolls
| Step | Action | Why This is Important |
|---|---|---|
| 1 | Align seams accurately | Prevents future lifting or curling. |
| 2 | Apply automotive-grade masking tape along seams | Holds seams tight during curing process. |
| 3 | Roll floor with 50-100 lb roller | Ensures tight bonding, removes air bubbles. |
| 4 | Remove tape after adhesive cures (typically 24 hours) | Leaves a clean, seamless finish. |
Allow adhesive at least 24 hours to cure before removing tape to ensure a strong, clean seam. Properly sealed seams will significantly enhance the flooring’s durability and appearance.

A professional finish depends heavily on flat subfloors, but what if your subfloor is uneven? Let’s explore this further.
Can I install rubber flooring rolls over an uneven subfloor?
No, installing rubber flooring rolls over an uneven subfloor isn’t recommended. Uneven surfaces must first be leveled, as irregularities greater than 1/8 inch compromise installation quality and flooring durability.
In my professional experience, uneven subfloors significantly affect rubber flooring performance. Uneven surfaces cause noticeable imperfections, such as curling edges, bubbling, or premature wear due to inconsistent stress distribution. Here’s how you can address this issue:
Handling Uneven Subfloors Before Installation
| Problem | Recommended Solution | Benefit |
|---|---|---|
| Cracks/Holes | Use cement-based patching compound | Provides a smooth and stable base |
| Surface Irregularity >1/8 inch | Level using self-leveling compound | Ensures uniform contact and prevents future issues |
| Wooden Subfloor Issues | Sand or replace affected sections | Ensures subfloor stability and flatness |
Ensuring a flat, stable base guarantees rubber flooring longevity and prevents costly repairs or reinstallation.

Having a perfect subfloor prepared, let’s next discuss choosing the best adhesive for your rubber flooring.
What type of adhesive is recommended for rubber flooring rolls?
The recommended adhesive for rubber flooring rolls is a high-quality, moisture-resistant adhesive like TruGLU 2.0, designed specifically for rubber flooring, ensuring durable, permanent bonding.
From my personal experience managing production, choosing the correct adhesive ensures the flooring lasts longer and withstands heavy use. Here’s why TruGLU 2.0 is highly recommended:
Recommended Adhesive for Rubber Flooring Rolls
| Adhesive | Features | Advantages |
|---|---|---|
| TruGLU 2.0 | High moisture resistance, strong bonding | Ideal for gyms, heavy-duty use |
| GatorTAPE | Temporary, repositionable solution | Good for temporary installations |
Applying TruGLU 2.0 evenly and following manufacturer’s instructions ensures reliable performance and a durable finish.
Understanding adhesives helps significantly, but how much time should you allow for the entire installation? Let’s clarify.
How long does it typically take to install rubber flooring rolls?
Typically, installing rubber flooring rolls takes about 1-2 days, including preparation, laying, cutting, adhesive application, rolling, and curing time. Full curing and heavy traffic use may require up to 72 hours.
Time needed can vary depending on the floor area, complexity, and experience level. Here’s a practical breakdown based on typical scenarios:
| Task | Approximate Duration |
|---|---|
| Preparation | 3-5 hours |
| Acclimation | 12-24 hours |
| Cutting and positioning | 2-4 hours |
| Adhesive application | 2-4 hours |
| Rolling and finishing | 1-2 hours |
| Curing time | 24-72 hours |
Proper time management ensures optimal results and long-lasting durability.

Knowing how long installation takes, next I’ll share essential maintenance tips to protect your investment.
How to maintain and clean rubber roll flooring after installation? What precautions should be taken?
Maintain rubber flooring by regular vacuuming, mopping with mild soap, and avoiding harsh chemicals. Precautions include avoiding petroleum-based cleaners and citrus solvents, which can degrade rubber surfaces.
Regular maintenance ensures longevity and visual appeal. Essential care practices include:
| Maintenance Task | Frequency | Notes |
|---|---|---|
| Vacuuming | Daily | Removes debris preventing damage |
| Damp mopping | Weekly | Use mild, neutral soap |
| Deep cleaning | Monthly | Removes stubborn marks |
| Avoid harsh chemicals | Always | Protects from damage |
Correct cleaning methods prevent premature wear and keep your flooring looking new.
Let’s address how to handle common problems like curling or bubbling next.
How to prevent issues such as curling or bubbling of rubber flooring?
Prevent curling and bubbling by ensuring proper acclimation, using adequate adhesive, rolling firmly during installation, and maintaining stable temperatures throughout the installation and curing process.
Proper installation avoids most common issues. Here’s a checklist from my expertise:
| Issue | Preventive Steps |
|---|---|
| Curling | Allow 12-24 hrs acclimation |
| Bubbling | Apply adhesive evenly and roll thoroughly |
| Both | Keep stable room temperature (≥65°F/18°C) |
These simple measures significantly reduce installation issues.
Conclusion
Proper installation, appropriate tools, effective sealing, and regular maintenance ensure durable, professional-quality rubber flooring installations, enhancing longevity and appearance significantly. For more expert insights and professional tips, check out our detailed professional guide to installing rubber roll flooring.