![WechatIMG65721[1]](https://meettfit.com/wp-content/uploads/2025/06/WechatIMG657211.jpg)
Getting Shock Turf right means following specific steps. We make sure each phase, from prep to finish, meets high standards. This ensures a safe, durable, and good-looking surface for any gym.
When I started in this business, I learned quickly that the success of any flooring project, especially something as specialized as Shock Turf, rests on strict adherence to a well-defined process. It is more than just laying down material. We are creating a high-performance surface. This involves detailed site assessment, precise material handling, and expert installation. Every step builds on the last, so cutting corners anywhere can lead to problems later. My team and I focus on getting each part perfect. We know a gym floor takes a lot of abuse, so it needs to hold up.
You see, a good floor makes a good gym. It holds up over time.
What goes into planning before Shock Turf installation?
Before we lay any Shock Turf, we do a lot of planning. This includes checking the floor, looking at the room, and getting all our materials ready. Good planning makes sure the job goes smoothly.
From my experience, this initial phase is where most problems are avoided. I once took on a project where the client rushed the prep. The old concrete floor had cracks and was uneven. We insisted on fixing it right, and it paid off. If we had not, the Shock Turf would have bubbled and failed fast. Here is how we break it down:
What site checks are needed for Shock Turf?
- Floor Check: We check how flat the floor is, if it is dry, and if it can handle weight. A bad base means a bad floor.
- Room Check: We look at air flow, heat, and wetness. These things change how glue dries and how the turf lays.
- Old Floor Work: We pull up old floors, fix any holes, and clean everything well. The new turf needs a clean, smooth base.
How do we check and store Shock Turf materials?
- Material Check: We look at all Shock Turf rolls or tiles to make sure they are good quality and we have enough.
- Storage Rules: We store glue, primer, and other items the right way. This keeps them good until we use them.
What tools do we need for Shock Turf?
We get all our tools ready. This includes tools for measuring, cutting, gluing, and rolling. Having the right tools makes the job go faster and better.

It makes sense to get ready right. This helps stop problems later on.
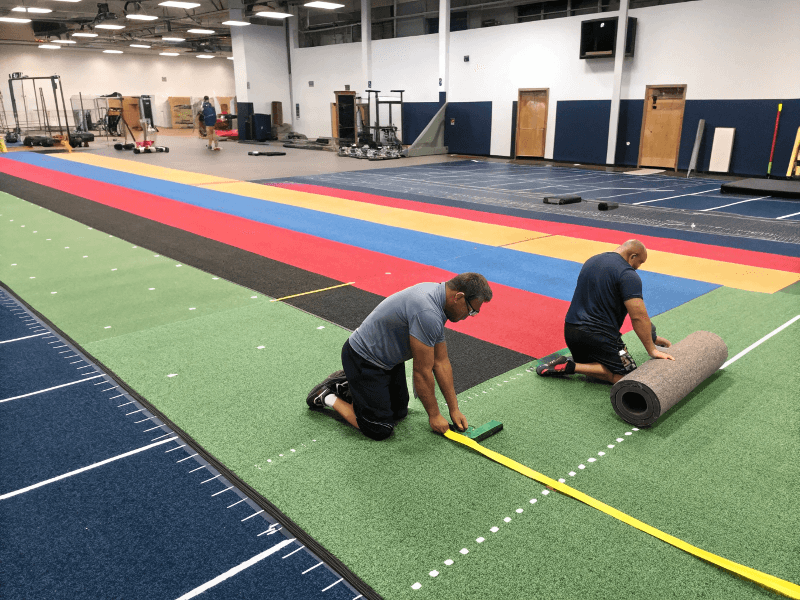
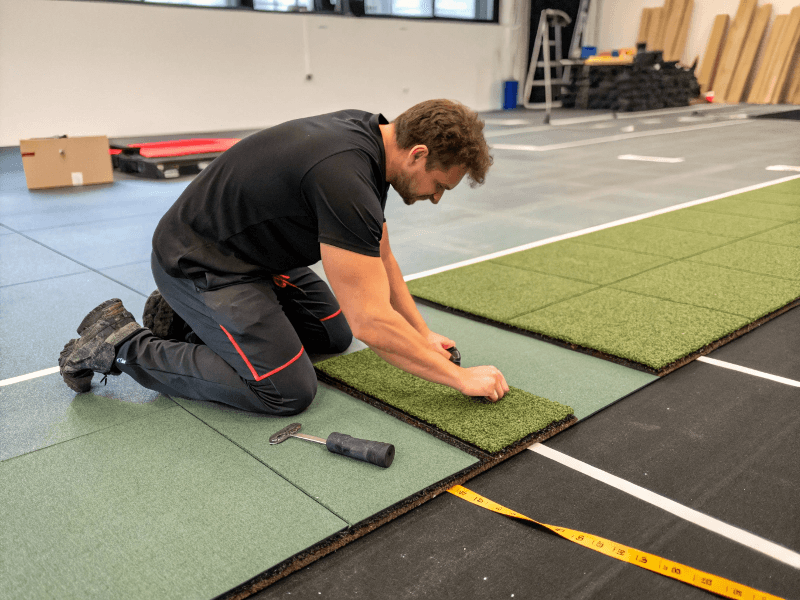
What are the key steps in laying Shock Turf?
The main part of putting down Shock Turf involves getting the floor ready, laying the turf carefully, and finishing the edges. Each step needs close attention to detail for a good result.
I remember a job where a small mistake in cutting led to a visible seam. We had to redo a whole section. That taught me that precision is key. We follow these steps carefully to avoid such issues:
How do we prepare the floor base for Shock Turf?
- Clean and Grind: We make sure the floor has no oil, dust, or bits. It has to be super clean.
- Fix and Level: We fill cracks and low spots. The floor must be very flat.
- Moisture and Primer: We put down a moisture barrier and a primer. This helps the turf stick better and keeps moisture out.
How do we lay the Shock Turf?
- Mark and Place: We measure and mark lines. This makes sure the turf goes in the right place and direction.
- Cut and Join:
- Pro Tools: We use special tools to cut straight and exact.
- Smooth Joins: We make sure seams are tight. This stops lifting and looks better.
- Pattern Match: If the turf has a design or logo, we line it up.
- Glue and Stick:
- Right Glue: We pick the best glue for the Shock Turf material and climate. We put on just enough, evenly.
- Set Time: We wait as long as the glue maker says.
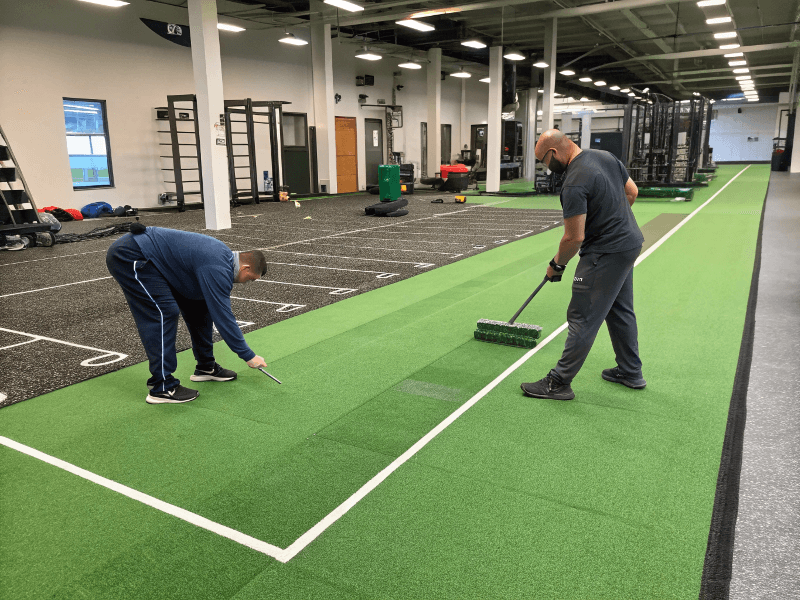
- Roll and Air Out: After laying, we roll the turf with a heavy roller. This gets out air bubbles and makes sure it sticks well.
How do we finish edges and trim Shock Turf?
We carefully finish edges around walls, poles, and doors. We use trim pieces and baseboards to make it look clean.
The work looks better when you handle these steps well. We aim for a perfect finish.
How do we solve common problems during Shock Turf installation?
During Shock Turf installation, issues like bubbles, uneven seams, or glue spills can pop up. We know how to fix these fast to keep the job on track.
I have seen every problem imaginable on job sites. Once, on a humid day, we noticed small air bubbles forming after rolling. We quickly adjusted our technique and used more aggressive rolling to press them out. Knowing how to react to these things comes from years of hands-on work.
What causes bubbles and lumps in Shock Turf?
Bubbles mean air got trapped. Lumps mean the floor was not flat enough. We fix these by rolling more, or by cutting and regluing small parts.
What makes seams uneven in Shock Turf?
Uneven seams happen if cuts are not straight or if turf shifts. We prevent this with careful measuring and quick adjustments during laying. If it happens, we can recut and rejoin.
How do we clean up spilled glue?
If glue spills, we clean it right away with the right cleaner. We make sure not to spread it around.
How do we get rid of smells from Shock Turf?
New turf and glue can have a smell. We keep the area well aired out to help the smell go away faster.

Knowing these fixes helps keep the project moving. It saves time and effort.
What happens after Shock Turf installation for checks and care?
After Shock Turf installation, we check the floor to make sure it is right, then give advice on how to keep it in good shape. Proper care makes the turf last longer.
My commitment to clients does not end when the last piece of turf is down. I always follow up to ensure they understand how to care for their new floor. I tell them about a client who did not follow our simple cleaning advice, and their turf looked worn too fast. With a little effort, Shock Turf can last many years.
How do we check the Shock Turf after installation?
We check that the floor is flat, stuck down well, and looks good. We walk over it and look closely at all seams.
How do we take care of Shock Turf later?
- Clean and Keep: We suggest daily cleaning and checking the turf regularly.
- No Dragging Heavy Things: Tell people not to drag heavy weights. This stops scratches.
- Keep Dry and Out of Sun: Keep water away and protect from too much sun. This helps the turf last.
These simple steps make a big difference. They keep the floor looking new for a long time.
Conclusion
Installing Shock Turf needs careful planning, precise laying, and good finishing. We focus on every detail to give you a strong, safe, and good-looking gym floor that lasts.
Ready to upgrade your gym with durable, high-performance Shock Turf? Contact us today for a free quote and sample!