In short: Soundproofing requires a two-pronged approach—blocking outside noise (isolation) and reducing internal echo (absorption). Start by sealing air gaps in doors and windows, then treat the floor with high-density rubber underlayment or PVC to stop vibration transfer. Finally, add soft furnishings to improve audio quality.
The Battle for Silence: Isolation vs. Absorption
In my years as an R&D engineer developing acoustic flooring solutions, I have seen many people confuse "soundproofing" with "acoustic treatment." If you glue egg cartons to your wall, you might reduce echo, but you will still hear the garbage truck outside. To truly soundproof your home office, you need to understand two physics concepts.
First is Sound Isolation. This stops sound from entering or leaving the room. It requires mass and air-tight seals. Think of this as "blocking" the noise. Second is Sound Absorption. This controls how sound bounces around inside your room. This is crucial for Zoom calls so you do not sound like you are speaking from inside a bathroom.
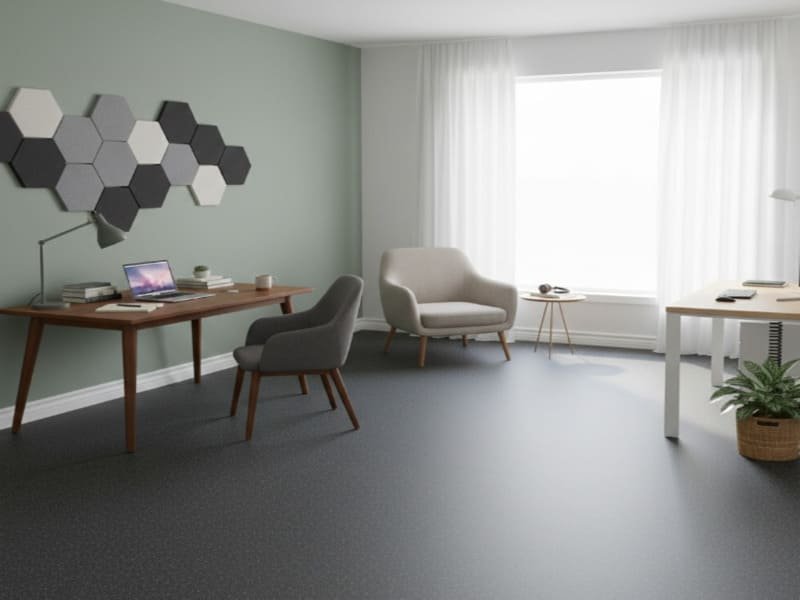
Most home offices suffer from "flanking noise." This is sound that travels through indirect paths—under doors, through ventilation, and specifically through the floor structure. As a product developer, I know that vibration transfer through floors is the most overlooked aspect of home office acoustics. A rolling office chair on a hardwood floor can create a significant amount of structure-borne noise that travels through the joists to the room below.

So, let’s look at the first step to fixing this.
Step 1: Seal the "Leaks" (Airborne Noise)?
If air can get in, sound can get in. You must seal the gaps around your doors and windows using weatherstripping, acoustic caulk, and heavy-duty door sweeps. This is the cheapest and most effective first step to block airborne frequencies like voices and traffic.
The Door and Windows are the Weakest Links
Sound behaves like water; it will find the path of least resistance. In most homes, the interior door is a hollow-core construction with a distinct gap at the bottom for airflow. In acoustic engineering terms, this is a massive hole in your defense. To fix this without replacing the door, you need to add mass and a seal. I recommend installing a heavy-duty rubber door sweep or an automatic door bottom that drops down when the door closes.
Next, look at the frame. If you can see light coming through the edges of your door, sound is pouring in. Apply high-quality weatherstripping tape around the perimeter. For windows, the logic is the same. Inspect the caulking around the window frame. If it is cracked, scrape it out and replace it with acoustic sealant. Unlike regular caulk, acoustic sealant remains flexible and does not crack over time, ensuring a permanent seal. If you rent your space and cannot renovate, hanging heavy "blackout" curtains (look for ones with a density above 300gsm) can add a necessary layer of mass to dampen street noise.

Once the air gaps are sealed, we must address the largest surface area in your room: the floor.
Step 2: Tackle the Floor (The Foundation of Silence)?
Hard floors reflect sound and transmit impact noise to the rest of the house. To fix this, you need materials with high IIC (Impact Insulation Class) ratings. I recommend using a high-density rubber underlayment for isolation, or resilient PVC flooring to dampen the sound of footsteps and rolling chairs.
Engineering the Perfect Floor for Focus
In our lab, we test materials for their IIC (Impact Insulation Class) rating. This measures how well a floor blocks impact noise, like footsteps or dropped items. A standard hardwood or tile floor has a very low IIC, meaning it acts like a drum skin, amplifying vibrations. To solve this, we use specific material densities to "decouple" the floor.
1. The Invisible Shield: Rubber Underlayment
If you have laminate or engineered wood, the best upgrade is a rubber acoustic underlayment. Unlike cheap foam which collapses over time, high-density rubber (typically 700-850 kg/m³) maintains its structure. It acts as a shock absorber between your floor and the subfloor. It creates a break in the structure so that when you walk or roll your chair, the vibration is absorbed by the rubber rather than transmitted to the floor joists.
2. The Modern Surface: Resilient PVC & Vinyl
If you are choosing a new finished floor, I always recommend PVC (LVT/LVP) over ceramic tile for offices. PVC has natural resilience or "give." When you roll an office chair on ceramic, it creates a high-pitched grinding noise. On PVC, that noise is significantly dampened. For a quick DIY fix, interlocking PVC tiles are excellent because they create a "floating floor" that further isolates sound.
3. Heavy-Duty Absorption: Rubber Mats
For home offices that double as gyms or hold heavy equipment, fine-grain rubber mats are superior. They provide the highest level of shock absorption. We engineer these mats to handle high impact, ensuring that dropping a book or a weight does not disturb the rest of the house.

Now that we have blocked the noise, we need to make the room sound good.
Step 3: Stop the Echo (Sound Absorption)?
To look and sound professional on calls, you must reduce reverb. Cover hard surfaces with soft materials like thick rugs, canvas art, or acoustic panels. Focus on placing these materials at "reflection points" on the walls to trap sound waves.
Improving Your Audio Quality
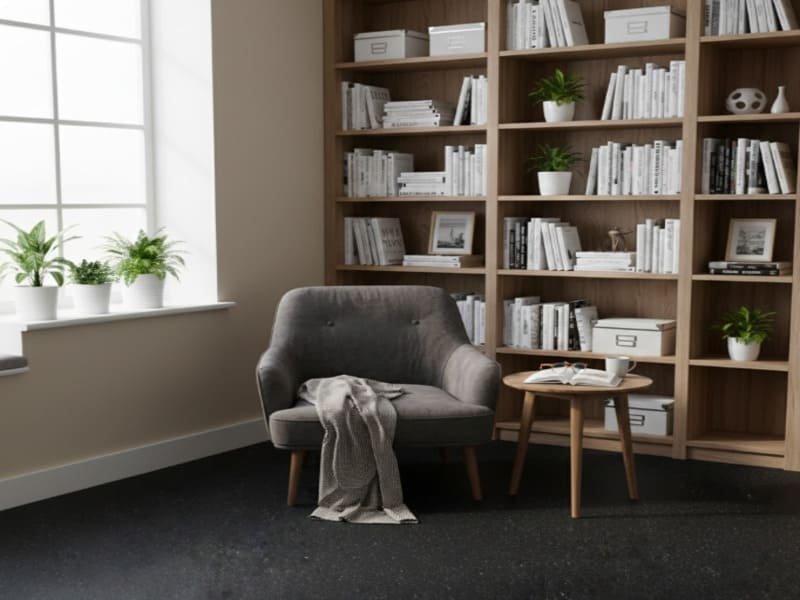
Have you ever noticed how a vacant room echoes? That is because sound waves bounce off hard drywall and glass. In a home office, this reverb lowers your speech intelligibility on video calls. As an engineer, I look at this as controlling the "decay time" of sound. You do not need to cover every inch of the wall; you just need to break up the large, flat surfaces.
Start with the floor if you haven’t installed acoustic flooring: add a thick area rug with a dense pad underneath. Then, look at your walls. Simple canvas paintings (without glass fronts) help, but dedicated acoustic panels are better. These panels are usually made of compressed fiberglass, polyester, or felt.
For the best results, use the "mirror trick." Sit at your desk and have someone slide a mirror along the wall. Wherever you can see the reflection of your mouth or speakers in the mirror, that is a primary reflection point. Place a panel there. Also, do not ignore the corners. Bass frequencies tend to build up in corners, making the room sound "muddy." Placing a bookshelf filled with books or a dedicated bass trap in the corner can significantly tighten up the audio profile of your room.
For those who own their home and want a permanent solution, we can go deeper.
Step 4: Advanced Construction (For Homeowners/Pros)?
For maximum silence, you must decouple the walls and add mass. This involves using Mass Loaded Vinyl (MLV) or installing a second layer of drywall with a damping compound. This creates a "room within a room" that physically separates your office from the rest of the structure.
Building a Room Within a Room
If you are renovating, standard insulation is not enough. You need Mass Loaded Vinyl (MLV). This is a heavy, limp vinyl sheet that we often use in industrial applications to line machinery enclosures. In a home office, hanging MLV against the studs before putting up drywall adds massive density without taking up space. It blocks a wide range of frequencies that standard insulation misses.
Another effective technique is Decoupling. Sound travels efficiently through rigid connections (like a drywall screw into a wood stud). By using "resilient channels" (metal strips that the drywall screws into) or sound isolation clips, you float the wall off the studs. This breaks the path for sound waves.
Alternatively, the "Green Glue" method is popular. You sandwich a layer of viscoelastic damping compound between two sheets of drywall. This compound converts sound energy into minute amounts of heat, drastically reducing sound transmission. While these methods are labor-intensive, they are the only way to achieve professional studio-level isolation—a process fully broken down in our tutorial on how to build a soundproof room.

However, if you cannot tear down walls, technology can help.
Step 5: Digital & Quick Fixes (Immediate Relief)?
If you need silence right now, use technology to mask or cancel noise. Active Noise Cancelling (ANC) headphones are essential for focus, while white noise machines can mask distracting background conversations. Software like Krisp can also remove background noise from your digital calls.
The Digital Layer of Silence
Sometimes, physical soundproofing is not possible or the budget is not there. In these cases, we manage the signal-to-noise ratio. White noise machines work by raising the ambient noise floor just enough to mask distinct, distracting sounds like a conversation in the next room. Our brains are wired to notice changes in sound (spikes), so a constant smooth "shhh" sound helps blend those spikes into the background.
For your ears, invest in high-quality Active Noise Cancelling (ANC) headphones. These use microphones to listen to incoming noise and generate an "anti-noise" sound wave that cancels it out before it hits your eardrum. This is pure wave physics in action and is incredibly effective for low-frequency drones like traffic or HVAC systems.
Finally, for your clients’ sake, use AI-powered noise suppression software. Apps like Krisp act as a digital firewall for your microphone, identifying and removing non-human sounds in real-time. This ensures that even if your dog barks, your client only hears your voice.

Let’s address some questions I frequently hear from customers.
FAQ: Common Questions Solved
Can I just use egg cartons to soundproof my room?
No. This is a dangerous myth. Egg cartons have zero mass, so they cannot block sound. They are also highly flammable. For soundproofing, you need heavy, dense materials like rubber or gypsum, as explained in our analysis of what material cancels out noise.
Is carpet better than a hard floor for soundproofing?
Carpet is good for absorption (stopping echo), but standard carpet underlay is too light to block sound transmission effectively. A hard floor (like LVP) installed over a high-density rubber underlayment often provides better sound isolation (IIC rating) than old carpet, while being easier to clean.
How much does soundproofing cost?
It varies wildly. A DIY approach (sealing gaps + heavy curtains) can cost under $100. Improving the floor with professional rubber underlayment typically costs $1-$3 per square foot. Full construction (MLV + double drywall) can run thousands of dollars. Start with the floor and door for the best ROI.
Conclusion
Soundproofing is a system, not a single product. Start by sealing air gaps, then upgrade your floor with high-density rubber or PVC to stop vibration, and finally, treat the walls to reduce echo.
If you are unsure which specific thickness of rubber underlayment or which type of PVC flooring is best for your specific home office setup, my team and I can help you analyze your space. Feel free to reach out to us for a technical consultation or request a sample kit to feel the material density yourself.