![Rubber Mat 20250905165331 (2)[1]](https://meettfit.com/wp-content/uploads/2025/09/rubber_mat_20250905165331_21.jpg)
You must verify their manufacturing capabilities and material knowledge. This means demanding detailed technical data sheets, analyzing physical samples for precise tolerances, and confirming their chosen logo integration method is mechanically sound for your specific high-wear application, not just aesthetically pleasing.
As a process engineer, my job is to look past the marketing photos and focus on the physics of the product. A beautiful gym floor is useless if it fails in three years. The difference between a floor that lasts a decade and one that peels, fades, or breaks down often comes down to small, technical details that are overlooked during the purchasing process. A competent supplier isn’t just a reseller; they are a manufacturer or have deep ties to one. They should be able to discuss topics like Shore A hardness, binder composition, wear layer thickness, and subfloor flatness tolerances. This guide is designed to give you the critical questions and technical knowledge you need to properly vet a supplier and ensure you are making a sound engineering investment, not just a cosmetic purchase.
We will now dissect the process from an engineering perspective, focusing on what truly matters for performance and longevity.
Which Material and Logo Technology is Right for Your Application?
The right choice is dictated by force, friction, and expected lifespan. High-impact zones require dense rubber (Shore A 60+) with waterjet-cut inlaid logos. High-friction areas need abrasion-resistant turf. The key is matching the material’s certified performance data to the physical demands of the space.
Selecting the correct material is a technical exercise, not a stylistic one. I always start with a "use-case analysis" of the facility layout. What is the maximum weight being dropped? What kind of movements will be performed? The answers provide the performance specifications we need. A supplier who immediately talks about colors without first asking about your weightlifting platform’s drop-rating is a red flag. The following table provides a more technical breakdown for making an informed decision.
| Material | Key Technical Specification | Logo Integration Method | Engineering Rationale |
|---|---|---|---|
| Rubber Rolls/Tiles | Shore A Hardness: 60-75; Thickness: 8-12mm | Waterjet Cutting (Inlaid) | Provides optimal shock absorption (force reduction) and durability. |
| Artificial Turf | Face Weight: 40-60 oz; Pile Height: 15-25mm | Woven-in Color Fibers | Resists abrasion from sleds and high-traction footwear. |
| Performance Vinyl | Wear Layer Thickness: >20 mil (0.5mm) | Reverse-Printed with Wear Layer | Protects the graphic from direct foot traffic and chemical wear. |
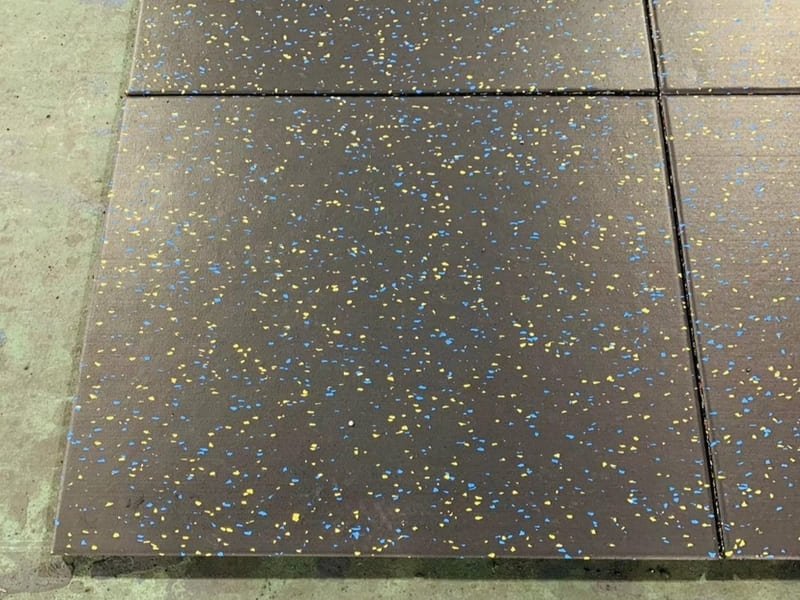
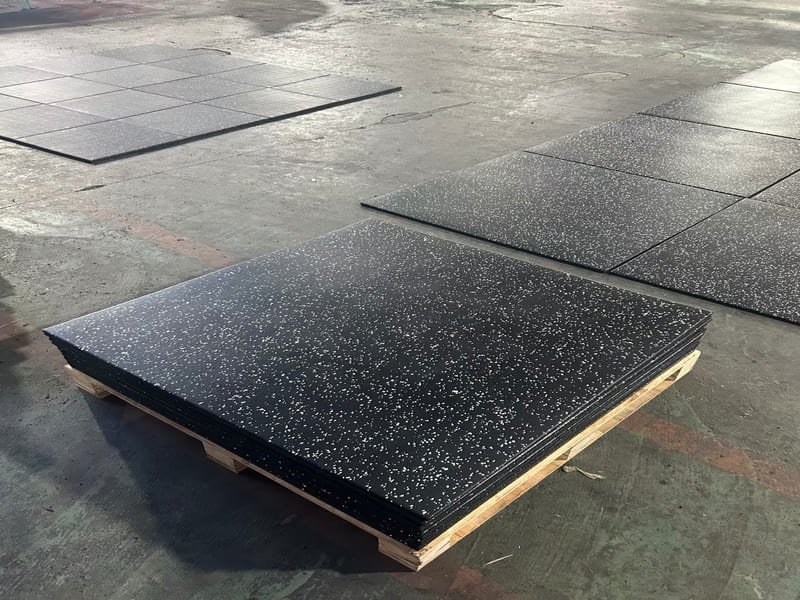
Rubber: It’s About More Than Thickness
While thickness is important for impact absorption, the material’s Shore A hardness is a critical indicator of its durability and density. A low-hardness rubber (below 60A) might feel soft but can permanently indent or tear under heavy loads. For free-weight areas, I specify a dense, high-durometer recycled rubber bound with a high-quality polyurethane adhesive. A poor-quality binder will cause the rubber to crumble and shed granules over time—a common failure point in cheaper products. Always request a technical data sheet (TDS) and check these values.
Logo Integration: The Engineering of Durability
This is where many costly mistakes are made.
- Waterjet Cutting: This is the superior method for rubber. It is a mechanical interlock, not a chemical bond. The logo pieces are cut with the same machine as the main floor, ensuring the tolerances are extremely tight (often less than 0.5mm). The pieces fit together perfectly. There is no adhesive layer to fail and no paint to wear off. The logo is physically part of the floor.
- High-Quality Printing: This method is suitable for vinyl but must be done correctly. The logo should be reverse-printed on the underside of a clear wear layer. This places the ink behind a protective shield. Surface-level printing, even with a topcoat, will inevitably wear away from foot traffic and cleaning. Ask the supplier to specify the thickness of the wear layer—anything less than 20 mil is insufficient for a commercial gym.
A technically proficient supplier will be able to explain exactly why their chosen method is the best for your application and provide data to back it up. To see how brands creatively apply these durable techniques, explore our custom rubber floor patterns guide.
What is the Correct Process for Design, Vetting, and Approval?
A rigorous process moves from a manufacturable design file (vector), to deep supplier vetting based on past projects and technical data, to final approval based on a physical sample that you have personally stress-tested. Skipping any of these steps introduces unacceptable risk.
A successful outcome is guaranteed by a disciplined process, not by hope. From a production standpoint, precision and verification are mandatory at every stage. I have seen projects delayed by weeks because the client provided a low-resolution JPG logo, or colors mismatched because a decision was made from a computer screen. This process is designed to eliminate such errors before they become expensive problems. It prioritizes technical validation over simple visual confirmation.
Step 1: Design for Manufacturing (DFM)
Your idea needs to be translated into a format our machines can read. This means you must provide a vector file (.AI, .EPS, .DXF). Vector files are mathematical descriptions of shapes, allowing us to scale your logo to any size with zero loss of quality. We also need specific color information, preferably Pantone codes, to ensure the most accurate match possible with the available material colors. This initial step prevents the most common source of design-related production errors.
Step 2: Vetting and Physical Sample Analysis
Do not just look at a supplier’s gallery. Ask for references for projects completed 3-5 years ago to see how their work holds up over time. When you receive a physical sample, don’t just look at it—analyze it:
- Lighting Test: Take it to your facility. Colors look drastically different under the fluorescent or LED lighting of a gym compared to an office.
- Seam Inspection (for Waterjet): Try to pull the logo and the main material apart at the seam. It should not give. Look at the cut quality. Are the edges sharp and clean, or are they frayed?
- Scratch and Chemical Test: Use a key to try to scratch the surface. Apply a small amount of your planned cleaning solution to a corner to see if there is any discoloration. A good sample will resist this abuse.
Step 3: Final Technical Approval
Your final sign-off should be on a document that includes the approved shop drawings with all dimensions, the Pantone color codes, and a reference to the physical sample you approved. This creates a clear, technical contract. Once you sign this, it authorizes my team to begin production, confident that we are manufacturing exactly what you have tested and verified.
This rigorous, hands-on approval process is your insurance against disappointment. It ensures that what you see is what you get.
What Truly Drives the Cost of Custom Gym Flooring?
The cost is a direct function of material volume, machine time, and skilled labor. Denser materials, thicker floors, and complex multi-color logos that require hours of waterjet cutting and manual assembly are fundamentally more expensive to produce. The price reflects the engineering and resources required.
When planning a budget, it’s crucial to understand the Total Cost of Ownership (TCO), not just the upfront price. A cheaper floor that fails in 3 years is far more expensive than a premium floor that lasts 10 years, especially when you factor in the cost of downtime and replacement. The price is a reflection of the product’s underlying technical value. A supplier should be able to break down their quote to explain these cost drivers.
| Cost Driver | Impact | Engineering Justification |
|---|---|---|
| Material Quality/Density | High | Higher-grade polymers and binders provide superior durability and longevity, costing more to source. |
| Floor Thickness | High | Directly increases the volume of raw material required per square foot. |
| Logo Complexity/Colors | High | Each additional color in a waterjet design is another piece to cut, handle, and assemble, increasing machine and labor time exponentially. |
| Installation Labor | Medium | Requires skilled labor for subfloor prep, adhesive application, and precise seam work. |
Beyond Upfront Price: Total Cost of Ownership (TCO)
Let’s run a simple scenario.
- Option A (Lower Upfront Cost): A printed logo on thinner rubber. Cost: $7,000. Lifespan under heavy use: 3 years before the logo degrades significantly. Cost per year: $2,333.
- Option B (Higher Upfront Cost): A waterjet-cut inlaid logo on thick, high-density rubber. Cost: $11,000. Lifespan: 10+ years. Cost per year: $1,100.
Option B requires a larger initial investment, but its TCO is less than half of the cheaper option over a decade. Furthermore, this calculation doesn’t include the cost of shutting down a section of your gym for replacement. When you buy flooring, you are buying performance over time.
Always frame your budget around long-term value. Investing in the right materials and manufacturing methods from the start is the most fiscally responsible decision.
How Do You Ensure the Long-Term Performance of Your Flooring?
Long-term performance is guaranteed by two factors: meticulous subfloor preparation before installation and a disciplined maintenance program using correct, non-destructive cleaning methods afterward. The best flooring product in the world will fail if installed on an improper foundation.
The day my team ships a finished floor, our quality control work is done. The responsibility for the product’s lifespan now shifts to the installation and maintenance teams. As an engineer, I know that a product only performs as well as its operating environment allows. A pristine floor installed on a damp or uneven subfloor is destined for premature failure. Similarly, using the wrong cleaning chemicals can chemically compromise the material.
Subfloor Preparation: The Non-Negotiable Foundation
This is the most critical phase of the entire project.
- Flatness Tolerance: The subfloor, typically concrete, must be extremely flat. The industry standard is a tolerance of no more than 3mm deviation over a 3-meter span. High spots or dips will create stress points in the flooring, leading to buckling or separating seams.
- Moisture Testing: Concrete is porous and can hold significant moisture. A concrete slab must be properly cured and tested for moisture vapor emission rate (MVER). Installing flooring over damp concrete will trap moisture, leading to adhesive failure, mold growth, and bubbling of the floor. Professional installers use methods like the Calcium Chloride test (ASTM F1869) to verify the slab is ready. Any supplier who doesn’t discuss subfloor testing is not a serious professional.
Maintenance: The Chemistry of Cleaning
The wrong cleaner can destroy your investment.
- The Importance of pH-Neutral Cleaners: Most recycled rubber flooring is held together by a polyurethane binder. Harsh, high-pH (alkaline) degreasers or acidic cleaners will chemically attack and break down this binder. This causes the rubber to become brittle and shed granules. Always use a pH-neutral cleaner specified for rubber or vinyl flooring.
- Avoid Over-watering: When mopping, use a damp mop, not a soaking wet one. Excessive water can work its way into the seams over time, especially if they are not perfectly sealed, potentially weakening the adhesive bond below.
Proper installation and maintenance are not afterthoughts; they are essential parts of the flooring system’s design and are critical for protecting your investment.
Conclusion
Selecting the right supplier is an exercise in technical due diligence. Focus on material specifications, manufacturing precision, and proven long-term performance, not just surface-level aesthetics.
Request a Technical Consultation
Our process begins with an engineering consultation, not a sales pitch. We believe in providing transparent, accurate information to help you make the best long-term decision for your facility.
Contact our team to request technical data sheets, discuss the specific requirements of your project, or order material samples for your own analysis. Let’s ensure your next flooring project is engineered for success.
My Role
As a Production Process Engineer specializing in custom gym flooring, I bring over a decade of hands-on experience in materials science and manufacturing optimization. My role involves overseeing the entire production lifecycle, from initial design consultation and material specification to the final quality assurance of intricate logo integrations. I partner with gym owners and product developers to translate their brand vision into a functional, durable, and aesthetically superior flooring solution. My expertise lies in the technical details—ensuring the right manufacturing process, like precision waterjet cutting, is matched with the right material for each specific application, whether it’s a high-impact weightlifting zone or a functional training area. I provide the engineering insight necessary to create custom flooring that not only looks impressive but also withstands the demands of a commercial fitness environment.