To choose the perfect rubber gym floor tiles, you must match the tile’s thickness directly to your primary workout activity. This single decision correctly dictates the level of subfloor protection, shock absorption, and long-term durability you will receive. Everything else is secondary.
I’ve consulted on hundreds of gym builds, from home garages to professional athletic facilities. A common, costly mistake I see is flooring chosen based on looks or price alone, leading to cracked concrete subfloors within a year. A proper gym floor is not an accessory; it is a piece of safety equipment engineered to withstand specific forces. This guide is my technical brief, designed to give you the essential data and criteria to make an informed, confident decision. We will cover the critical specifications—thickness, material composition, and installation requirements—ensuring you invest in a solution that performs correctly and protects your property for years to come.
Before we analyze specifications, it’s crucial to understand the fundamental reasons why rubber is the undisputed material standard for gym applications. Its performance is a matter of material science, not preference.
Why is Rubber the Superior Material for Gym Flooring?
Rubber is superior because its inherent physical properties—high density, elasticity, and a high coefficient of friction—are perfectly suited to the demands of a gym. It is specifically engineered to absorb impact, reduce noise, and prevent slips in a way that generic flooring cannot.
| Benefit | Engineering Principle |
|---|---|
| Extreme Durability | SBR rubber, post-vulcanization, has a cross-linked molecular structure that resists abrasion and compression fatigue. |
| Subfloor Protection | The material’s elasticity allows it to deform under load, dissipating kinetic energy from a dropped weight over a wider area. |
| Injury Prevention | The surface reduces peak impact forces on joints, and its high coefficient of friction meets ASTM F2772 standards for slip resistance. |
| Acoustic Insulation | Its dense, porous composition effectively traps and dampens sound waves, reducing ambient noise by a measurable decibel level. |
From a technical standpoint, the choice is clear. When a heavy weight is dropped, the floor must absorb and distribute immense force in milliseconds. The vulcanized SBR rubber used in our tiles is engineered for this exact purpose. It protects your concrete subfloor from fracturing and your equipment from damage. Critically, it also protects you. The cushioning effect isn’t just about comfort; it’s about reducing the peak impact forces transmitted to your ankles, knees, and spine during high-impact exercises. Furthermore, its slip-resistance properties are consistent and quantifiable, providing a safe surface even when wet with sweat—a non-negotiable safety requirement in any serious training environment.
Understanding the "why" behind rubber is key. Now, let’s move to the most critical specification you will choose. This decision will define the performance of your floor.
How Thick Must Your Rubber Gym Tiles Be?
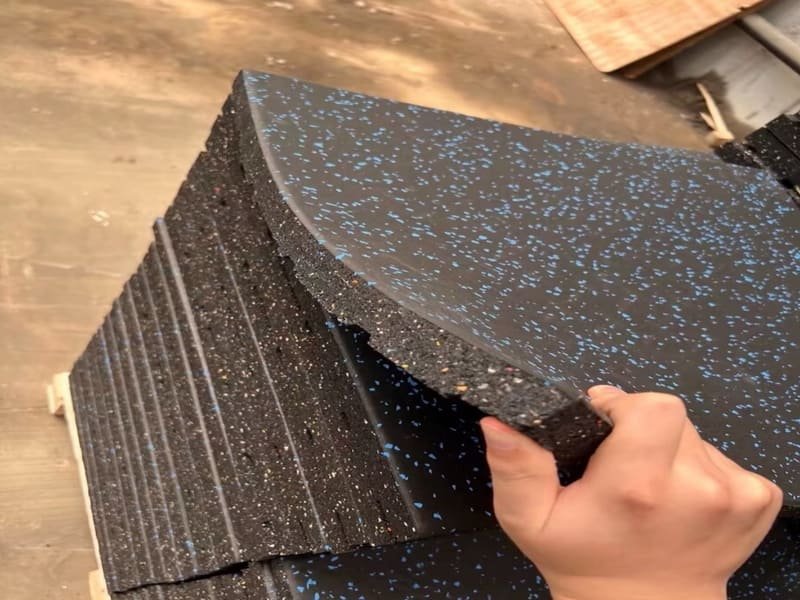
Your tile thickness must correspond to the maximum weight and drop height it will endure. For general fitness, 8mm (3/8") is the industry standard. For dedicated heavy weightlifting where drops are frequent, 12mm (1/2") is the minimum requirement for adequate protection.
| Thickness | Max Use Case | Technical Justification |
|---|---|---|
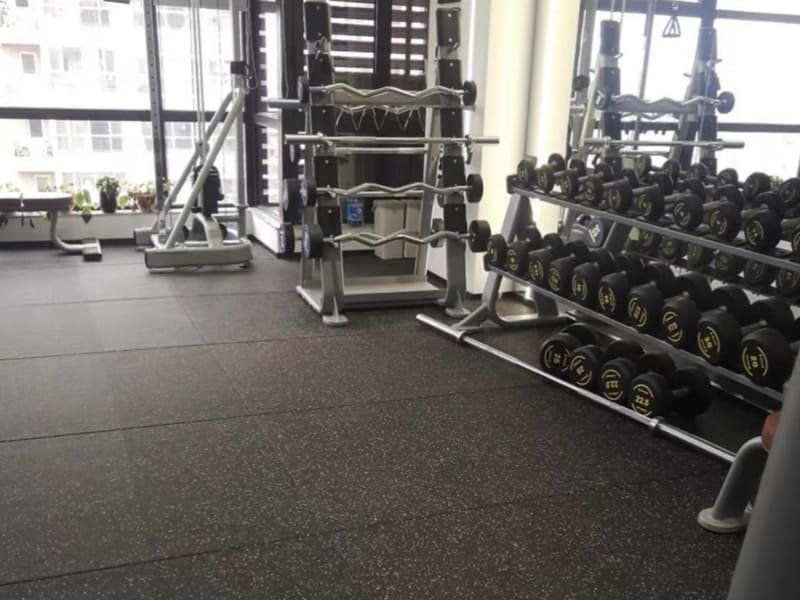
| 6mm (≈1/4") | Cardio Equipment & Bodyweight Zones | Protects against abrasion and light static loads. Not rated for dynamic impacts. |
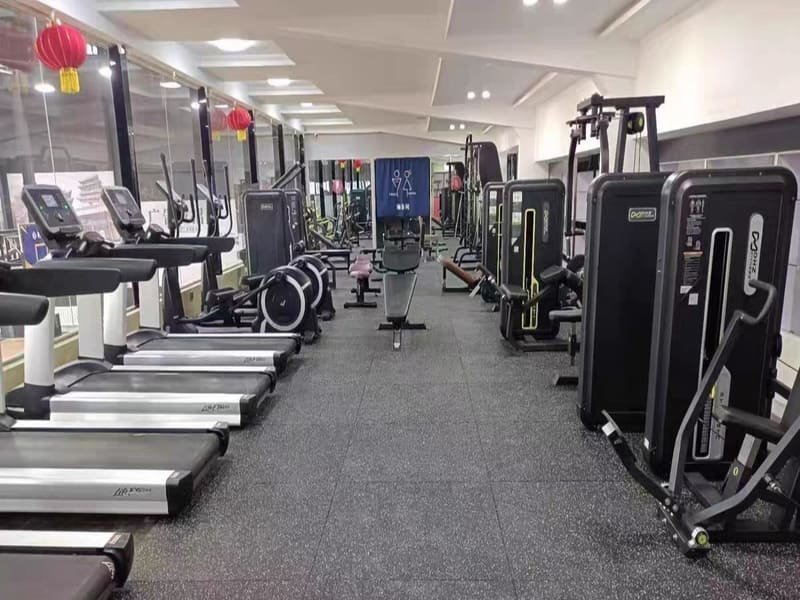
| 8mm (≈3/8") | All-Purpose & CrossFit Gyms | The optimal balance. Protects concrete from repeated drops of weights up to 50kg. |
| 12mm+ (≈1/2") | Powerlifting & Olympic Weightlifting | Essential for absorbing the high kinetic energy from repeated drops of 100kg+ barbells. |
The Baseline: 6mm (1/4")
This thickness is an excellent protective layer under static equipment like treadmills or for stretching and bodyweight exercise areas. It prevents scratches and wear on your subfloor. However, it lacks the mass and elasticity to adequately absorb the shock from even a moderately heavy dropped dumbbell. I do not recommend it for any area where free weights are used.
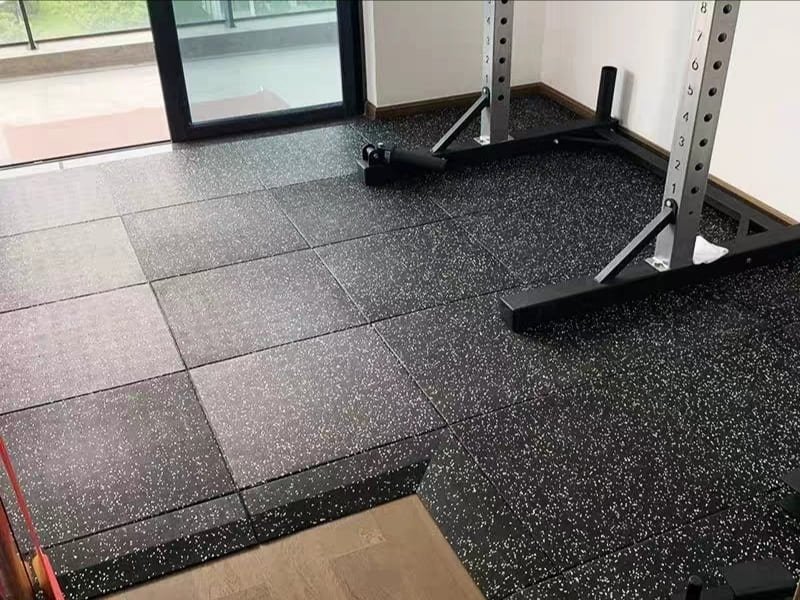
The Industry Standard: 8mm (3/8")
This is the workhorse of the fitness industry. Its thickness and density are engineered to provide the optimal balance of protection, stability, and value. It will reliably protect a standard concrete subfloor from damage caused by the accidental dropping of most dumbbells and kettlebells. It is the correct specification for the vast majority of home gyms and commercial free-weight areas.
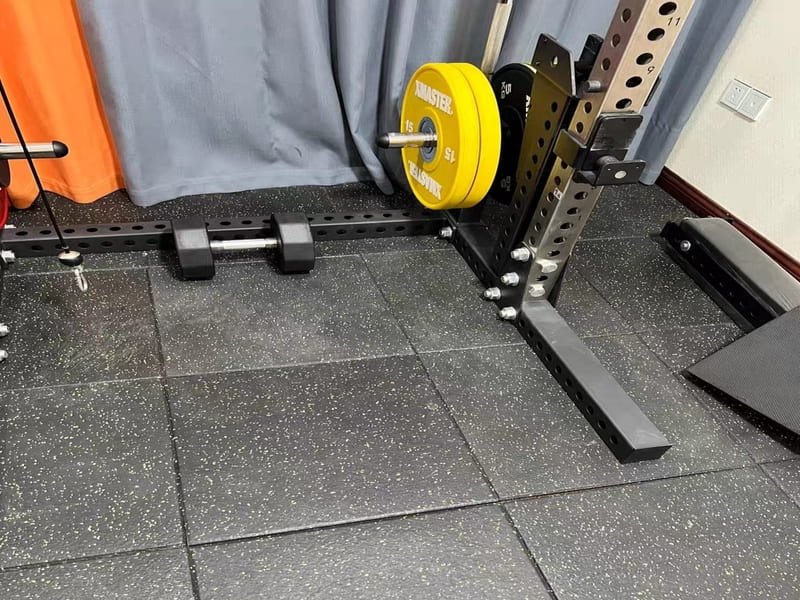
The Heavy-Duty Requirement: 12mm+ (1/2")
If your training involves Olympic lifts, powerlifting, or Strongman exercises where dropping heavy barbells is part of the routine, this is your minimum starting point. Areas with lifters moving 140kg (300 lbs) or more absolutely require a floor of this specification to prevent long-term subfloor damage and to provide necessary acoustic dampening.
Now that you have determined the correct thickness, let’s briefly examine the materials themselves. This affects aesthetics, cost, and the initial room environment.
What is the Exact Composition of Rubber Gym Tiles?
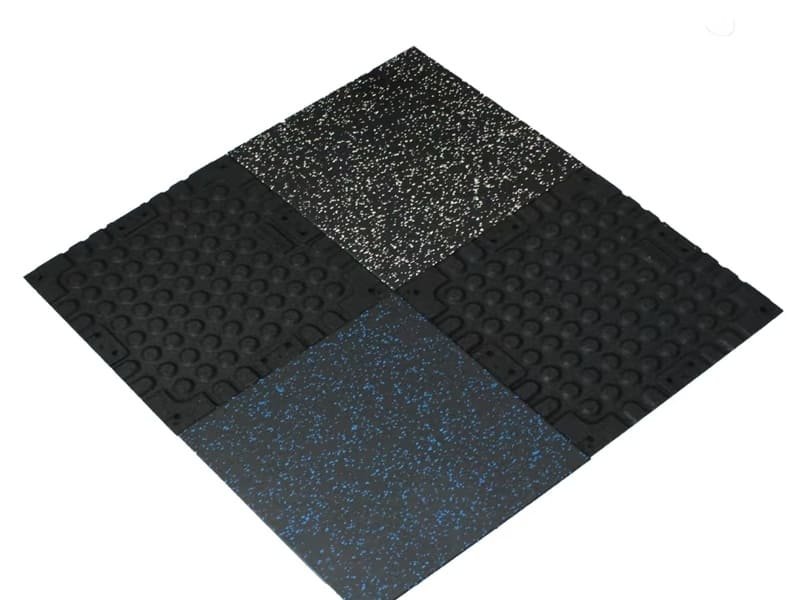
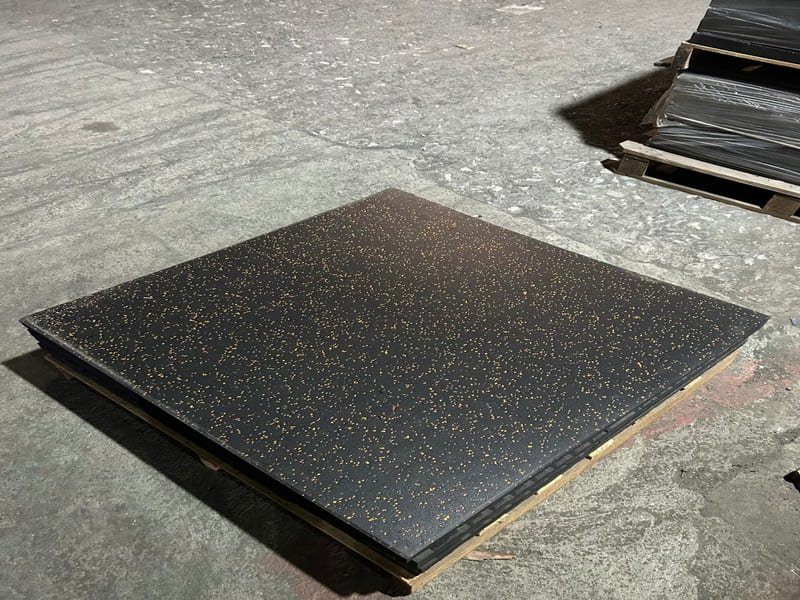
The vast majority of gym tiles are composed of recycled SBR (Styrene-Butadiene Rubber) granules held together by a polyurethane binder. The color flecks are typically virgin EPDM (Ethylene Propylene Diene Monomer) rubber, added for aesthetic appeal and enhanced durability.
| Component | Technical Function | Key Characteristic |
|---|---|---|
| SBR Granules | Primary structural mass and impact absorption | High durability and abrasion resistance |
| EPDM Flecks | Color and visual texture | Excellent color stability and UV resistance |
| Polyurethane Binder | Adheres all granules into a solid tile | Crucial for tile longevity and strength |
SBR and EPDM
SBR is the same durable rubber used in vehicle tires, and its recycling for flooring is a proven, sustainable process. It provides the core performance characteristics of the tile. EPDM is a synthetic rubber with superior colorfastness, so it is used for the decorative flecks. A tile with a higher EPDM percentage (e.g., 20% vs. 10%) is considered a more premium product.
The Odor and Off-Gassing
It is a scientific fact that products made from recycled vulcanized rubber will have an initial odor. This is from the release of trace volatile organic compounds (VOCs) from the manufacturing process, known as off-gassing. The smell is not harmful and will dissipate over a few weeks. Good ventilation is key to speeding this up. If you require a zero-odor environment from day one, you must invest in premium tiles made from 100% virgin rubber, which have a significantly higher cost.
With your specifications set, we turn to the practical matter of installation. A proper installation ensures the performance and longevity of your flooring system.
Can You Reliably Install Rubber Gym Tiles Yourself?
Yes, interlocking rubber tiles are specifically designed for DIY installation. A successful result depends on meticulous subfloor preparation. An unprepared subfloor is the primary cause of installation failure. No adhesive is needed for most home gym applications if the tiles are installed wall-to-wall.
| Step | Action | Technical Reason |
|---|---|---|
| 1. Subfloor Prep | Subfloor must be clean, dry, and level. | An uneven subfloor will cause seams to sit improperly and potentially separate under load. |
| 2. Acclimatize | Let tiles rest in the room for 48 hours. | Allows the rubber to thermally expand or contract to the room’s ambient conditions before fitting. |
| 3. Installation | Start from a corner and fit seams tightly. | A systematic layout ensures a square and stable final floor. Use a rubber mallet to seat seams fully. |
| 4. Cutting | Use a sharp utility knife and straight edge. | Allows for precise cuts against walls and around obstacles for a professional finish. |
The most critical step is subfloor preparation. The surface must be flat. If your concrete is uneven, the interlocking tabs on the tiles will be stressed, leading to weak points and potential separation over time. Avoid installing over soft surfaces like plush carpet at all costs, as the unstable base will never allow the seams to lock securely. For most home gyms, the weight of the tiles combined with a tight fit against the walls provides sufficient stability without glue. In large commercial spaces, we may specify adhesive to prevent any possibility of shifting under extreme commercial use.
Your floor is installed. Proper, minimal maintenance is all that is required to protect your investment and ensure it performs safely for its entire service life.
What is the Correct Maintenance for Rubber Flooring?
Correct maintenance requires using only a pH-neutral cleaner. Harsh, solvent-based cleaners (like citrus, pine, or acetone-based products) are forbidden, as they will chemically attack and break down the polyurethane binder, causing the floor to degrade prematurely.
| Task | Correct Method | Why It’s Correct |
|---|---|---|
| Routine Cleaning | Vacuum (beater bar off) or sweep. | Removes abrasive grit and dust without damaging the surface. |
| Deep Cleaning | Damp mop with water and a pH-neutral cleaning solution. | Cleans effectively without leaving residue or causing chemical damage. |
| Spills | Wipe up immediately with a cloth. | The rubber is water-resistant, but prompt cleanup prevents any potential staining. |
| Forbidden | All solvent, acid, or oil-based cleaners. | These chemicals break down the polymer chains of the polyurethane binder, causing the tile to crumble. |
The longevity of a rubber tile is dependent on the integrity of its polyurethane binder. This binder is a strong polymer, but it is susceptible to chemical attack from solvents and acids. Using the wrong cleaner will permanently compromise the floor’s structure. All that is needed is a simple routine of sweeping or vacuuming to remove debris, and occasional damp mopping with a cleaner that is chemically neutral. With this simple care, a high-quality rubber floor is engineered to last for more than a decade, even under heavy commercial use.
We have covered the technical, installation, and maintenance protocols. Finally, we address the budget, framing it as a long-term value investment.
How Should You Budget for a Proper Rubber Floor?
Budget approximately $2 to $8 per square foot. The price is dictated by thickness and material quality. This is not an expense but a capital investment that provides a return by preventing costly subfloor repairs and enhancing the safety and value of your property.
| Cost Factor | Price Impact | Technical Reason |
|---|---|---|
| Thickness | High | Price is directly correlated to the volume of raw material in the tile. |
| EPDM Content | Medium | Virgin EPDM material is more costly to produce than recycled SBR. |
| Warranty | N/A | A longer warranty (5+ years) often indicates higher quality binders and processing. |
| Shipping | Variable | Rubber is dense and heavy; freight costs are a significant part of the total project budget. |
When you evaluate cost, compare the price of the flooring to the potential cost of repairing a structurally cracked concrete slab—a repair that can easily exceed several thousand dollars. The floor’s primary function is risk mitigation. It protects your foundation, your equipment, and your body. A longer manufacturer’s warranty is often a good indicator of a higher quality binder and more rigorous manufacturing tolerances, justifying a higher initial price point for greater long-term reliability. Always factor in shipping costs, as the high weight of the product can make this a substantial portion of your total budget.

This guide has provided the core technical data. Here are answers to a few more specific questions I frequently encounter from clients.
What Other Technical Questions Should You Ask?
You should ask about water resistance, fire ratings, and outdoor suitability. The answers are critical for safety and longevity. Tiles are water-resistant but not waterproof. They should have a fire rating for commercial use. They are not suitable for permanent outdoor installation.
| Question | Technical Answer |
|---|---|
| Install over carpet? | No. The unstable base will compromise the interlocking seams. |
| Are they waterproof? | The rubber is water-resistant, but seams can allow water to seep to the subfloor. |
| What about fire safety? | For commercial use, tiles must have a Class 1 or Class 2 fire rating per ASTM E648. |
| Can they be used outdoors? | No. Prolonged UV exposure will break down the polyurethane binder and fade the color. |
Conclusion
The correct rubber gym floor is an engineered system. Match the tile thickness to your lifting intensity, ensure it is installed on a prepared subfloor, and maintain it correctly.
My Role
As the Technical Director for Meetall Sport, I oversee the material science, manufacturing processes, and quality control for our entire range of athletic flooring. With over two decades in this industry, my focus is on ensuring every product meets stringent performance standards for impact absorption (ASTM F1292), slip resistance (ASTM F2772), and durability. My team and I function as technical consultants for our clients, helping them specify the correct flooring system for their application, from private training studios to large-scale commercial facilities. We provide the technical expertise to ensure your investment is sound, safe, and built to last.
Your gym’s foundation is too important for guesswork. If you require a precise flooring specification for your project, contact my team. We can provide a technical consultation, a detailed quote, and material samples for your evaluation.