The best rubber flooring installation method depends on your space: Glue-down is the best for permanent, high-traffic commercial gyms. Double-sided tape offers a secure but removable balance for home garages. Loose lay is the fastest and easiest way for heavy mats or temporary residential setups.
Many people spend a lot of money on high-quality rubber flooring but fail to think about how it stays on the ground. As someone who has overseen hundreds of installations, I can tell you that the "best" method is not just about cost. It is about how the material reacts to the environment and the work you do on top of it. If you choose the wrong method, your floor will shift, the seams will open, and you might even trip during a workout. You must look at the specific needs of your room, such as the subfloor type and how much moisture is in the air. This guide will show you exactly how to choose so your floor stays flat and safe for years.
The first step is to see how these three main methods compare in a real-world setting.
Which Method Fits Your Project Best?
You should choose Glue-Down for maximum durability, Tape for a secure DIY home gym, and Loose Lay for quick setups where you might move the flooring later. Each method has a different impact on your budget and the long-term stability of the rubber.
| Feature | Glue-Down | Double-Sided Tape | Loose Lay |
|---|---|---|---|
| Difficulty | High (Professional) | Medium (DIY Friendly) | Low (Easy) |
| Stability | Permanent / No Movement | Semi-Permanent | High Friction |
| Cost | Highest (Adhesive + Labor) | Moderate | Lowest |
| Best Use | Commercial / High Impact | Home Garage / Studios | Renters / Heavy Mats |
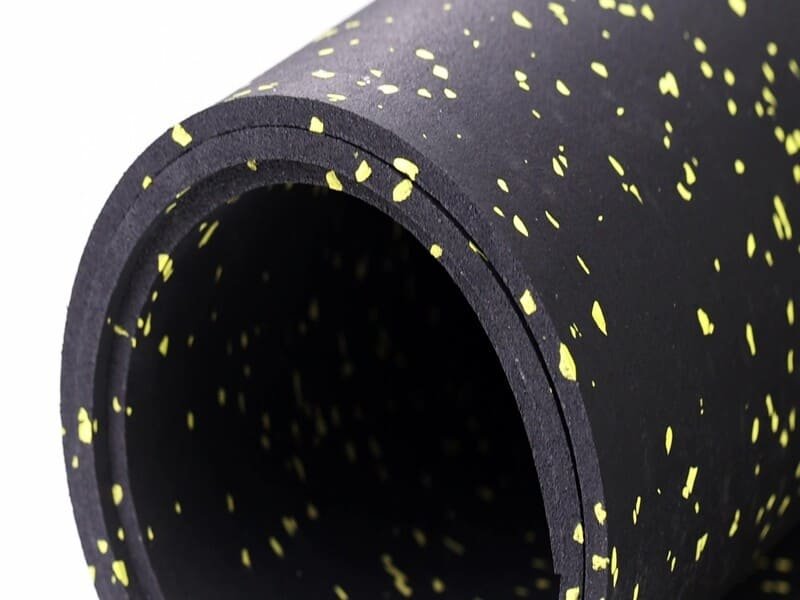
When I work with product developers, I always explain that the installation is part of the product performance. If you have a 10mm or 12mm rubber roll, it has a lot of "memory" from being rolled up. Glue-down installation uses polyurethane adhesive to create a chemical bond that fights this memory. This is why it is the standard for professional facilities. Tape is a great middle ground because it holds the edges down but does not require a full floor spread of chemicals. Loose lay works best for heavy, thick mats (usually 15mm or more) because the weight of the rubber itself creates enough friction to stay still. However, if you are doing high-intensity interval training (HIIT) with a lot of lateral movement, loose lay might let the floor "creep" or slide over time.
Now let’s look at the most robust option for those who want a floor that never moves.
Is Glue-Down the Best for Commercial Gyms?
Yes, glue-down is the only way to ensure 100% stability in high-traffic or commercial areas. It prevents the rubber from expanding or contracting too much and stops water from getting under the seams during cleaning, which protects your subfloor from damage.
Technical Requirements for Glue-Down
| Requirement | Detail | Why it Matters |
|---|---|---|
| Adhesive Type | One-part Polyurethane | Provides a flexible but strong bond |
| Cure Time | 24 to 48 Hours | Prevents indentations from heavy weights |
| Trowel Size | 1/16" Square Notch | Ensures the right amount of glue spread |
Glue is a powerhouse but it is not for everyone. If you use glue, you are making a long-term commitment. I have seen many people try to remove glued rubber later and they end up destroying the concrete or plywood underneath. It is messy and requires you to work fast before the glue sets. But for a business owner, this is the safest choice. It handles heavy machinery and constant foot traffic without any gaps forming between the rolls. If your gym has huge temperature changes, glue keeps the rubber in place so it does not "buckle" when it gets warm. It also creates a water-tight seal which is vital if you mop your floors with a lot of water.

If you want a secure floor but might move in two years, tape is a better choice.
Can Double-Sided Tape Handle Heavy Workouts?
Double-sided tape works very well for residential gyms and small studios. It holds the perimeter and the seams together to prevent tripping, but it still allows you to pull the floor up later without ruining the surface underneath the rubber.
I often suggest tape for garage gyms. In a garage, the concrete might have some moisture, and tape is easier to manage than a full spread of glue. You should use a high-quality, pressure-sensitive adhesive tape specifically made for rubber. The trick is to apply the tape to the subfloor first, then lay the rubber on top. I always tell my team to roll the seams with a heavy floor roller after taping. This pressure "activates" the bond. While it is not as strong as glue, it is much better than doing nothing. The main risk is that the tape can fail if the floor gets very wet or if there is a lot of dust on the subfloor when you start.
Tape Installation Comparison
| Factor | Home Gym | Commercial Gym |
|---|---|---|
| Movement Risk | Low | High |
| Ease of Removal | High | Low |
| Maintenance | Minimal | Regular check on seams |

If you are a renter or just have a few heavy mats, you might not need any adhesive at all.
When Should You Use the Loose Lay Method?
Loose lay is perfect for heavy rubber mats or interlocking tiles in low-traffic areas. Because rubber is heavy and has a high coefficient of friction, it will generally stay in place if the pieces are thick enough and fit tightly against the walls.
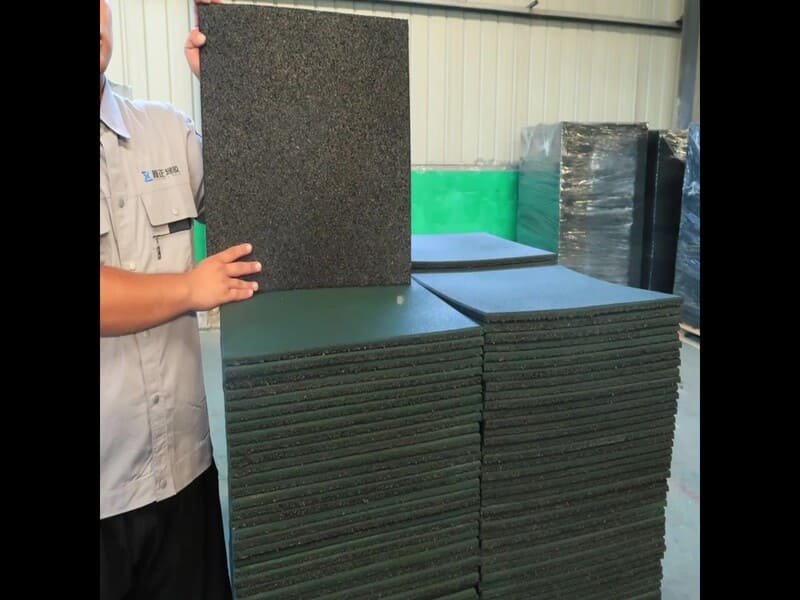
Loose lay is the fastest way to get a floor down. You just drop it and walk away. But there is a secret: this works best with interlocking tiles rather than rolls. The "puzzle" teeth of the tiles lock them together so they cannot pull apart. If you use straight-edge rolls without tape or glue, they will eventually move. I have seen gaps as wide as half an inch form after just a few months of use. This happens because the rubber expands during the day and shrinks at night. Without something holding it down, it "walks" across the room. Only use loose lay if your mats are at least 15mm thick or if you are okay with adjusting them occasionally.
Loose Lay Suitability
| Application | Recommended? | Technical Reason |
|---|---|---|
| Weightlifting Mats | Yes | Weight of mat exceeds shifting force |
| Thin Rubber Rolls | No | Rolls are too light and will curl |
| Interlocking Tiles | Yes | Mechanical lock prevents seam opening |
Before you start any of these methods, there are three things you must do to avoid failure.
What Are the Non-Negotiable Installation Steps?
You must acclimate the rubber for 48 hours, clean the subfloor perfectly, and use the "double cut" method for seams. Skipping these steps will cause the rubber to shrink, bubble, or show ugly gaps regardless of the adhesive you use.
The "Must-Do" Checklist
| Step | Action | Benefit |
|---|---|---|
| Acclimation | Lay flat for 48h | Prevents shrinking after glue sets |
| Moisture Test | Check concrete dampness | Prevents glue or tape from peeling |
| Double Cutting | Overlap and cut through both | Creates a perfectly tight, invisible seam |
Acclimation is the most important part. Rubber is made under heat and pressure, then rolled up tight for shipping. When you unroll it, it wants to crawl back to its original shape. If you glue it down immediately, it will pull away from the walls as it relaxes. I once saw a job where the installer didn’t wait, and a week later, there was a one-inch gap around the whole room. Also, your subfloor must be flat. Rubber is flexible, so it will show every bump or crack in the concrete. If the floor isn’t level, the seams won’t stay flat, and people will trip.
This brings us to the final decision on which path you should take.
Conclusion
Choose glue for permanent commercial strength, tape for a secure but removable home gym, or loose lay for thick mats and quick DIY projects.
If you are planning a project and need specific advice on which method fits your floor or if you need a few samples to test the quality and weight for yourself, feel free to send me a private message. I can help you figure out the best fit for your space.
Need samples or expert advice? Send me a private message to get started!