
You can install a gym on carpet, but simply throwing down a thin mat is dangerous. Without a stable subfloor system, you risk injury from instability and permanent chemical damage to your home’s carpet.
The Physics of Instability: Why the "Marshmallow Effect" Matters
As a Quality Control Specialist in rubber manufacturing, I see customers make the same mistake daily. They buy high-quality rubber, place it on plush carpet, and then wonder why their squat rack feels like it is on a waterbed. We call this the "Marshmallow Effect." In engineering terms, carpet is a compressible substrate. It is designed to squash under pressure to provide comfort. However, while learning how to install a home gym floor over concrete is the standard approach for professional setups, carpeted homes require an engineered floating platform to achieve that same rigid, non-compressible base. When you lift heavy weights, you need ground reaction force—the ability to push against the floor. If the floor absorbs that energy by sinking, your body has to compensate.
This compensation leads to rolled ankles, knee strain, and poor lifting form. Furthermore, heavy equipment like treadmills or racks creates "point loads"—intense weight focused on a tiny surface area. On carpet, these point loads will sink deeply, causing the equipment to tilt or wobble. To fix this, you do not just need a floor cover; you need a load-distribution system. You must stop thinking about "covering" the carpet and start thinking about "floating" a rigid platform above it.
Now that we understand the physical risks of stability, we must look at the hidden chemical risks that can cost you your security deposit.
What is the Hidden Risk of Rubber on Carpet?
Rubber contains oils that can permanently stain carpet through a process called "plasticizer migration." To prevent this, you must place a vapor barrier, such as PE film or Kraft paper, between the rubber and the carpet.
Understanding Material Chemistry: The Silent Floor Killer
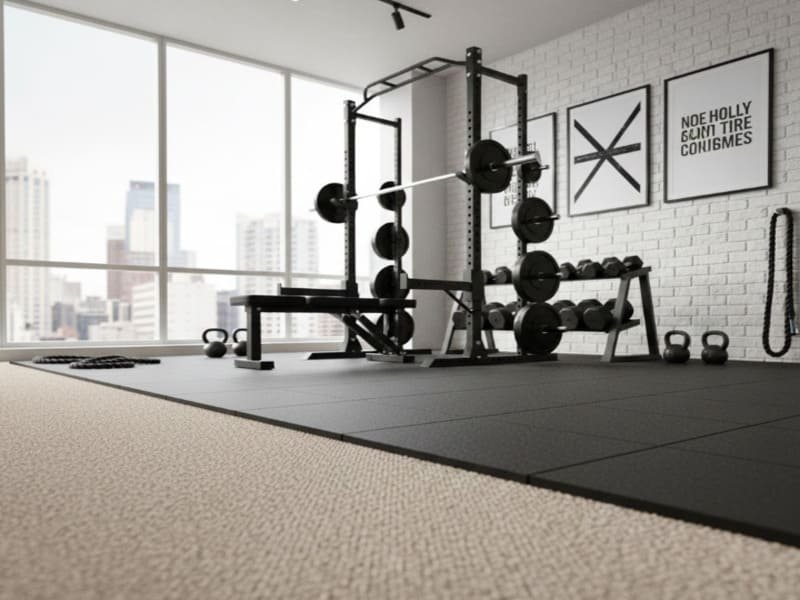
Most people focus on the weight of the gym, but as a manufacturer, I worry about the chemistry. Most gym flooring is made from SBR (Styrene-Butadiene Rubber), often recycled from car tires. To make this rubber flexible and durable, manufacturers use plasticizers and oil-based binders during the vulcanization process. These compounds are stable inside the rubber, but they are not static. Over time, especially in warm environments, these oils can slowly "migrate" or leach out of the bottom of the mat.
If you have dark carpet, you might never notice. But if you have light-colored, beige, or grey carpet, this migration causes a yellow or brownish stain that looks like a urine stain. This is a chemical reaction with the carpet fibers, not just surface dirt. No amount of steam cleaning will remove it because the carpet fiber itself has been chemically altered. This is why a physical barrier is non-negotiable. A simple layer of 6-mil plastic sheeting or heavy-duty builder’s paper stops this migration dead in its tracks. It is a cheap insurance policy for your home.

Once you understand the risk, it is time to build. Follow this exact protocol to build a stable platform.
The 5-Step "Plywood Sandwich" Installation Protocol
This is the industry-standard method for high-pile carpet. Follow these five steps to create a floating subfloor that disperses weight and protects your home.
Step 1: Clear and Prep the Zone
Move all furniture out. Do not try to build "around" a sofa. You need a clean rectangle. Vacuum the carpet thoroughly. This is your last chance to remove dust and allergens before you seal the floor for potentially years.
- Pro Tip: If your carpet has loose loops, trim them now so they don’t create uneven bumps under the plastic.
Step 2: The "Chemical Shield" (Vapor Barrier)
Roll out 6-mil Polyethylene (PE) plastic sheeting or heavy-duty Kraft paper over the entire carpeted area.
- Action: Overlap any seams by at least 6 inches (15cm) and tape the seams with packing tape. Run the plastic 2 inches up the wall (you can trim it later). This ensures zero rubber oils ever touch your carpet fibers.
Step 3: The "Skeleton" (Plywood Subfloor)
Lay down 12mm – 18mm (1/2" – 3/4") OSB or Plywood sheets. This is the most critical step for stability.
- Layout: Lay the sheets perpendicular to how you will lay the rubber tiles.
- The Brick Pattern: If your room needs multiple rows of wood, stagger the joints like a brick wall. Do not let four corners meet at one point—that creates a weak spot.
- Gap Management: Leave a tiny 3mm gap between wood sheets to allow for expansion, and tape over these gaps with duct tape to prevent pinching.
Step 4: The "Skin" (Rubber Flooring)
Install your 20mm-25mm rubber tiles on top of the wood.
- Start Point: Start from the corner that is most visible (usually the door) so you have full tiles where it matters.
- Locking it Down: Use double-sided carpet tape on the underside of the perimeter tiles to stick them to the plywood. Do not glue the middle tiles; gravity and the interlocks will hold them. This keeps the floor tight but allows you to dismantle it later.
Step 5: The Load Test
Before moving your squat rack in, stand on the platform and jump. It should feel solid, like a drum, not squishy like a mattress. If it feels solid, move your equipment in.

Now that you know how to build it, let’s make sure you buy the right materials for your specific carpet type.
Which Flooring Specifications Match Your Carpet Pile?
For low-pile carpet, 20mm interlocking tiles are sufficient. For high-pile carpet, you need the plywood subfloor plus tiles. Avoid rubber rolls entirely, as they will curl and bunch up without adhesive.
Selecting the Right Specs: A Manufacturer’s Guide
Not all rubber performs the same on soft surfaces, and understanding the specific density requirements—much like knowing how to choose OCR gym flooring for high-intensity training—is the key to selecting the right product for your home. In the factory, we test density and tensile strength, but for you, the most important factor is rigidity. Here is how to match the product to your room:
- Low Pile / Commercial Carpet: This carpet has very little squish. You can often skip the plywood (Steps 2 & 3 above) and lay 20mm Interlocking Tiles directly on top. The interlocks keep the floor connected, and the 20mm thickness provides enough weight to keep it flat. Budget Estimate: Moderate.
- Medium / High Pile Carpet: This is standard bedroom carpet. You MUST follow the full 5-Step Protocol above. If you lay tiles directly on this, the seams will pop open every time you step near them. It creates a massive trip hazard. Budget Estimate: Higher (includes wood costs).
Why You Must Avoid Rubber Rolls:
I see this mistake constantly. Rolls are cheaper, so people buy them. But rubber rolls have "memory"—they want to curl back into a cylinder. In a commercial gym, we glue rolls to the concrete. You cannot glue rolls to carpet. Without glue, the edges will curl up, and the middle will bunch up like a wrinkled rug. It looks terrible and is unsafe. Always stick to heavy, high-density tiles for carpet applications.
Before you spend any money, there is a simple physical test you can do right now to see if you need the full plywood setup.
How Can You Test Your Carpet Stability Before Buying?
Perform the "Heel Test" by standing on one leg in your lifting shoes. If you sink or wobble significantly, your carpet is too soft for direct installation and requires a plywood subfloor.
The Heel Test: A DIY Engineering Assessment
You do not need expensive lab equipment to test your floor; you just need gravity. This test simulates the force transfer of a heavy squat or deadlift. Put on the shoes you plan to exercise in. Go to the room where you want the gym. Stand on one leg. Lock your knee and put your entire body weight onto that single heel.
Look at your foot.
- The Pass: If your shoe sinks only a tiny bit (less than 5mm) and you feel stable, your carpet is dense. You can likely use 20mm+ interlocking tiles directly on top.
- The Fail: If you see your heel sink deep into the fibers (1cm or more), or if you have to wave your arms to keep balance, your foundation is unstable. If you build a gym directly on this, you will hate it. The equipment will rock, and you will feel unsafe.
If you fail this test, do not try to save money by skipping the plywood. The wood is the only thing that will fix that instability. It is better to spend the extra $100 on wood sheets now than to twist a knee later.
Even with the right setup, you likely still have concerns about smell and long-term damage.
What Are the Most Common Questions About Rubber Over Carpet?
High-quality EPDM rubber prevents strong odors, while plywood minimizes carpet crushing. Avoid "horse stall mats" as their inconsistent thickness creates gaps and tripping hazards on uneven carpet surfaces.
Addressing Your Real Concerns
Q: Will my room smell like a tire shop?
This is a quality control issue. Cheap rubber uses aggressive binders and raw recycled tires, which off-gas sulfur. For a living space, this is unpleasant. Look for tiles that are "Low-VOC" or feature an EPDM top layer. EPDM is a synthetic rubber that is much more stable and nearly odorless. It costs slightly more, but for a bedroom gym, it is essential.
Q: Will the weight crush my carpet permanently?
I will be honest: Yes, heavy weight compresses foam padding. The plywood method helps immensely by spreading that weight out, reducing the pressure per square inch. However, after 5 years, the carpet under the platform will be flatter than the rest of the room. This is the trade-off for having a gym.
Q: Can I use "Horse Stall Mats"?
Technically, yes, but I do not recommend it. Stall mats are made for barns, not precision gyms. Their thickness tolerance is poor—one mat might be 18mm, the next 22mm. On concrete, this is annoying. On carpet, it is a disaster. The uneven edges create ridges that you will trip over. Precision-cut gym tiles are made to exact standards so they lock together flush, creating a seamless surface even on a softer base.
Conclusion
Building a gym on carpet is not just about buying a mat; it is about engineering a stable system. By following the 5-Step Protocol—clearing, shielding, stabilizing with wood, and locking down the rubber—you ensure your safety and protect your property investment.