Is Rubber Gym Flooring Hard to Maintain?
No, it is actually one of the easiest flooring materials to maintain. By simply vacuuming daily to remove grit and mopping weekly with a pH-neutral cleaner (avoiding oils and bleach), you can keep your floor pristine for decades without expensive professional services.
As a Quality Control Engineer who has spent years testing the durability of SBR and EPDM rubber materials, I often hear customers ask, "Will I regret buying rubber flooring because of the cleaning?" The answer is a definitive no. Rubber is naturally antimicrobial, water-resistant, and tough. However, "tough" does not mean "invincible." The biggest threat to your floor isn’t the heavy deadlifts or the dropped dumbbells; it is the chemistry of your cleaning bucket. Many gym owners—whether running a garage gym or a 20,000 sq. ft. facility—unknowingly ruin their investment by using harsh solvents that dissolve the binder holding the rubber granules together. In this guide, I will simplify the science of floor care, differentiating between home and commercial needs, so you can stop worrying about maintenance and focus on training.If you are looking for a more detailed, step-by-step breakdown of daily and long-term care routines, you can also refer to our in-depth guide on How to Care for Rubber Gym Flooring.
Before we dive into the engineering details, let’s get straight to the point for those who need immediate answers.
What Is the Fastest Way to Clean Rubber Gym Flooring (TL;DR)?
For immediate results: Vacuum loose debris daily to prevent scratching. Weekly, mix a pH-neutral cleaner (or mild dish soap) with warm water, use a damp (not soaking) microfiber mop to clean, and let it air dry. Never use oil-based solvents, bleach, or wax.
If you are looking for the "Cheat Sheet" to keeping your warranty valid and your floor looking new, here is the summarized protocol. Rubber flooring consists of rubber granules bonded by a polyurethane adhesive. This adhesive is sensitive to pH extremes and solvents. Therefore, the "Golden Rule" is neutrality. You do not need aggressive scrubbing for daily maintenance; you just need to remove the abrasive dirt and sweat oils.
The 30-Second Maintenance Rules:
- The "Always": Vacuum or sweep daily. Dirt acts like sandpaper.
- The "Weekly": Damp mop with a pH-neutral solution.
- The "Never": No oil-based degreasers (Lysol/Pine-Sol), no bleach, no soaking wet mops.
- The "Fix": For smells, use an enzymatic cleaner. For chalk, use diluted vinegar.
| Do This | Why? |
|---|---|
| Vacuum Daily | Removes abrasive grit that dulls the surface. |
| Damp Mop | Cleans without trapping water in seams. |
| pH-Neutral Soap | Protects the chemical binder from dissolving. |
| Microfiber | Traps dirt better than cotton; uses less water. |

Now that you have the quick answer, we need to look at the specific tools required, because a home garage gym owner does not need the same equipment as a commercial facility manager.
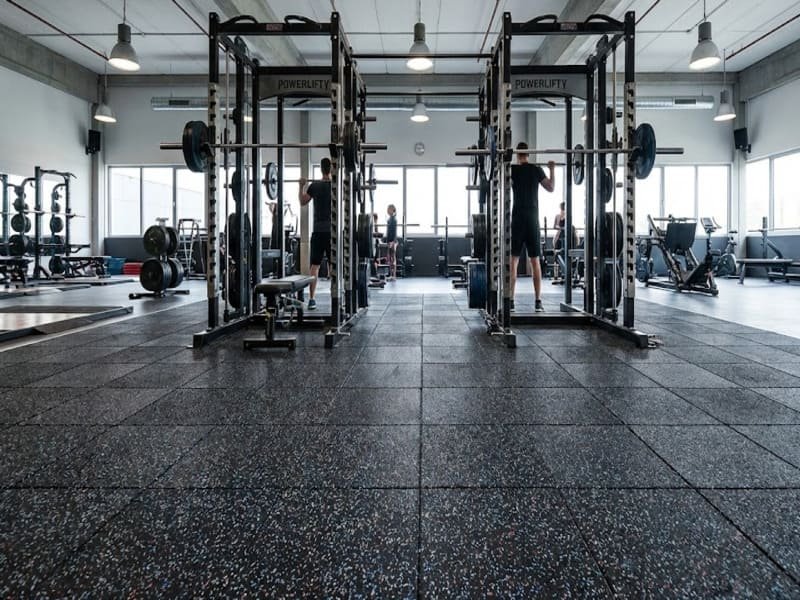
What Tools Do You Need for Home vs. Commercial Gyms?
Home gym owners only need a vacuum and a microfiber mop with mild dish soap, while commercial facilities require auto-scrubbers (used carefully) and specialized enzymatic cleaners to handle high-traffic sweat and bacteria load.
From my experience in product development, I know that "over-cleaning" is a common mistake for home users, while "under-sanitizing" is the risk for commercial gyms. We must tailor the toolkit to the application.
For the Home Gym Owner:
You don’t need industrial chemicals. Your floor sees low traffic (1-3 people). Your priority is preventing dust buildup and keeping it looking sharp.
- Cleaner: Warm water + a few drops of mild dish soap (like Dawn).
- Tool: A simple microfiber mop with a flat head. It’s cheap, effective, and prevents you from using too much water.
- Vacuum: A standard stick vacuum (ensure the beater bar is off).
For the Commercial Facility Manager:
You are dealing with hundreds of sweaty shoes daily. Your priority is hygiene and speed.
- Cleaner: A dedicated pH-Neutral Commercial Floor Cleaner and an Enzymatic Cleaner for odor control in locker areas.
- Tool: For large areas, an Auto-Scrubber with a soft nylon brush or pad (Red pad usually). Warning: Never use stiff grit brushes on an auto-scrubber, or you will strip the top layer of the rubber.
- Vacuum: A wide-area walk-behind vacuum.
| Feature | Home Gym | Commercial Gym |
|---|---|---|
| Traffic Level | Low | Very High |
| Primary Threat | Dust & Aesthetics | Bacteria, Sweat, Chalk |
| Recommended Tool | Microfiber Mop | Auto-Scrubber (Soft Pad) |
| Chemical Choice | Mild Dish Soap | pH-Neutral Concentrate |

Having the right tools is half the battle; knowing which chemicals are "kryptonite" to your floor is the other half.
Which Chemicals Will Destroy Your Rubber Floor?
You must strictly avoid all oil-based solvents, harsh acids (like undiluted bleach), and waxes, as these chemically attack the polyurethane binder, causing the floor to curl, crumble, and lose its structural integrity.
As an engineer, I analyze failed flooring samples regularly. The number one cause of failure is not wear and tear—it is chemical attack. The polyurethane binder that holds the rubber granules together is chemically similar to the glues dissolved by solvents. If you use a heavy-duty degreaser, turpentine, or an oil-based cleaner (often found in "pine" scented products), you are softening that binder.
Over time, you will notice the corners of your tiles curling up or the surface becoming sticky. This is irreversible damage. Additionally, avoid Waxes or Sealers. Rubber is designed to be non-slip. Adding wax creates a dangerously slippery surface for weightlifting and creates a maintenance nightmare where the wax builds up and peels off, looking terrible. Stick to the chemistry of "less is more."
The "Forbidden List":
- Solvents/Paint Thinners: Instant binder destruction.
- Oil-Based Cleaners: Causes rubber to swell and soften.
- Undiluted Bleach: Fades color and degrades the polymer.
- Abrasive Scouring Powders: Scratches the smooth finish permanently.
Once you have secured safe chemicals, establishing a routine is key to preventing the buildup of grime that becomes hard to remove later.
How Do You Establish a Safe Cleaning Routine?
A "Damp Mop" technique is critical—never flood the floor with water—and frequent water changes are necessary to prevent spreading dirty bacteria-laden water back onto the porous rubber surface.
The texture of recycled rubber is naturally porous. This provides excellent grip, but it also means it can trap dirt if you aren’t careful. The most common mistake I see is "flooding." Users dump a bucket of water on the floor and try to mop it up. Do not do this. Water can seep through the seams of the mats, getting trapped between the rubber and the subfloor. This stagnant water breaks down the adhesive glue and grows mold.
Instead, use the Damp Mop Method. Dip your mop in the cleaning solution and wring it out until it is almost dry. It should feel moist to the touch, not dripping. When you mop, the floor should air dry within a few minutes. If it takes 20 minutes to dry, you used too much water. Furthermore, change your bucket water frequently. If the water is grey, you are just painting your floor with liquid dirt.
- Step 1: Dry Vacuum (Essential).
- Step 2: Mix Cleaner (Follow dilution ratios strictly).
- Step 3: Damp Mop (Wring it out!).
- Step 4: Air Dry (Use fans if needed).

Routine cleaning handles the dirt, but what about the specific "nightmares" like gym chalk and locker room odors?
How Can You Remove Tough Stains like Chalk and Odors?
Use a diluted vinegar solution (4:1 water to vinegar) to dissolve alkaline chalk residues, and use bio-enzymatic cleaners to digest the organic bacteria that cause lingering sweat odors.
In a functional fitness gym or weight room, standard soap won’t fix everything. Gym Chalk (Magnesium Carbonate) is alkaline and pastes up when wet. To remove it, we need basic chemistry: a mild acid neutralizes the base. Mix water and white vinegar (4 parts water, 1 part vinegar). This mild acidity breaks down the chalk so it can be wiped away. Note: Rinse with water afterwards to remove vinegar residue.
For Odors, the smell usually comes from bacteria feasting on sweat trapped in the rubber pores. A regular cleaner just perfumes the bacteria. You need an Enzymatic Cleaner. These cleaners contain biological enzymes that literally "eat" the organic waste causing the smell. This is the secret weapon for commercial gyms. For Gum, freeze it with ice and chip it off; never scrape it while soft.
Troubleshooting Cheat Sheet:
| Problem | The Fix | The Mechanism |
|---|---|---|
| Gym Chalk | Diluted Vinegar (4:1) | Acid neutralizes alkaline chalk. |
| Sweat Odor | Enzymatic Cleaner | Enzymes digest odor-causing bacteria. |
| Scuff Marks | Tennis Ball on a Stick | Friction erases marks safely. |
| Gum | Ice + Plastic Scraper | Freezing makes gum brittle to chip. |

If your flooring is brand new, you might encounter a unique set of issues that looks like "dirt" but is actually part of the manufacturing process.
Why Does New Flooring Need a Special "First Clean"?
New rubber mats often have a waxy "mold release agent" on the surface, requiring a few aggressive initial washes with mild soap to strip the film and eliminate the "new rubber" smell.
When we manufacture these mats, we use a "release agent" to prevent the hot rubber from sticking to the steel molds. When you unroll your new floor, this agent is often still present. It can make the floor feel slippery or look oily. This is not a defect; it is a byproduct of production.
For your First Clean, you need to be a bit more thorough than usual. You may need to mop the floor 2 or 3 times in the first week using a slightly higher concentration of mild dish soap to cut through this waxy layer. This also helps with "off-gassing." The rubber smell is strongest when new. By cleaning the surface and keeping the room well-ventilated for the first week, this smell will dissipate rapidly.
Before we wrap up, let’s address the most frequent questions I get from clients to clear up any remaining confusion.
Frequently Asked Questions (FAQ)
Q: Can I use a steam mop on my rubber mats?
A: No. The intense heat can warp the rubber and loosen the glue holding the granules together. Stick to cool or warm water.
Q: My mop turns black when I clean, is that bad?
A: If the floor is brand new, it’s just the release agent (normal). If the floor is old, a black mop means you are scrubbing too hard or using harsh chemicals that are disintegrating the rubber surface.
Q: Do I need to seal my rubber floor?
A: Generally, no. Sealing can make the floor slippery and create a maintenance cycle of stripping and re-sealing. High-quality rubber is designed to be used raw.
Conclusion
Rubber flooring is not delicate; it’s just chemically specific. If your goal is to go beyond basic cleaning and actively extend the service life of your flooring, this guide breaks down proven methods in detail: What Maintenance Tips Can Extend the Life of Rubber Gym Floor.
Whether you are running a home gym or a commercial facility, the secret to longevity is simple: keep it pH-neutral, keep it dry, and keep it oil-free. If you follow these basic engineering principles, your floor will handle the heavy lifting for years to come.
Ready to upgrade your facility?
If you are unsure which thickness or density is right for your specific training style, contact our team. We can send you free samples so you can feel the quality difference yourself before you decide.