
The best outdoor rubber flooring depends on your project. Interlocking tiles are ideal for patios and decks. Rubber pavers are great for walkways. Mats work best for high-wear zones. Your choice depends on your specific use, budget, and the condition of your existing ground surface.
As a technical director in the rubber flooring industry, I’ve seen countless projects succeed or fail based on one thing: choosing the right material for the job. You have an outdoor space you want to improve. You are tired of cracked concrete, slippery wood decks, or muddy patches of grass. You need a solution that is safe, durable, and low-maintenance. Outdoor rubber flooring is an excellent option, but the term covers a wide range of products, from tiles and mats to pavers and rolls. People often ask me if it can handle the weather, if it gets too hot, and what the real cost is. This guide will give you the clear, straightforward answers you need from an engineering perspective. We will look at each option to help you make the best technical decision.

Choosing the right type of flooring is the first and most important step. Each product is engineered for different applications, loads, and environmental conditions. Making the wrong choice can lead to poor performance and a shorter lifespan for your surface. Let’s examine the main options.
What Are The Main Types Of Outdoor Rubber Flooring?
The four main types are rubber tiles, mats, pavers, and rolls. Each is designed for different applications. Tiles are for general patio use, mats for specific high-wear or wet areas, pavers for walkways, and rolls for large, seamless commercial spaces. The table below compares them directly.
| Feature | Rubber Tiles | Rubber Mats | Rubber Pavers | Rubber Rolls |
|---|---|---|---|---|
| Best Use Case | Patios, Playgrounds | Entrances, Wet Areas | Walkways, Patios | Large, Open Areas |
| Installation | DIY Friendly | Place & Use | Moderate DIY/Pro | Professional |
| Appearance | Grid Pattern | Utilitarian | Stone/Brick Look | Seamless |
| Cost | Medium | Low-Medium | Medium-High | Medium |
Outdoor Rubber Tiles
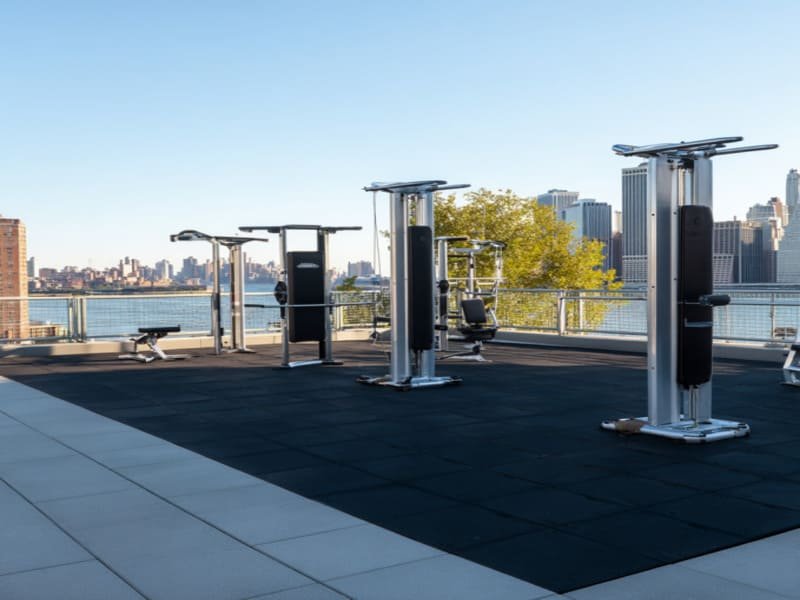
These are the most common and versatile option for outdoor spaces. They are typically square and feature an interlocking system, like puzzle pieces. This design makes installation straightforward, even for DIY projects, because it does not require adhesive. From a technical standpoint, the interlocking system allows the floor to expand and contract with temperature changes without buckling. The seams between the tiles also create natural drainage channels. This is ideal for patios, decks, and rooftops. The main drawback is that the seams are visible, and if the sub-base is not perfectly level, the tiles can shift over time, creating an uneven surface.
Outdoor Rubber Mats & Matting
Rubber mats are engineered for specific, targeted applications rather than covering an entire surface. For example, a perforated mat is perfect for a pool deck or entrance because the holes allow water to drain instantly, maximizing slip resistance. Solid, heavy-duty mats are used under swings or at the bottom of a slide to prevent erosion and provide impact absorption. These products are highly functional and durable for their intended purpose. Their limitation is that they are not designed for creating a large, unified surface. They solve specific problems in smaller zones.
Outdoor Rubber Pavers
Rubber pavers are a specialized type of tile. They are manufactured to be much thicker and more rigid, often mimicking the look of traditional brick or stone. This makes them a great choice for walkways, driveways, and patios where you want a more classic aesthetic combined with the comfort and safety of rubber. They are extremely durable and slip-resistant. But they are very heavy, which makes installation more labor-intensive. Their rigidity means the sub-base preparation must be excellent to prevent them from rocking or shifting.
Outdoor Rubber Flooring Rolls
Rubber rolls offer a seamless, uniform look, which is why they are common in large commercial gyms. For outdoor use, they are best suited for large, open areas like a commercial patio or event space. The primary advantage is the minimal number of seams, which creates a very clean appearance. But this is not a DIY product. The rolls are extremely heavy and difficult to manage, so professional installation is required. Drainage can also be a challenge. Unlike tiles with built-in drainage paths at the seams, a rubber roll relies entirely on its porosity and a perfectly graded sub-base to prevent water from pooling.
Understanding the physical properties and how they perform in real-world conditions is critical. You must consider how the material will react to sun, rain, and temperature changes over many years. This is where material science and quality control make a huge difference in product performance.
How Does Rubber Flooring Handle Outdoor Weather And Safety?
High-quality outdoor rubber flooring handles weather very well. It contains UV inhibitors to resist sun damage and fading. Its flexibility prevents cracking in freezing temperatures. It is also naturally slip-resistant, even when wet. For playgrounds, the tile thickness directly determines its fall safety rating.
As a technical director, I focus on long-term performance. A product is only good if it can withstand its environment. Outdoor rubber flooring faces constant challenges from UV radiation, water, and temperature swings.
How It Handles Weather
- Sun (UV Resistance): The sun’s UV rays will degrade rubber over time, causing it to become brittle, crack, and fade. We prevent this by adding UV inhibitors to the raw material mix during manufacturing. For superior colorfastness, EPDM (Ethylene Propylene Diene Monomer) rubber is the best choice. Unlike standard SBR (Styrene-Butadiene Rubber) which is black, EPDM is a synthetic rubber that is colored all the way through and offers the highest resistance to fading.
- Heat: Dark-colored rubber will absorb heat from the sun and get hot, just like asphalt. This is a simple matter of physics. If your surface is in direct, intense sunlight, I always recommend choosing lighter colors like grey, tan, or green. These colors can significantly reduce the surface temperature, making it more comfortable to walk on.
- Rain and Cold: Rubber flooring’s performance in rain and cold is a major advantage over concrete or wood. Most tiles and pavers are porous and have drainage channels at the seams, allowing water to pass through. This, combined with a properly sloped sub-base, prevents puddles. In winter, rubber’s natural flexibility allows it to expand and contract without cracking, which is a common failure point for rigid materials like concrete in freeze-thaw cycles.
The Safety Factor
Safety is often the primary reason people choose rubber flooring. It has a naturally high coefficient of friction. This means it provides excellent grip and is very slip-resistant, even when wet. For any area where children will be playing, you must also consider fall protection. This is measured by the Critical Fall Height (CFH), which is determined by the thickness of the rubber. A thicker tile provides more shock absorption. Always look for products tested to ASTM F1292, the industry standard for playground surfacing safety. This certification ensures the product meets specific performance requirements for protecting against head injuries.

A project’s success depends on a realistic budget. The price of the tiles or rolls is only one part of the total cost. The preparation work underneath is just as important and can be a significant expense if you are not starting with a suitable surface.
What Is The Real Cost Of Outdoor Rubber Flooring?
The material cost for outdoor rubber flooring typically ranges from $8 to $20 per square foot. The biggest additional cost is sub-base preparation. If you are installing over dirt or grass, expect to add $5 to $15 per square foot for excavation and a proper gravel base.
I always tell clients to budget for the entire system, not just the rubber they see on top. The foundation is critical, and it is the most common source of unexpected costs. Let’s break down the expenses.
Material and Hidden Costs
The price per square foot for the rubber itself varies by type and quality. Rubber rolls can sometimes be cheaper in material cost, but the required professional installation often makes the total price similar to high-quality tiles. Rubber pavers are usually at the higher end due to their thickness and density. The number one hidden cost that people fail to budget for is sub-base preparation.
- Installing Over Concrete or Wood: If you have an existing patio or deck that is level and in good condition, your prep cost is minimal. You just need to clean the surface thoroughly before you begin.
- Installing Over Dirt or Grass: This is a major construction project. You cannot simply lay rubber tiles on the ground. The earth will shift and your floor will become uneven and unsafe. Proper preparation involves excavating several inches of soil, laying down a geotextile landscape fabric to block weeds, and then installing and compacting a 4-6 inch layer of crushed gravel. This work is what provides a stable, well-draining foundation. It is absolutely essential for a long-lasting installation.

Proper installation is what ensures you get the full value and lifespan out of your investment. A high-quality product installed on a poor base will fail. Maintenance, on the other hand, is refreshingly simple once the flooring is correctly in place.
How Do You Install And Maintain Outdoor Rubber Flooring?
Installation depends on the product. Interlocking tiles are DIY-friendly on a prepared hard surface. But heavy rubber rolls or any project requiring ground excavation should be handled by a professional. Maintenance is very easy: simply use a broom, leaf blower, or garden hose to clean the surface.
The difficulty of installation varies widely. It is important to be realistic about your skills and the requirements of the job.
Installation: DIY vs. Professional
- DIY-Friendly: Interlocking rubber tiles and placing rubber mats are well within the capabilities of most homeowners. The key is to have a proper base to work from. If you are laying tiles on an existing, level concrete patio, the job is straightforward. You start in a corner and connect the tiles, cutting them to fit the edges with a utility knife.
- Professional Help Required: I strongly recommend hiring a professional for two scenarios. First, for installing heavy rubber rolls. Their weight and size make them impossible for one person to handle safely and correctly. Second, for any project that involves preparing a sub-base from scratch over dirt or grass. The excavation, leveling, and compacting of the gravel base require specialized equipment and expertise to get right.
Long-Term Maintenance
This is one of the best features of outdoor rubber flooring. The maintenance is minimal. Debris like leaves and dirt can be easily removed with a broom or a leaf blower. For a deeper clean, you can simply hose the surface down with water. For tougher stains, a bit of mild soap and a soft brush will do the job. The most common problem I see is weeds growing through the seams. This is not a failure of the rubber; it is a failure of the base. Using a quality landscape fabric during the base preparation step will prevent this from ever happening.
Conclusion
Choose the right rubber flooring by matching the product to your use. Tiles for patios, pavers for walkways. Your total budget must include the critical cost of base preparation.
Ready to upgrade your outdoor space? Contact our team for a free quote or to request product samples. We’ll help you find the perfect, heavy-duty outdoor rubber flooring solution for your needs.