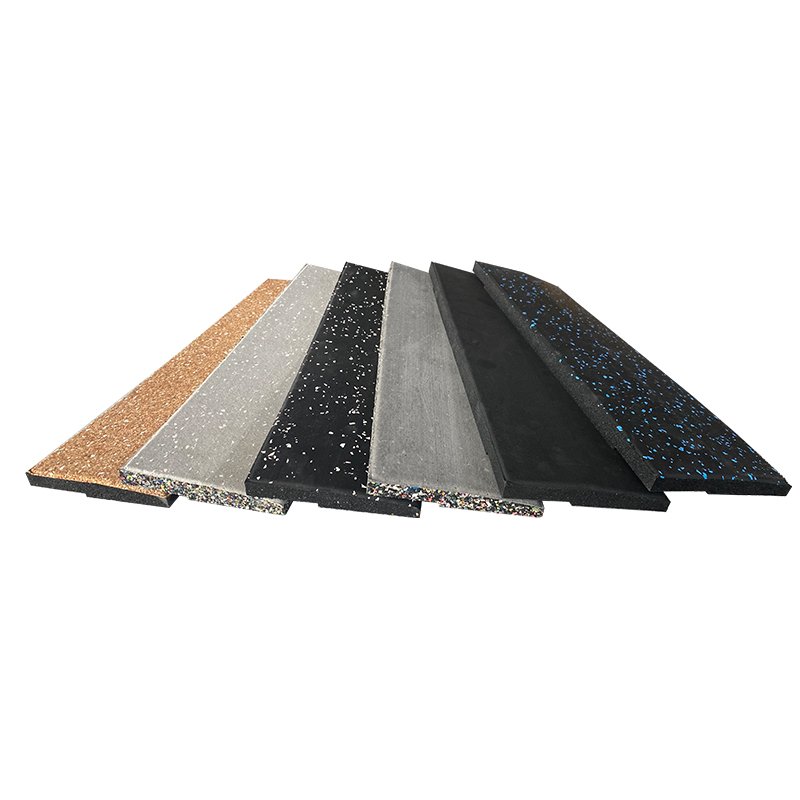
Navigating through spaces should be a seamless experience, don’t you agree? Imagine walking or pushing a cart across a room, and instead of bumps and jolts, you feel a smooth transition from one-floor surface to another. That’s where rubber flooring edge ramps and reducers come into play! These unsung flooring heroes do more than meet the eye, ensuring that every step you take is safe and comfortable.
Rubber flooring edge ramps are not just about connecting different flooring types or levels; they are about enhancing accessibility and safety in various spaces, from gyms to garages and even outdoor walkways.
This guide will dive deep into rubber flooring edge ramps, exploring their benefits, installation, and much more. We’ll uncover how these essential accessories adapt to different flooring thicknesses, ensuring a smooth, trip-free transition between surfaces. So, let’s embark on this journey to discover the transformative impact of rubber flooring edge ramps in creating versatile and user-friendly spaces!

How Do Rubber Flooring Reducer Edges Match Different Thicknesses of Rubber Gym Tiles?
Rubber flooring reducer edges are like the diplomats of the flooring world. They smoothly negotiate the transition between different flooring surfaces, ensuring peace and harmony in the levels of your floor, especially in a versatile space like a gym. But how exactly do they manage to do this, mainly when dealing with various thicknesses of rubber gym tiles? Let’s dive into the details.
Firstly, the rubber flooring reducer edges are crucial in creating smooth transitions. Imagine a gym where various activities occur, each requiring a different type of flooring. Some areas might have thick, cushioned rubber tiles for high-impact exercises, while others might have thinner surfaces for lighter activities. The reducer edges act as a bridge, ensuring no abrupt edges or tripping hazards, allowing equipment, athletes, and fitness enthusiasts to move across areas safely and effortlessly.
So, how do these reducer edges adapt to different thicknesses of rubber gym tiles? It’s all about design and flexibility. Reducer edges are crafted with various grooves and levels that allow them to accommodate and snugly fit the sides of different thicknesses of tiles. They essentially “reduce” the edge, making a gradual slope from the thicker to the thinner surface, ensuring that the transition is not abrupt but relatively smooth and subtle.
Several considerations come into play when selecting and installing the appropriate reducer edges. You’ll want to consider the thickness of the tiles you are working with and choose a reducer that corresponds to those measurements. Installation is typically straightforward, but ensuring the reducer is securely attached and flush with the flooring surfaces is critical to its effectiveness.
In conclusion, rubber flooring reducer edges are essential in managing transitions between different flooring surfaces in a gym, adapting to various thicknesses, and ensuring a safe and smooth passage for all. Their thoughtful design and installation make them effective ambassadors of floor harmony and accessibility.
What Are Rubber Flooring Reducers and Ramp Mats?
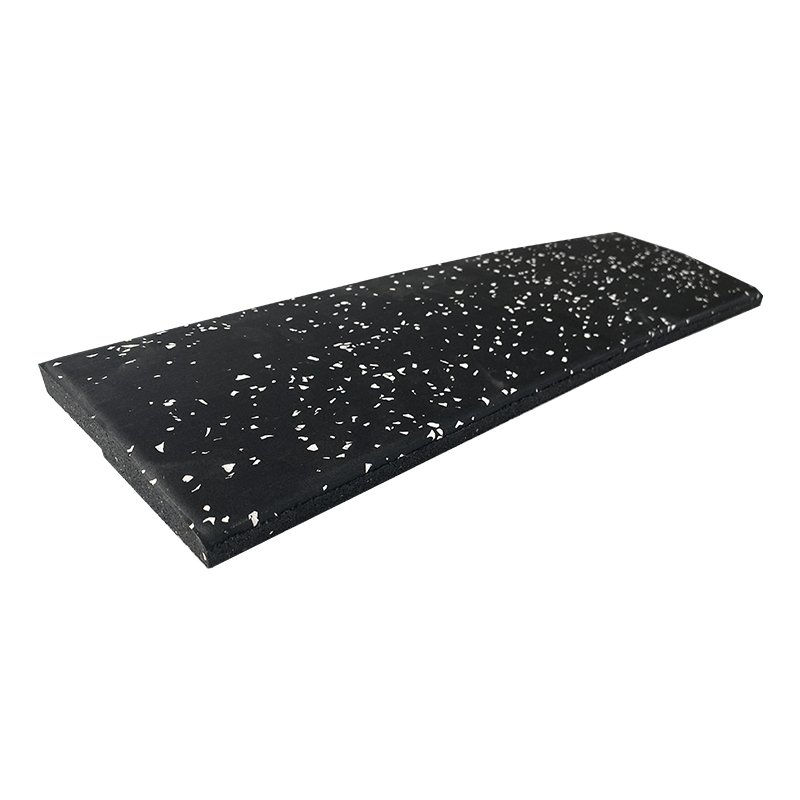
Let’s chat about handy elements in our spaces that we might not always notice but definitely can’t do without—rubber flooring reducers and ramp mats. These pieces are crucial to creating a fluid transition between spaces with different flooring heights and providing a grippy surface where needed.
Rubber flooring reducers, also known as edge ramps, are the perfect solution when you’ve got a thick rubber flooring item on one side and a lower surface on the other. They’re like the peacekeepers of the floor, ensuring everything meets up nicely without any awkward edges. Plus, they come in custom lengths, so you can get that just-right fit for your space, whether it’s a fitness center or your home garage.
Now, onto ramp mats. The textured, often corrugated ramp cleats give you that superior anti-slip surface. They’re typically made from ramp cleat rubber rolls and are essential for areas where ultimate traction is a must—think outdoor rubber surfaces or the moist surfaces of cellar flooring. They’re also a dream for wheelchair accessibility, with their beveled edge ramps making it easy to roll on and off without a hitch.
You’ll often see these mats secured with double-sided tape or double-sided sealing tape, ensuring they stay put. And if you need to fit them into an unusual space? No worries. A sharp utility knife can trim them down to size, and they’re flexible enough to handle a ramp flip or conform to an S-shaped floor.
These rubber ramps are for more than heavy-duty areas like loading docks or factory ramps. They’re also perfect for more delicate locations, like under patio mats or as a van floor liner. And for those with four-legged friends, they make excellent dog mats, thanks to their profound studded barriers that remove excess soil from paws or shoes.
Whether outfitting a trailer with rubber flooring or laying down runner mats for a horse trailer, these reducers and mats are all about customization and versatility. They can be cut into half-foot increments or shaped to fit any design, making them a go-to for temporary indoor setups and permanent outdoor installations.
In short, rubber flooring reducers and ramp mats are the detail that makes a big difference. They bridge the gap between two flooring surfaces, offer custom lengths before installation, and provide a safer walking surface for everyone. So, whether rolling wheels over them or just walking, you can trust these rubber essentials to keep the path smooth and secure.
How to Install Rubber Edge Reducer?
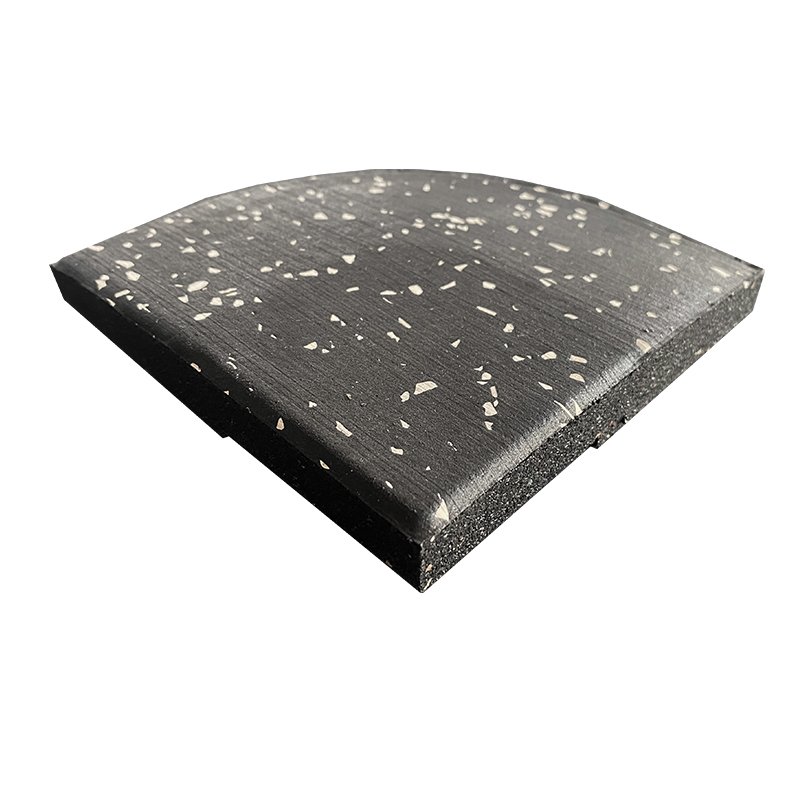
I got a new rubber edge reducer and would like to know how to install it. No worries, I’ve got you covered with a step-by-step guide to keep your space sharp and safe in no time.
Here’s how you can lay down that ramp edging like a pro:
Step 1: Measure and Prep the Area
First, measure the area where you’ll place the rubber edge reducer. You want to make sure you’ve got the length just right. If you need to trim it to fit, mark the spot with a sharp utility knife and a straight edge. Then, please give it a clean cut to get the custom length you need.
Step 2: Clean the Surface
Before laying anything down, ensure the surface is clean and dry. Any dirt or moisture can mess with the adhesive; we don’t want that. A quick sweep and a wipe-down should do the trick.
Step 3: Apply the Adhesive
If you’re using a polyurethane-based adhesive or double-sided sealing tape, apply it carefully along the edge where you’ll place the reducer. This stuff is vital to keep your reducer firmly in place.
Step 4: Position the Reducer
Now, take your rubber edge reducer and line it up with the edge of your flooring. Once you’re happy with the placement, press it down firmly along the length of the adhesive. If you’re using double-sided tape, remove the backing first.
Step 5: Secure the Reducer
After pressing down, please give it security by walking along the edge or rolling a heavy object over it. This helps the adhesive bond to the floor and the reducer, ensuring a snug fit.
Step 6: Seal the Edges
For an extra measure of security and to ensure ultimate traction, you should seal the edges of the reducer. Some folks use additional adhesive or a sealant to make sure no edges are peeling up.
Step 7: Let It Set
Give your new installation some time to set up. Avoid walking on or testing it until the adhesive has had time to cure. Depending on the product you’re using, this could take anywhere from a few hours to a full day.
Tips for a Successful Installation:
– Always double-check your measurements before cutting. It’s the old saying: measure twice, miss once.
– Use a high-quality adhesive compatible with the flooring material and the rubber reducer.
– If installing the reducer in an area with heavy traffic or load-bearing requirements, consider using mechanical fasteners and adhesive for added strength.
– After installation, maintain the area according to the manufacturer’s instructions to ensure the longevity of your rubber edge reducer.
And there you have it! With these steps, you’ll have those rubber edge reducers installed like a seasoned pro did them. Remember, take your time, be precise, and your floors will thank you.
What Are the Different Types of Ramp Flooring?
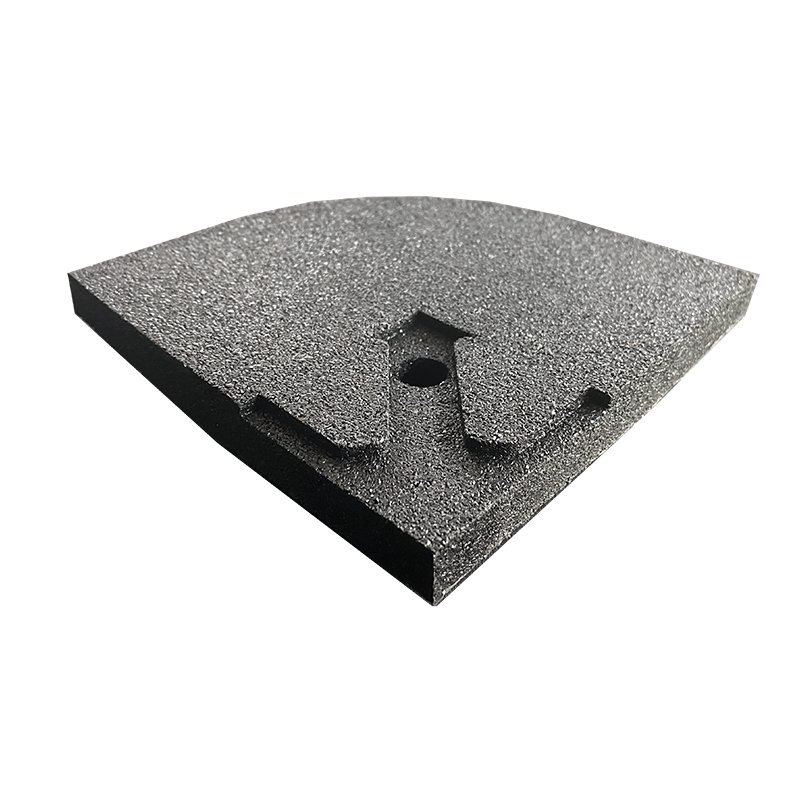
When it comes to ramp flooring, there’s a whole world of options, each with its own features and benefits. Whether rolling out a welcome mat for wheelchairs or laying down a path for heavy-duty equipment, the correct type of ramp flooring can make all the difference.
Let’s explore some of the most popular types available:
Rubber Flooring Edge Ramps:
First up, we’ve got the trusty rubber flooring edge ramps. This type is all about grip and durability. The surface is usually textured with corrugated ramp cleats—raised lines that give shoes and wheels something to cling to. It’s a fantastic choice for areas with a lot of foot or wheel traffic and needing extra traction to prevent slips and falls.
Corrugated Ramp Cleat Rubber Runners:
These are similar to the rubber ramp cleat flooring but come in a runner mat format. They’re easy to roll out and perfect for temporary or seasonal use. You can lay them down when needed and roll them up when you don’t. Plus, they’re a cinch to clean—hose them down, and you’re good to go.
Beveled Edge Ramps:
Beveled edge ramps are all about creating a smooth transition. They’re designed to reduce tripping hazards and are especially useful for wheelchairs or carts that quickly move from one surface height to another. These ramps often come with an anti-slip surface and can be made from various materials, including rubber and metal.
Aluminum Ramp Flooring:
For a more industrial or heavy-duty setting, aluminum ramp flooring is the way to go. It’s sturdy, can handle much weight, and features a diamond plate pattern with excellent traction. Plus, it’s resistant to rust and corrosion, making it a great outdoor option.
Composite Ramp Flooring:
Composite materials are becoming increasingly popular for ramp flooring due to their durability and lightweight nature. They can mimic the look and texture of wood or metal but are often more affordable and require less maintenance. Composite ramps can also come in various colors to match your aesthetic needs.
Interlocking Ramp Flooring:
Interlocking ramp flooring tiles are a versatile and user-friendly option. They snap together like puzzle pieces, making installation a breeze. This type is excellent for those wanting to move or adjust their ramp setup periodically. The interlocking design also allows for easy replacement of individual tiles if necessary.
Each type of ramp flooring has its unique set of benefits, so when choosing the right one for your needs, consider factors like the environment (indoor vs. outdoor), load requirements, and whether you’re looking for a permanent or temporary solution. With the right ramp flooring in place, you can ensure safety, accessibility, and a smooth path forward for everyone.
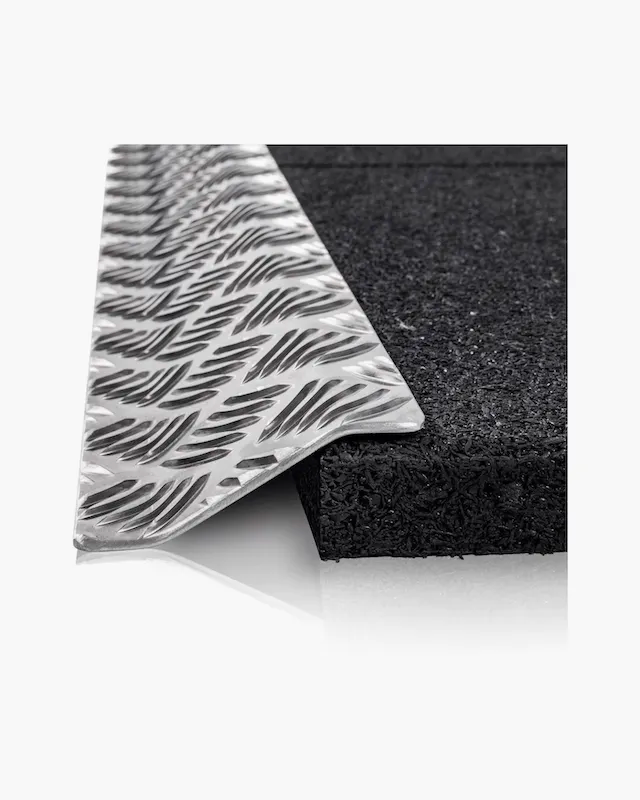
Can You Cut Rubber Flooring Edge Ramps? How?
Certainly, shaping rubber flooring edge ramps to fit your garden’s unique contours is doable and straightforward with the right approach. Here’s a guide to help you trim rubber edging precisely, incorporating various rubber flooring solutions.
Selecting the Appropriate Tools:
To start, you’ll need the proper cutting implements. A sharp utility knife is ideal for slicing through the rubber mat’s edges, especially if you’re working with ramp cleat rubber flooring or the mega profile edging of deck floor mats. For those thicker, more stubborn pieces, like the dense material of horse trailer matting or the robust thickness of fitness center flooring, a saw specifically designed for rubber may be necessary. The key is a sharp edge to ensure clean, smooth cuts.
Measuring for Accuracy:
Accuracy is paramount. Take the time to measure where your rubber edging will go, and mark your rubber material accordingly. A straight edge or chalk line can help keep your cuts accurate, ensuring that your rubber floor or mat effectively secures the adjacent flooring.
Executing the Cut:
Lay your rubber edging flat on a solid surface. If it’s prone to shifting, anchor it near your cut line to stabilize it. With a firm hand, guide your utility knife or scissors along the marked line for a neat division. When using a saw, maintain a steady pace and pressure to avoid jagged edges.
Safety First:
Always prioritize safety. Wear gloves to safeguard your hands from the material and the blade, and consider eye protection to shield against debris, mainly if you’re using a power saw.
Refining the Edges:
After cutting, you may notice some roughness along the cut edge. Some sandpaper can smooth this out, or make minor trims for a cleaner look. This is also the moment to apply any carpet tape or adhesives if you secure the edging for a more permanent installation.

Expert Advice:
– Keep the blade clean for the sharpest cut, primarily if you work with materials like the ramp cleat runner or anti-slip mats.
– For complex shapes or curves, consider making a series of minor, strategic cuts to achieve the desired shape without compromising the integrity of the material.
– A cutting mat can be a valuable investment for extensive cutting jobs, protecting your surfaces and ensuring a more precise cut.
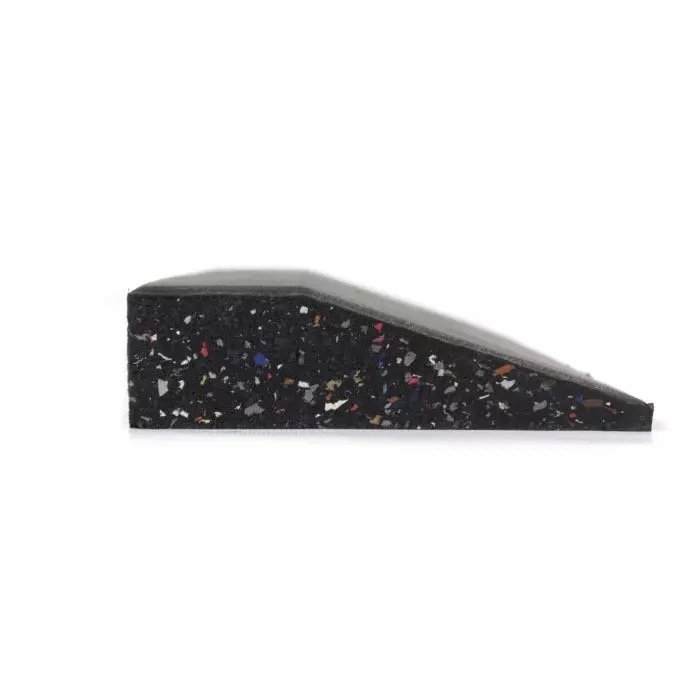
With these steps, cutting rubber flooring edge ramps, whether for an outdoor rubber surface, garage floor mats, or low-profile edge ramps, becomes a manageable task. Tailor your garden’s edging to perfection, and enjoy the seamless integration of your rubber flooring ramps and mats into the landscape.


