


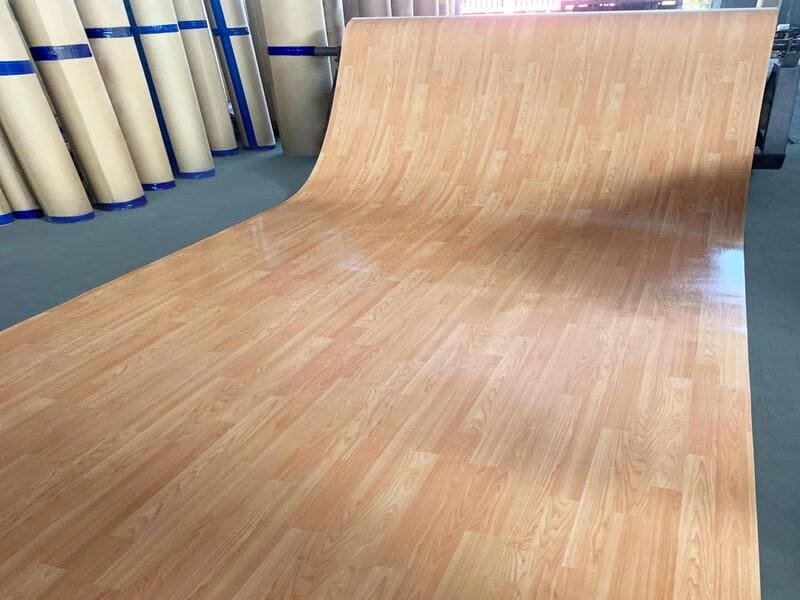
Aby naprawić winylową podłogę w rolkach, należy przykleić pasujący kawałek materiału na uszkodzonym obszarze, przeciąć obie warstwy metodą podwójnego cięcia, przykleić lub przymocować taśmą nową łatkę w zależności od sposobu montażu podłogi, a następnie uszczelnić połączenia. Prawidłowo wykonana naprawa może być znacznie mniej widoczna niż pierwotne uszkodzenie.
Rozdarcie, przypalenie lub wyżłobienie w podłodze winylowej może sprawić, że nawet ładne pomieszczenie będzie wyglądało na zaniedbane. Od lat zajmuję się produkcją podłóg winylowych w rolkach i obserwuję, jak materiał ten zachowuje się po opuszczeniu fabryki i trafieniu do prawdziwego domu lub obiektu. Dobrą wiadomością jest to, że rzadko trzeba wymieniać całą podłogę. Dzięki odpowiedniemu cięciu, materiałom dostosowanym do konkretnego rodzaju montażu oraz odrobinie cierpliwości łata może dobrze wtopić się w podłogę. W tym poradniku przeprowadzę Cię krok po kroku przez proces oceny uszkodzenia, doboru odpowiedniego materiału, wycinania i montażu łaty, uszczelniania połączeń oraz omówię kilka kwestii dotyczących bezpieczeństwa, o których warto wiedzieć przed rozpoczęciem pracy.
Before you pick up a knife, it helps to know what you are working with. Vinyl sheet flooring covers a wide range of constructions and installation methods, and the right repair approach depends on all of it. Let’s walk through each step.
Czy można samodzielnie naprawić podłogę winylową?
Większość pojedynczych rozdarć, oparzeń, przebić i wyżłobień można naprawić w domu, o ile otaczająca je podłoga i podłoże są nadal w dobrym stanie. Rozległe uszkodzenia, utrzymująca się wilgoć lub słaba przyczepność kleju pod podłogą zazwyczaj wymagają profesjonalnej oceny lub wymiany.
Nie ma ustalonej wartości, która odróżniałaby naprawę typu „można załatać” od sytuacji, w której trzeba coś „wymienić”, i podchodziłbym ostrożnie do każdego poradnika, który podaje jako zasadę konkretną liczbę cali. W rzeczywistości liczy się to, czy uszkodzenie ma charakter punktowy, czy podłoże pod podłogą jest suche i stabilne oraz czy podłoga wokół uszkodzonego miejsca jest nadal mocno przytwierdzona. Pojedyncze rozdarcie, przypalenie lub wyżłobienie w podłodze, która poza tym jest w dobrym stanie, zazwyczaj nadaje się do naprawy metodą łatania. Rozległe zawijanie się, pękanie lub powtarzające się uszkodzenia w wielu miejscach wskazują na poważniejszy problem, taki jak utrata przyczepności kleju lub wilgoć, którego nie da się naprawić samym łataniem.
| Typ uszkodzenia | Zalecenie |
|---|---|
| Pojedyncze rozdarcie, oparzenie lub przebicie | Poprawka |
| Pojedyncza rysa, podłoga w dobrym stanie | Poprawka |
| Liczne miejsca, w których materiał jest zużyty, zwinięty lub uniesiony | Należy ustalić przyczynę; może być konieczna wymiana |
| Powszechne problemy z wilgocią lub uszkodzenia kleju | Należy sprawdzić podłoże; może być konieczna jego częściowa lub całkowita wymiana |
Wskazówka dotycząca bezpieczeństwa przed rozpoczęciem cięcia: Jeśli Twoja podłoga lub klej pod nią są stare, mogą zawierać azbest. Starsze podkłady pod wykładziny winylowe oraz starsze kleje podłogowe były czasami produkowane z materiałów zawierających azbest, a cięcie, szlifowanie lub skrobanie może spowodować uwolnienie włókien. Jeśli nie masz pewności co do wieku lub składu swojej podłogi, zleć jej ocenę przed przystąpieniem do samodzielnego cięcia lub skrobania.
Gdy już wiesz, że dana naszywka jest odpowiednia i bezpieczna, kolejnym krokiem jest znalezienie materiału, który faktycznie do niej pasuje.
Gdzie można znaleźć pasujący winyl na naszywkę?
Najpierw sprawdź, czy pozostały jakieś resztki materiału z pierwotnego montażu. Jeśli takich nie ma, postaraj się znaleźć resztkę, która jak najbardziej odpowiada wzorowi, kolorowi i partii produkcyjnej.
Start by checking whether any material was left over from the original installation. Installers or property owners often keep offcuts specifically for future repairs like this, tucked away in a closet, garage, or under an appliance. If you cannot find any, your next best option is a remnant that matches as closely as possible. This is where understanding manufacturing helps: vinyl sheet flooring is produced in batches, and slight color or pattern shifts can occur between production lots, even within the same product line. When sourcing a remnant, try to get material from the same production lot or original installation if you can, since this minimizes shade and pattern differences. Also check the pattern’s directional orientation carefully under good lighting before you cut anything — running a directional print or wood-grain pattern the wrong way is one of the most common and most avoidable mistakes.
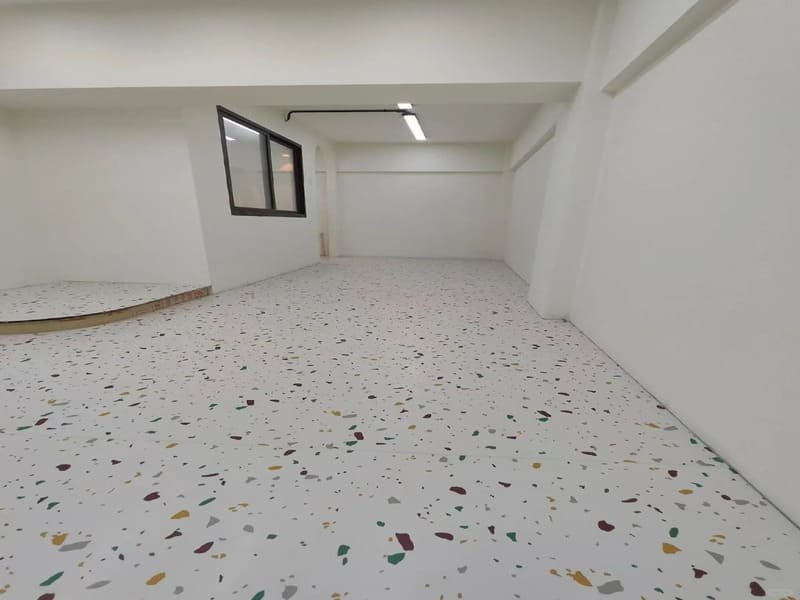
Mając już przygotowany materiał, przed zebraniem narzędzi warto sprawdzić, w jaki sposób ułożono podłogę.
Jakie narzędzia i materiały są potrzebne do naprawy podłogi winylowej?
You need a sharp utility knife, a metal straight edge, painter’s tape, a seam treatment appropriate to your product, a hand or seam roller, and a replacement piece of vinyl slightly larger than the damaged area. The adhesive or bonding method depends on how your floor was originally installed.
Good results in vinyl repair come down to sharp tools and matching your materials to your specific product, not expensive equipment. A dull blade is the top reason patches turn out ragged, since it drags and tears the vinyl instead of slicing cleanly — use a brand-new blade. Before you buy adhesive, identify your installation type: fully adhered sheet vinyl, perimeter-bonded floors, loose-lay floors, and tape-secured floors can call for different patching materials and methods. A fully adhered floor typically needs a compatible vinyl flooring adhesive under the patch. A loose-lay or tape-secured floor may instead need a recommended seam tape beneath the patch rather than a fresh layer of adhesive. When in doubt, check your flooring manufacturer’s repair documentation or contact them directly.
| Narzędzie/Materiał | Cel |
|---|---|
| Nóż uniwersalny (nowe ostrze) | Czyste, proste cięcia |
| Metalowa linijka | Prowadzi ostrze |
| Painter’s tape | Utrzymuje łatkę w miejscu podczas cięcia |
| Środek do uszczelniania szwów, spoiwo chemiczne lub pręt do zgrzewania termicznego (zgodnie z zaleceniami producenta) | Uszczelnia i wykańcza przycięte krawędzie |
| Taśma klejąca lub taśma uszczelniająca (dopasowana do rodzaju montażu) | Poprawka dotycząca obligacji lub zabezpieczeń |
| Rolka ręczna lub rolka do szwów | Nakłada łatkę, usuwa pęcherzyki powietrza |
| Wymiana winylu | Sama poprawka |
Gdy już wszystko zostało zidentyfikowane i przygotowane, możesz przystąpić do samej naprawy.
Jak wyciąć i zamontować łatkę do podłogi winylowej?
Tape the patch over the damage, cut through both layers at once with a straight edge, remove the debris, bond the new piece using the method appropriate to your installation type, then roll it and let it set per the adhesive manufacturer’s instructions.
This is the double-cut method, and it is the core technique behind most sheet vinyl patch repairs. Lay your spare vinyl patch over the damaged area and line up the pattern with the surrounding floor as closely as you can, then tape it down firmly with painter’s tape so it cannot shift. Using your metal straight edge and sharp blade, cut a clean square or rectangle straight through both the patch and the damaged flooring underneath in a single motion. A geometric shape is far easier to fit cleanly than tracing around a jagged tear, and cutting both layers together ensures the patch and the opening are the same size. Remove the tape, lift out the damaged section and the cutout, then clean the subfloor of old adhesive or debris so it is dry and flat. From here, follow the bonding method matched to your installation type: apply a thin, even layer of compatible vinyl adhesive for a fully adhered floor, or place the recommended seam tape for a loose-lay or tape-secured floor. Drop the new patch into place, press the edges flush, and remove excess adhesive according to that adhesive’s instructions — don’t assume every product wipes away the same way, and never assume seam sealer can be handled like adhesive. Roll the patch firmly with a hand or seam roller to set it and remove air. If your adhesive manufacturer recommends weighting the area, keep it weighted for the period they specify rather than a fixed 24 hours across the board.
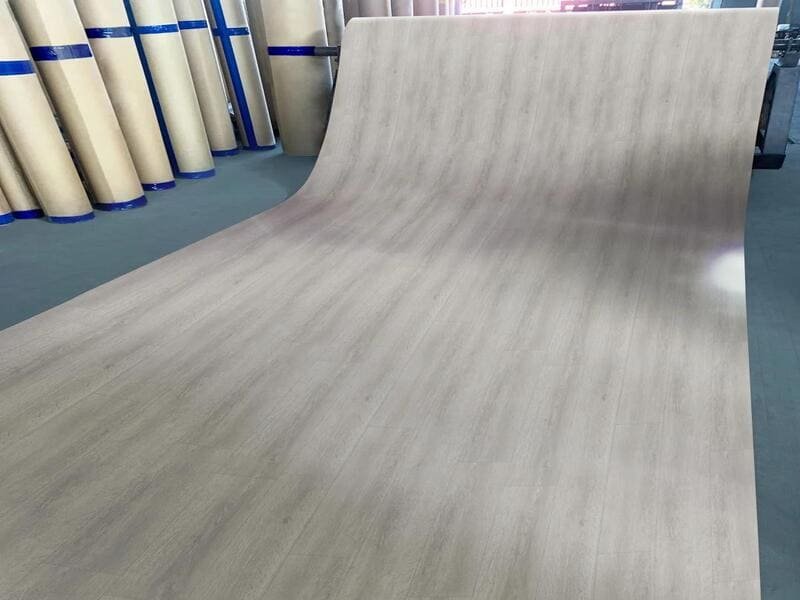
Przyklejenie łaty to większość pracy, ale szwy nadal wymagają uwagi.
Dlaczego po załataniu należy zabezpieczyć szwy?
Uszczelnienie krawędzi cięcia za pomocą środka do uszczelniania szwów, spawania chemicznego lub termicznego, odpowiedniego dla danego produktu, pomaga zapobiegać przedostawaniu się wilgoci i zanieczyszczeń do szwu oraz zapewnia trwalszą naprawę.
Vinyl itself is highly water-resistant, but an open, untreated seam can still give moisture and contaminants a path down to the adhesive or subfloor. Proper seam treatment closes that gap and helps protect the repair, though it is worth being clear-eyed that seam treatment on a patch is not the same as saying the entire floor assembly becomes a sealed waterproof system. For residential fully adhered sheet vinyl, a cold chemical weld or seam sealer compatible with your product is usually appropriate along the cut edges. Let it cure fully, per the product’s instructions, before foot traffic returns.
Uwaga dotycząca podłóg komercyjnych: some homogeneous sheet vinyl, healthcare flooring, wet-area flooring, and cleanroom installations require heat-welded seams rather than a residential cold-weld seam sealer. Always follow your flooring manufacturer’s repair specification for the product in question, since chemical welds, cold welds, seam sealers, and heat-weld rod systems are not interchangeable.
| Stan szwu | Wynik |
|---|---|
| Nieobrobiona krawędź cięcia | Wilgoć i zanieczyszczenia mogą przedostać się do warstwy kleju i podłoża |
| Prawidłowo obrobiony szew (zgodnie z zaleceniami producenta) | Lepsza ochrona naprawy w miarę upływu czasu |
Nawet przy starannym wykonywaniu pracy zdarzają się sytuacje, w których konieczne jest dostosowanie techniki.
What If the Pattern Doesn’t Line Up or the Patch Curls?
W przypadku wzorów kierunkowych lub złożonych należy utrzymać resztkę podłogi w tej samej orientacji co ułożoną podłogę i przesuwać ją wzdłuż powtarzającego się wzoru, zamiast ją obracać. W przypadku zawijających się krawędzi należy wziąć pod uwagę pokrycie klejem, wilgotność oraz stan podłoża — a nie tylko ponowne przyklejenie.
Jednolite kolory są mniej wymagające, ale wzory imitujące słoje drewna lub wzory geometryczne wymagają większej staranności, ponieważ wszelkie niedopasowania są wyraźnie widoczne. Ułóż resztkę w tym samym kierunku co ułożoną podłogę i przesuń ją o kilka cali wzdłuż powtarzającego się wzoru, aż nadruk będzie jak najlepiej dopasowany — obracanie wzoru kierunkowego w celu „dopasowania” zazwyczaj powoduje bardziej widoczne niedopasowanie, a nie mniej. W przypadku śladów po przypaleniu w porównaniu z fizycznymi rozdarciami podstawowa technika jest podobna, ale przypalenia mogą sprawić, że winyl stanie się kruchy lub lekko skurczy się na krawędziach, dlatego należy wyciąć fragment nieco szerszy niż widoczne uszkodzenie, aby usunąć cały uszkodzony materiał. Jeśli po naprawie róg się zawija, jedną z możliwych przyczyn jest słabe przyleganie kleju, ale nie jest to jedyna przyczyna — wilgoć, zanieczyszczenie podłoża, nieodpowiedni klej, niewystarczająca warstwa kleju lub przemieszczanie się materiału mogą powodować ten sam objaw. Jeśli zawijanie się utrzymuje po ponownym przyklejeniu, warto sprawdzić stan podłoża, zamiast po prostu nakładać więcej kleju.
Kilka ostatnich poprawek może sprawić, że naprawa będzie mniej widoczna.
Jak sprawić, by łata na podłodze winylowej była mniej widoczna?
Należy stosować system wykańczania połączeń, który producent podłogi wyraźnie zatwierdził dla danego produktu, a wykonaną pracę sprawdzić w świetle padającym pod kątem — czyli padającym z niskiego kąta — aby wykryć miejsca, które nadal się wyróżniają.
The difference between an average patch and a well-blended one usually comes down to matching your materials to your specific product rather than using a generic fix. Don’t fill remaining hairline gaps with generic putty unless your flooring manufacturer specifically approves it for that purpose — use the seam sealer, chemical weld, or heat-weld system recommended for your product instead, since seam integrity matters more than cosmetic filling, especially on commercial floors. I also recommend inspecting your work with a flashlight held low and angled across the floor, since overhead room lighting hides flaws that raking light reveals immediately. Doing this check while the material is still workable gives you a chance to make small corrections before anything cures permanently.
Często zadawane pytania
Czy mogę użyć zwykłego kleju superglue do naprawy podłogi winylowej?
Nie. Superklej po wyschnięciu staje się twardy i kruchy i nie dopasowuje się do ruchów wykładziny winylowej, przez co ma tendencję do pękania i odklejania się. Należy użyć kleju do wykładzin winylowych lub środka do uszczelniania połączeń, który jest kompatybilny z daną wykładziną.
Jak długo trwa schnięcie kleju winylowego?
This varies by product. Many vinyl adhesives set within a few hours but need longer, sometimes 24 to 48 hours, before they’re ready for heavy foot traffic. Always check the specific adhesive manufacturer’s instructions rather than assuming a universal timeline.
Does my floor’s installation type matter for patching?
Tak. W przypadku winylu arkuszowego montowanego metodą pełnego przyklejenia, metodą luźnego układania oraz mocowanego taśmą mogą być wymagane różne materiały do napraw — w niektórych przypadkach konieczne jest zastosowanie kleju pod łatką, w innych natomiast zaleca się użycie specjalnej taśmy do łączenia. Ustalenie rodzaju montażu przed rozpoczęciem prac pozwala uniknąć zastosowania niewłaściwej metody łączenia.
What if I don’t have a leftover piece of vinyl?
Source a remnant that matches your flooring’s color, pattern, and ideally production lot as closely as possible. Bring a photo or a small sample cut from an inconspicuous area, like inside a closet, to help find the closest match.
Wnioski
Naprawa podłóg z arkuszy winylowych pozwala zaoszczędzić sporo pieniędzy i czasu, a dostosowanie techniki — w tym wyboru kleju i sposobu wykończenia połączeń — do konkretnego produktu sprawia, że naprawa jest trwała i dyskretna.
Moja rola
Zajmuję się zarządzaniem produkcją wykładzin winylowych w rolkach i posiadam praktyczne doświadczenie w całym procesie – od opracowywania receptur materiałów po gotowe rolki – obejmujące zarówno heterogeniczne wykładziny winylowe do zastosowań domowych, jak i homogeniczne konstrukcje z PVC przeznaczone do obiektów komercyjnych. Moje doświadczenie obejmuje produkcję wykładzin winylowych na zamówienie oraz na skalę przemysłową dla różnych branż, a także wsparcie inżynieryjne w zakresie optymalizacji projektów oraz doradztwo techniczne dotyczące właściwości materiałów i metod naprawczych. Koncentruję się na łączeniu wiedzy z zakresu produkcji z praktycznymi zastosowaniami, pomagając klientom w rozwiązywaniu wyzwań związanych z projektowaniem i doborem materiałów, zanim dotrą one do etapu montażu.
Have a flooring project, an unusual repair situation, or a question about matching material to your specific installation? Send me a message — I’m happy to help you think through the right approach, material match, or a custom vinyl sheet flooring solution for your needs.