Aby zapobiec uszkodzeniu gumowej wykładziny podłogowej, należy priorytetowo traktować przygotowanie podłoża, pozostawić 48-72 godziny na aklimatyzację materiału i używać ostrych, precyzyjnych narzędzi. Unikanie przeciągania ciężkich rolek i zapewnienie prawidłowego czasu wiązania kleju to niezbędne kroki w celu ochrony integralności strukturalnej i wykończenia powierzchni gumy.
Widziałem wiele projektów, które zakończyły się niepowodzeniem nie dlatego, że produkt był zły, ale dlatego, że instalacja została przeprowadzona w pośpiechu. Guma jest materiałem o wysokiej wydajności, ale jest wrażliwa fizycznie podczas fazy konfiguracji. Musisz zarządzać czynnikami środowiskowymi, takimi jak wilgotność i temperatura, przy jednoczesnym zachowaniu ścisłych protokołów obsługi. Jeśli nie uwzględni się naturalnego rozszerzania i kurczenia się gumy lub chemicznego zachowania klejów, istnieje ryzyko powstania trwałych zarysowań, szczelin lub pęcherzyków powietrza. Z mojego doświadczenia wynika, że 90% "wad produktu" zgłaszanych przez klientów jest w rzeczywistości wynikiem niewłaściwej obsługi na miejscu. Postępując zgodnie z systematycznym podejściem inżynieryjnym, można przekształcić zadanie wysokiego ryzyka w przewidywalny, wysokiej jakości wynik.
Ten przewodnik przeprowadzi Cię przez profesjonalne kroki, które zapewnią, że Twoja podłoga pozostanie idealna od momentu opuszczenia rolki.
Czy wysokie koszty "prostych" błędów są warte ryzyka?
Nie, proste błędy są kosztowne, ponieważ rujnują wizualne wykończenie i trwałość strukturalną podłogi. Instalację należy traktować jako proces techniczny, a nie tylko pracę fizyczną. Precyzja w ciągu pierwszych kilku godzin decyduje o tym, czy podłoga przetrwa dziesięć lat, czy ulegnie awarii w ciągu jednego.
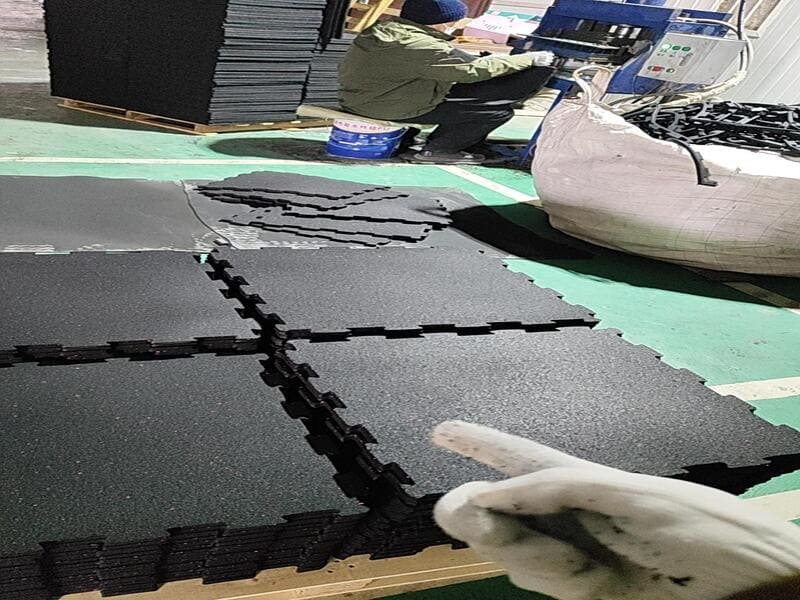
"Paradoks trwałości" to prawdziwa rzecz w moim świecie. Często powtarzam mojemu zespołowi, że podłoga zbudowana do podnoszenia ciężarów o wadze 200 kg może zostać zniszczona przez jeden tępy nóż. Kiedy ostrze jest tępe, ciągnie gumę zamiast ją ciąć, tworząc postrzępione krawędzie, których nie ukryje żadna ilość kleju. Wielu klientów dzwoni do nas w sprawie "wadliwych" krawędzi, ale kiedy docieram na miejsce, widzę ślady przeciągniętej rolki lub pośpiesznego cięcia. Naszym celem jest zawsze "jednoczęściowy" wygląd. Wymaga to czystego placu budowy i skoncentrowanego umysłu. Pamiętam projekt, w którym pracownik przeciągnął 100-kilogramową rolkę po pokrytej żwirem podłodze; oparzenia spowodowane tarciem były głębokie i trwałe. Musieliśmy wymienić całe trzy rolki. Zrozumienie, że guma jest wrażliwa, dopóki nie zostanie w pełni związana i utwardzona, jest pierwszym krokiem w kierunku doskonałego rezultatu.
| Powszechny błąd | Natychmiastowy wpływ | Konsekwencje długoterminowe |
|---|---|---|
| Przeciąganie rolek | Zarysowania/oparzenia powierzchni | Rozerwanie strukturalne |
| Tępe ostrza | Poszarpane szwy | Odstępy i ryzyko potknięcia |
| Ignorowanie ziarna | Przebicia/guzki | Awaria kleju |
Największa część zapobiegania ma miejsce jeszcze przed otwarciem kleju.
Dlaczego należy zarządzać "pamięcią" gumy podczas wstępnej instalacji?
Musisz zarządzać "pamięcią" gumy, ponieważ rolki pozostają ściśnięte w pojemnikach przez tygodnie i chcą powrócić do tego kształtu. Odczekanie 48-72 godzin od ułożenia na płasko uwalnia wewnętrzne naprężenia, co zapobiega pojawianiu się "szczelin skurczowych" po przyklejeniu podłogi.
Aklimatyzacja to czysta fizyka. Kiedy produkujemy gumową podłogę, jest ona zwijana pod naprężeniem, a następnie umieszczana w kontenerze transportowym. Jeśli przykleisz ją natychmiast, guma ostatecznie skurczy się, pozostawiając szczeliny między płytkami lub rolkami. Nazywam przygotowanie podłoża "operacją", ponieważ wymaga ono takiego poziomu szczegółowości. Zawsze sprawdzamy współczynnik emisji pary wodnej (MVER). Kontrolowanie wilgotności i zasadowości ma zasadnicze znaczenie dla Zapobieganie awariom instalacji gumowego podkładuponieważ nadmierna wilgoć może zniszczyć wiązanie kleju od spodu. Używam "testu papieru ściernego", aby sprawdzić podłoże; musi być wystarczająco porowate, aby klej mógł się wgryźć, ale wystarczająco gładkie, aby niedoskonałości nie "telegrafowały" na powierzchnię.
| Czynnik | Standardowe wymagania | Dlaczego ma to znaczenie |
|---|---|---|
| Wilgotność (MVER) | < 5 funtów / 1000 stóp kwadratowych | Zapobiega gniciu kleju |
| Poziom pH | 7 do 9 | Chroni wiązania chemiczne |
| Temperatura | 18°C do 25°C | Zapewnia prawidłowe utwardzanie |
Po rozluźnieniu materiału i przygotowaniu podłogi należy ostrożnie obchodzić się z produktem.
W jaki sposób protokół "Anti-Scuff" chroni Twoją inwestycję?
Protokół ten chroni podłogę poprzez zakaz przeciągania materiałów i egzekwowanie zasady "brudnych butów". Organizowanie rolek według numerów partii pozwala również uniknąć różnic w odcieniach. Kroki te zapewniają, że powierzchnia pozostaje nieskazitelna, a kolor wygląda jednolicie na całej siłowni.
Przez lata pracy na budowie widziałem piękne podłogi zniszczone przez pył budowlany. Jeśli żwir zostanie uwięziony pod gumą, działa jak papier ścierny za każdym razem, gdy ktoś po niej chodzi, ostatecznie zrywając wiązanie. Egzekwujemy ścisłą "strategię etapowania". Upewniam się, że mój zespół sprawdza numery partii, aby uniknąć "wariancji cieniowania". Nawet przy wysokiej jakości produkcji, różne serie produkcyjne mogą mieć niewielkie przesunięcia kolorów. Jeśli wymieszasz je losowo, podłoga będzie wyglądać jak szachownica. Układamy je w kolejności zapewniającej płynny przepływ wizualny. Podnoszenie zamiast ciągnięcia to ciężka praca, ale jest to jedyny sposób na uniknięcie oparzeń spowodowanych tarciem, których nie usunie żaden środek czyszczący.
Lista kontrolna zarządzania witryną
- Sprawdź wszystkie numery partii przed ułożeniem.
- Odkurzyć podłoże dwukrotnie przed rozwinięciem.
- Do wszystkich rolek należy używać wózków lub dwuosobowych podnośników.
Precyzyjna obsługa prowadzi bezpośrednio do najbardziej technicznej części pracy: cięcia.
Dlaczego cięcie precyzyjne to coś więcej niż tylko używanie noża?
Precyzyjne cięcie wymaga ostrych ostrzy i smarowania, aby zapobiec "zbijaniu się" gumy. Użycie roztworu wody z mydłem na ostrzu zmniejsza tarcie w przypadku mat o dużej gęstości. Zawsze tnij o 1/4 cala dłużej niż to konieczne, aby umożliwić naturalne kurczenie się, które ma miejsce, gdy guma osiada.
Istnieje duża różnica między "cięciem na zimno" a "cięciem przeciągającym". Cięcie na zimno jest czyste i pionowe. Cięcie z przeciąganiem ma miejsce, gdy zbyt mocno ciągniesz za tępe ostrze, rozciągając gumę podczas pracy. Po zakończeniu cięcia, guma zatrzaskuje się z powrotem i nagle element jest zbyt krótki. Zawsze uczę moich instalatorów, aby używali metalowej prostej krawędzi i wykonywali wiele lekkich przejść zamiast jednego ciężkiego. W przypadku naszych mat o dużej gęstości (ponad 1000 kg/m³) tarcie jest intensywne. Odrobina wody mydlanej na ostrzu sprawia, że ślizga się ono jak po maśle. Zapobiega to powstawaniu efektu "zębów piły", który rujnuje profesjonalne szwy.
| Gęstość materiału | Metoda cięcia | Częstotliwość ostrza |
|---|---|---|
| Niski (800 kg/m³) | Pojedynczy karnet | Co 50 stóp |
| Wysoki (1000+ kg/m³) | Multi-Pass + Lube | Co 20 stóp |
Czyste cięcie jest użyteczne tylko wtedy, gdy klej prawidłowo utrzymuje je na miejscu.
Jak uniknąć "lepkiego bałaganu" w inżynierii klejenia?
Unikniesz bałaganu, wybierając odpowiednie wiązanie chemiczne i przestrzegając "Flash Time". Prawidłowe użycie 1-składnikowego lub 2-składnikowego poliuretanu zapobiega zwijaniu się gumy. Musisz poczekać, aż uwięzione gazy wydostaną się podczas okna odgazowywania, aby uniknąć trwałych pęcherzyków na powierzchni.
Wybór niewłaściwego kleju to przepis na katastrofę. W przypadku większości naszych ciężkich instalacji zalecam dwuskładnikowy poliuretan, ponieważ tworzy on solidne wiązanie, które jest odporne na wilgoć. Jednak czas jest najważniejszy. Jeśli położysz gumę zbyt wcześnie, klej nadal będzie "odgazowywał". Gazy te zostają uwięzione i tworzą pęcherzyki, które wyglądają jak bąble na podłodze. Mówię moim pracownikom, że mają 10-minutowe okno. Jeśli klej rozleje się na powierzchni, należy go natychmiast wyczyścić. Gdy klej utwardzi się na ziarnach gumy, pozostaje tam na zawsze. Używamy specjalnych środków czyszczących zatwierdzonych przez producenta, aby upewnić się, że nie zmatowimy wykończenia podłogi podczas czyszczenia.
Po usunięciu kleju uwaga skupia się na szwach, w których podłoga żyje lub umiera.
Czy metoda "podwójnego cięcia" może sprawić, że łączenia będą niewidoczne?
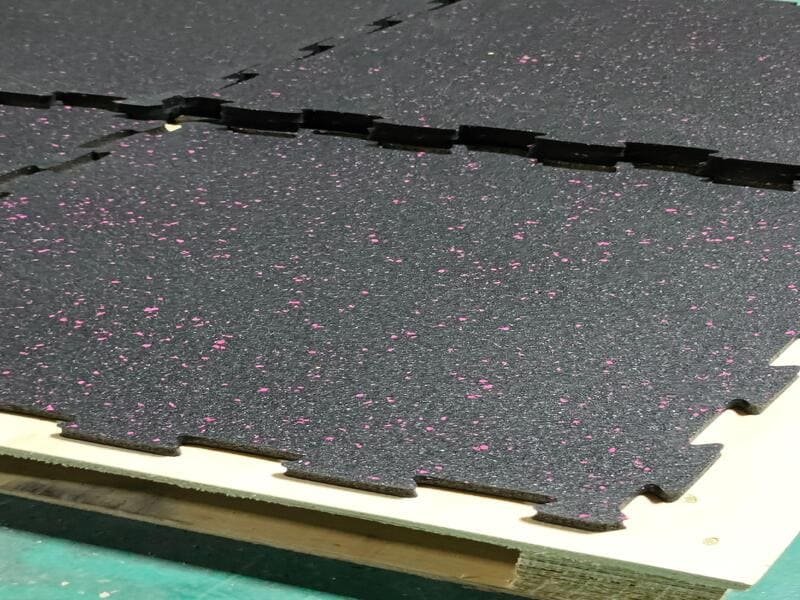
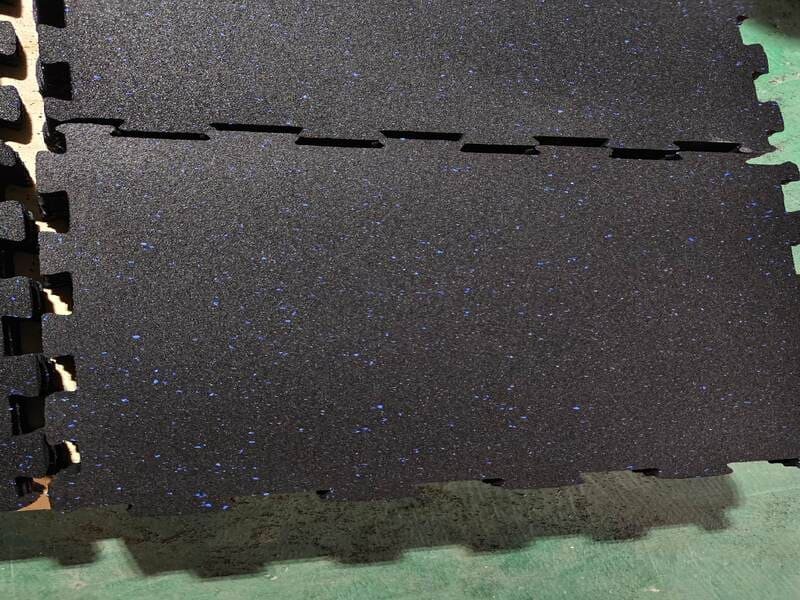
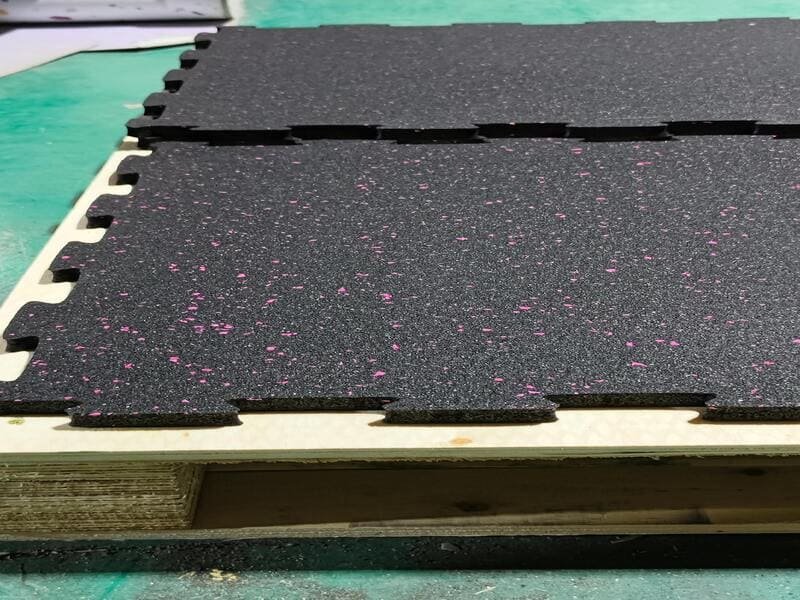
Tak, metoda "Double Cut" tworzy ciśnieniowy, hermetyczny szew poprzez nakładanie się krawędzi i przecinanie obu warstw jednocześnie. W połączeniu z ważącym 75 funtów wałkiem zapewnia to transfer kleju 100% i zapobiega zwijaniu się krawędzi lub powstawaniu szczelin w miarę upływu czasu.
Integralność szwów to znak rozpoznawczy mistrza montażu. Zawsze nalegam na "podwójne cięcie" rolek. Przecinając dwie nakładające się warstwy, obie krawędzie idealnie do siebie pasują, nawet jeśli ręka trochę się trzęsie. Używamy również uszczelniaczy szwów w wilgotnych miejscach, takich jak szatnie. Zapobiega to przedostawaniu się wody czyszczącej pod maty. Jeśli woda się tam dostanie, powstaje zapach "zgniłej gumy", którego nie można się pozbyć bez rozerwania podłogi. Rolka z obciążeniem to ostatni krok. Nie chodzi tylko o wagę; chodzi o usunięcie każdej małej kieszeni powietrznej, aby upewnić się, że guma i podłoże stanowią jedną całość.
Normy ciśnienia zgrzewu
- Zakładka: Minimum 1 cal.
- Waga rolki: od 75 do 100 funtów.
- Wzór: Środek na zewnątrz, aby wypchnąć powietrze.
Praca nie jest zakończona tylko wtedy, gdy ostatni element zostanie ułożony; faza utwardzania jest krytyczna.
Dlaczego pierwsze 24 godziny to strefa zakazana?
Pierwsze 24 godziny są krytyczne, ponieważ klej jest nadal płynny. Zbyt wczesne przesuwanie ciężkiego sprzętu powoduje "przemieszczenie kleju", tworząc trwałe grzbiety. Należy użyć oddychającej ochrony, takiej jak Ram Board, zamiast plastiku, aby umożliwić bezpieczne odprowadzanie wilgoci i zapachów.
Widziałem wiele doskonałych instalacji zrujnowanych przez właściciela siłowni, który chciał przenieść bieżnie cztery godziny wcześniej. Jeśli klej nie stwardnieje, ciężar maszyny wypchnie klej spod gumy, tworząc trwałe wgłębienie lub grzbiet. Utwardzanie to proces chemiczny, którego nie można przyspieszać. Nigdy nie przykrywaj nowej gumy folią z tworzywa sztucznego. Guma musi oddychać po zakończeniu odgazowywania. Plastik zatrzymuje zapach "nowej gumy" i może nawet powodować kondensację wilgoci, co niszczy wiązanie. Używamy oddychających ochraniaczy kartonowych, jeśli w pomieszczeniu nadal pracują inne osoby. I pamiętaj: wilgotny mop tylko do pierwszego czyszczenia. Nadmiar wody może przedostać się do nieutwardzonych szwów i zniszczyć ciężką pracę.
Nawet przy najlepszych planach, na miejscu mogą pojawić się pewne wyzwania.
Co jeśli coś pójdzie nie tak podczas instalacji?
Jeśli szwy otwierają się, należy naprawić naprężenie poprzez ponowne zrolowanie lub użycie obciążników szwów. W przypadku uporczywego zapachu należy upewnić się, że wilgoć nie została uwięziona. Znajomość Jak szybko naprawić drobne uszkodzenia podłogi w siłowni może zapobiec kosztownym wymianom w przypadku drobnych błędów cięcia lub szwów podczas instalacji.
Zawsze trzymam "zestaw naprawczy" w mojej ciężarówce. Jeśli szew pęknie z powodu zmian temperatury, czasami musimy użyć strzykawki, aby wstrzyknąć odrobinę kleju i dociążyć go. Kwestia zapachu jest zwykle związana z wentylacją. Jeśli pomieszczenie jest szczelnie zamknięte, naturalny zapach gumy (który jest normalny) staje się skoncentrowany. Otwórz okna! Moją ulubioną sztuczką w przypadku małych szczelin jest zmieszanie odrobiny gumowego pyłu z naszych cięć z niewielką kroplą spoiwa. Tworzy to pastę, która "spawa" szczelinę i staje się prawie niewidoczna po wyschnięciu. To właśnie te drobne poprawki inżynieryjne odróżniają reżysera od nowicjusza.
Wnioski
Perfekcyjna instalacja chroni zwrot z inwestycji i gwarancję.