Have you ever walked into a gym and noticed how perfectly those rubber tiles hug the floor? No bumps, no sliding – just a smooth surface that sticks together like besties at a yoga class. Well, we often overlook a tiny secret to that togetherness: joining plates for gym tiles.
So, why are these joining plates such a big deal? Imagine doing a burpee, and your foot catches on a loose tile, or you’re about to lift your personal best, and the floor shifts. Not cool, right? Joining plates swoop in like little floor heroes, keeping everything tight and just right.
This chat will explore why joining plates are the unsung heroes of gym safety and aesthetics. Whether you’re a gym owner, a home workout enthusiast, or just someone curious about gym setups, you’ll want to stick around. We’ll dive into how these handy little plates can save you from a fitness faux pas and keep your gym tiles looking sharp and staying put.
Ready to get down to the floor facts? Let’s roll!

What Are Joining Plates for Gym Tiles?
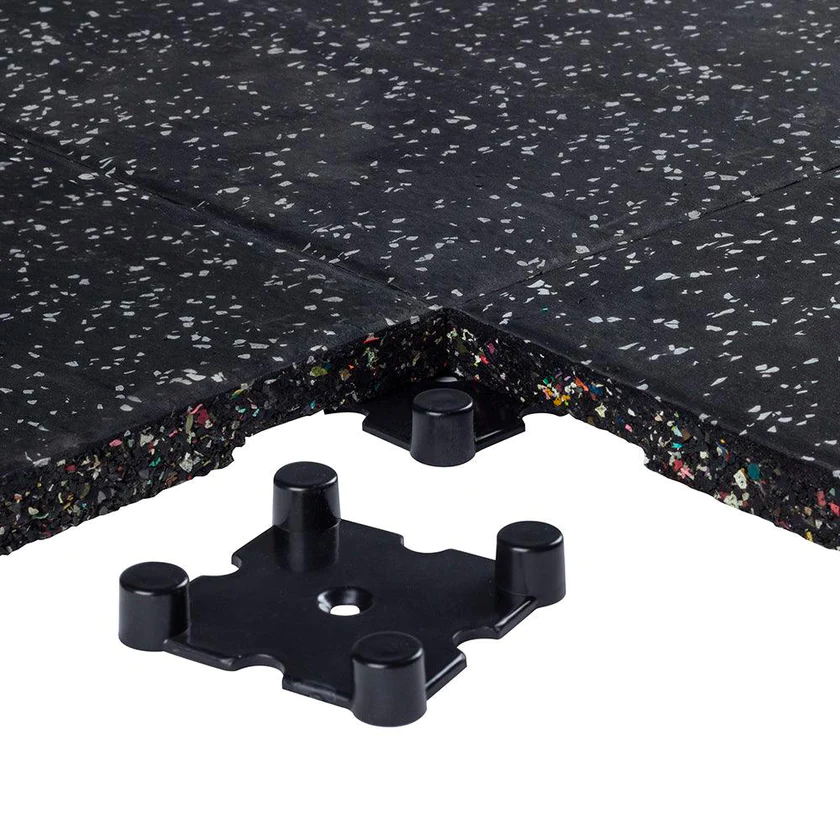
Alright, let’s break it down. Joining plates are like the secret agents of the gym floor world. They’re these flat, often rectangular pieces that may not look like much at first glance, but they pack a punch in functionality. Their main role? To lock those gym tiles together.
These plates are designed to fit snugly underneath or between gym tiles, creating a seamless and secure floor surface that won’t give up on you when you’re mid-squat or in the zone on a high-intensity interval.
Why Are Joining Plates Essential for Rubber Gym Mats?
You might wonder, “Why can’t my rubber mats lie there and behave?” Well, rubber mats have a mind of their own. They can shift, slide, and even curl up at the edges when not secured. That’s where joining plates come in as the essential peacekeepers.
First off, they bring durability to the table. Locking the mats in place prevents the edges from curling up – a common tripping hazard that can wear down your carpets faster than your motivation on a Monday morning. Plus, they distribute the weight evenly across the surface, so when you drop that heavyweight, the impact doesn’t just bully one tile but gets absorbed across the board.
Safety-wise, they’re a no-brainer. A gym floor that stays put is safer. No slips, trips, or “whoopsies” that can lead to injuries. And remember, a stable base means you can focus on your form and technique, not on whether the ground beneath you will slip-slide away.
So, in the grand scheme of gym safety and longevity, joining plates are the unsung heroes, ensuring your workout space is as steadfast as your fitness goals.

How Do You Join Two Rubber Mats Together Using Joining Plates?
Do you have some rubber mats you want to buddy up? Joining plates are your go-to wingman. Here’s a simple step-by-step guide to get those mats united:
1. Lay Out Your Mats: Position your rubber mats on the floor where you want them to go. Make sure they’re close to each other, like two pieces of bread ready to make a sandwich.
2. Clean the edges: Before introducing the connecting plate, please quickly clean the edges of the mat. Any dust or dirt may make it harder for the container to lock in.
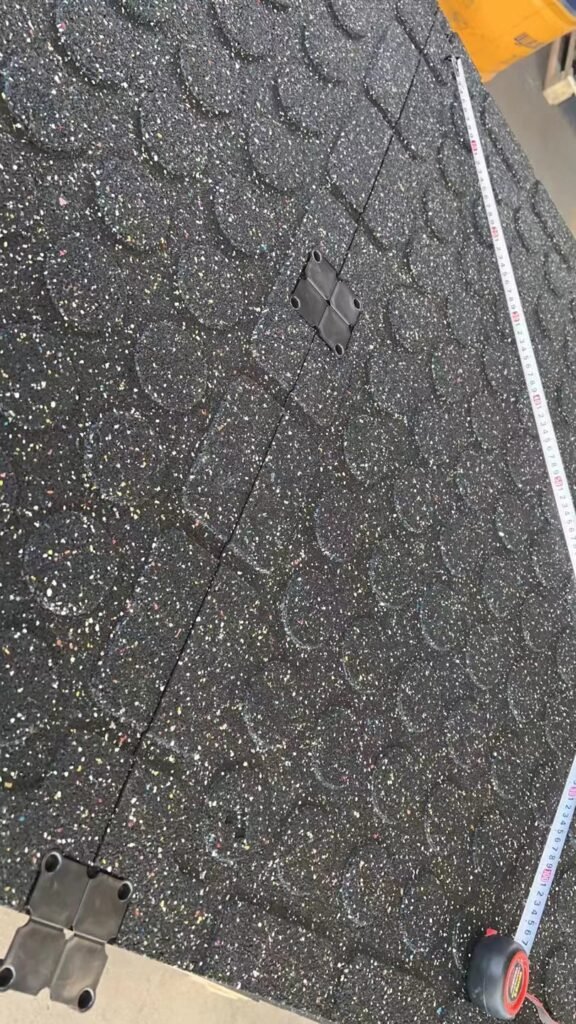
3. Align the connecting board: Take your connecting board and arrange it along the edge where the two mats meet. Install the holes on the edges of the two mats with connecting plates to fix them.
4. Secure the Plates: Press down firmly along the joining plates to ensure they’re secure.
5. Double-Check for Gaps: Give your handiwork a once-over. You shouldn’t see any gaps or movement when walking on the mats. If you do, adjust the plates as needed.
6.Test It Out: Do a little jog or a mock burpee. Congratulations, you’ve just joined your rubber mats if everything stays put!
What Material Are Joining Plates Made Of?
Joining plates come in various materials, each with its superpowers. You’ve got heavy-duty plastic ones that are tough and can take a beating but are light and easy to handle. Then there are metal joining plates, which are the heavyweights of the joining plate world – they’re super strong and can take almost anything you throw at them.
The material choice affects durability big time. Plastic is moisture-resistant and won’t rust, making it a solid choice for sweaty gym environments. On the other hand, metal is the ultimate strength and can last for ages, but you’ll want to ensure it’s treated to resist corrosion.
Are Joining Plates Designed to Withstand Heavy Gym Equipment?
They’re like the linebackers on the gym floor. Joining plates are specifically designed to handle the grunt work. Whether it’s a barrage of barbells or a stampede of spin bikes, these little guys are built to withstand the pressure.
The secret is in the design. Joining plates distribute the weight and stress of heavy equipment across a wider area. This means no single point takes all the impact, which helps prevent damage to the mats and keeps the floor stable. So, go ahead and bring on the heavyweights – with the right joining plates, your gym floor is ready to rumble.
How Do I Stop My Stall Mats from Moving with Joining Plates?
You know the struggle if you’ve ever had a workout session interrupted by a traveling stall mat. But fear not because joining plates are here to save your workout (and your sanity). Here’s how to keep those mats from taking a walk:
1. Choose the Right Joining Plates: Not all joining plates are equal. Make sure you pick the ones designed for the thickness and material of your stall mats.
2.Position Your Mats: Lay out your mats in the desired location. If there’s any furniture around, move it aside to give yourself plenty of room to work.
3. Clean the Area: A clean floor means your joining plates will adhere better. Wipe down the edges of the mats and the bottom where you’ll place the leaves.
4. Place the Joining Plates: Slide the joining plates between the mats at the seams. If they’re interlocking, snap them together firmly.
5. Secure the Plates: Step on the plates or use a rubber mallet to ensure they’re fully engaged with the mats. This step is crucial for a slip-free zone.
6. Test the Security: Give the mats a good shuffle with your feet. If they don’t budge, you’ve done it! If there’s any movement, check if the plates need more pressure or if additional plates are necessary.
7. Maintain Regularly: Always check the joining plates to ensure they’re still holding strong. Over time, they might need a little press or a quick replacement.

What Clips Hold Stall Mats Together Effectively?
When it comes to clips, think of them as the belts to your joining plates’ buttons. They add an extra layer of security. Here are a few types:
1. Interlocking Clips: These are like puzzle pieces for your mats. They fit into the edges and lock in place, creating a continuous surface that’s tough to pull apart.
2. Edge Clips: These clips are perfect for the outer edges of your mat setup. They usually have a flat bottom against the floor, and a curved top grips the mat.
3. Anchor Clips: For an even more secure fit, anchor clips fasten to the floor with screws or adhesive and then grip the mat, nailing it down without damaging it.
Each type of clip serves a purpose: to provide a quick fix or a more permanent solution. The key is to match the clip to your mat’s needs and the level of activity in your gym. With the right hooks in place, your stall mats won’t just stay put — they’ll become a steadfast foundation for your fitness journey.
Are Joining Plates Compatible with All Types of Gym Tiles?
When it comes to getting all your gym tiles to play nice together, joining plates are the universal peacekeepers of the gym floor. But are they the one-size-fits-all solution? Mostly, yes. They’re like friendly neighbors who get along with just about everyone.
Joining plates are designed to be versatile. Whether your tiles are thick, comfy rubber for heavy-lifting areas or the dense, interlocking type for high-traffic zones, there’s a joining plate out there that’s up to the task. However, it’s not a wild free-for-all. You need to check the specs to make sure the plates match your particular type of tile – think of it like setting up a suitable blind date.
Do Joining Plates Come in Different Sizes?
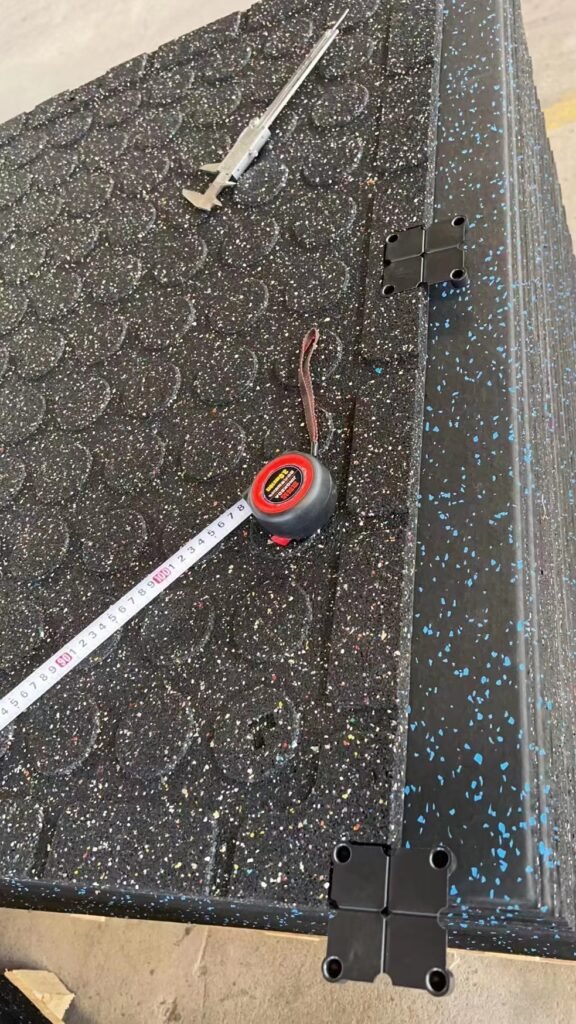
Size matters when it comes to joining plates. They come in various sizes to fit the thickness and dimensions of different gym tiles. You’ve got your standard sizes that are like the common folk of the joining plate world – they’ll fit the majority of tiles. Then there are the custom sizes for those unique, sometimes oddball tiles that need an exceptional fit.
It’s like shopping for clothes – you’ll usually find your size off the rack, but now and then, you might need a little tailoring. The same goes for joining plates. Measure your tiles, check the thickness, and choose your dishes accordingly.

How Do Joining Plates Connect with Tiles?
Joining plates have two main ways of connecting tiles: the interlocking mechanism and the adhesive option. It’s like choosing between Velcro shoes and lace-ups – both have perks.
The interlocking mechanism is all about those grooves and teeth that click together. It’s a solid choice if you want something sturdy and reusable. You can take them apart and put them back together like a LEGO project, which is great if you love to change things up now and then.
On the flip side, adhesive joining plates are like stickers for your gym floor. Peel off the back, stick them down, and voila – your tiles are going nowhere. They’re super easy to install, but they’re more of a once-and-done deal. If you ever need to move your tiles, you might have to say goodbye to the adhesive plates and hello to a fresh set.
Both options have their own fans, and the best choice depends on your gym’s needs and how often you like to shake things up with your layout.
Will Joining Plates Be Noticeable Once Installed?
Let’s talk looks because we know that in the gym, it’s not just your muscles that need to look good – your floors do, too. The big question is, will joining plates turn your sleek gym floor into a patchwork quilt? The answer is not necessarily.
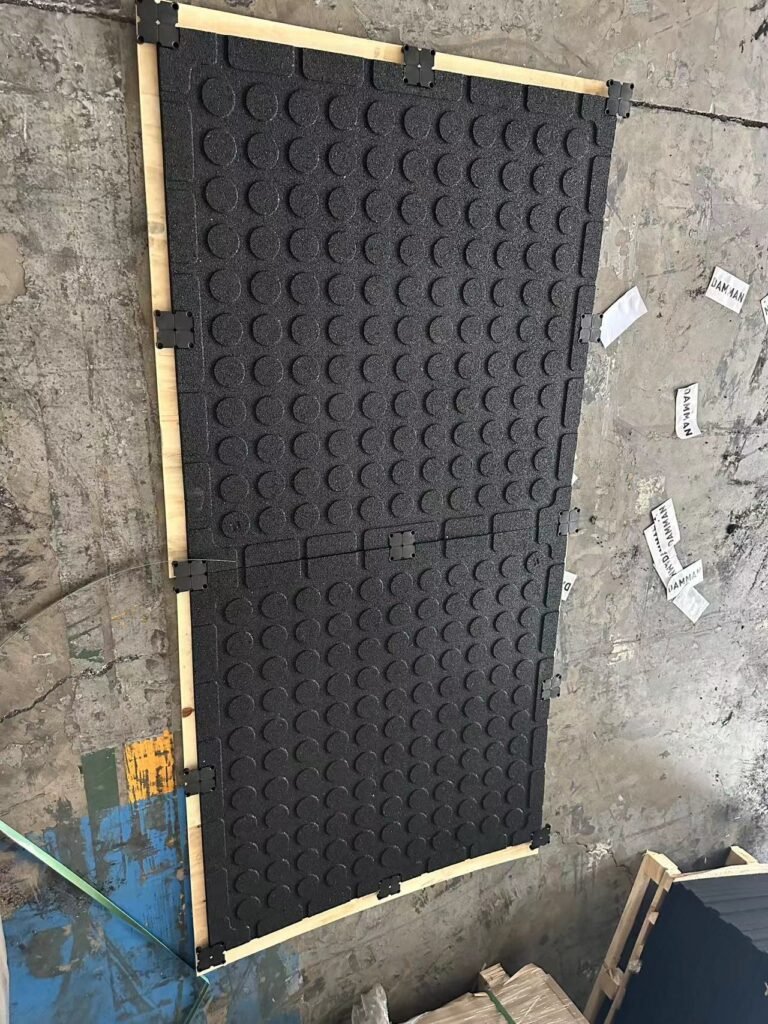
Joining plates are like the undercover agents of the gym floor. They’re designed to be as discreet as possible. They’re mostly hidden underneath the mats, doing their job without anyone being the wiser. They’re the unsung heroes who keep the peace without stealing the spotlight.
But some joining plates might be a tad more visible, especially if they’re sitting on top of the mats or if there’s a color mismatch. However, manufacturers have gotten hip to the fact that gym owners care about aesthetics. That’s why many joining plates now come in colors that blend in with standard gym flooring, and their profiles are super low-key.
So, will you see them? Maybe a little, if you’re looking. But will they be the first thing people notice when they walk into your gym? Nope. They’ll be too busy admiring the seamless expanse of your well-maintained, no-trip-zone gym floor. And if someone spots the joining plates, they’ll nod in appreciation of your attention to detail and safety.
How Easy Is It to Install Joining Plates?
Can you handle installing joining plates on your own? Here’s some excellent news: it’s a breeze. It’s even simpler than whipping up a batch of cookies (and with no risk of burning anything). Installing these plates is a no-fuss, no-muss task that won’t have you scratching your head.
Let’s walk through the installation steps: You’re looking at a click-together or stick-on job. Have you ever snapped together a child’s toy or slapped on a sticker without ending up in a sticky mess? Then you’ve got all the skills needed. Just align the plates, click or press them into place, and make sure they’re firmly attached. And that’s it. You can leave the heavy-duty tools and the how-to manuals on the shelf for this one.
Can Gym Staff Install Joining Plates, or Is Professional Help Required?
Now, you might be wondering if you need to call in the pros and make a cup of coffee for the floor installer guy. But here’s the scoop: your gym staff can usually handle this task with their eyes closed (though, keep them open for best results). Joining plates are designed for easy installation, with clear instructions that don’t read like a cryptic ancient manuscript.
Unless you’re dealing with a massive space or a super complex floor design, you can usually skip the professional help. Save that budget for new gym equipment or a fancy juice bar.
Are Special Tools Required for the Installation of Joining Plates?
You won’t need an arsenal of tools to install these bad boys. If you’re using interlocking plates, you might need your hands. For adhesive types, a pair of scissors if you need to trim anything. And if you’re going with dishes that require hardware, a simple drill or screwdriver will do the trick.
So, there’s no need to dust off that old, intimidating power tool set lurking in the back of your storage closet. You’re golden with a few essential tools and some elbow grease. Before you know it, you’ll be standing on a stable floor. You’ll want to invite over that friend who’s always bragging about their balance to try and find a wobble.
What Kind of Warranty Comes with Joining Plates?
When investing in joining plates for your gym, you’re not just buying a product; you’re buying peace of mind. And nothing says peace of mind quite like a solid warranty. Most reputable joining plate manufacturers stand behind their products with a guarantee that ensures you’re covered if things don’t go as planned.
The length and terms of the warranty vary, but typically, you see anything from a one-year to a multi-year contract. This warranty promises that the joining plates you’re installing should withstand the rigors of gym life for a certain period.
What Does the Warranty Cover for Joining Plates?
So, what’s under the hood of a joining plates warranty? Generally, it protects you against defects in materials and artistry. This means if your joining plates crack under normal use conditions or don’t perform as advertised, you can breathe easy knowing that the warranty has your back.
The warranty might cover things like:
– Replacement of Faulty Plates: If a plate is a dud, the warranty should help you get a replacement without extra charges.
– Material Durability: If the plates don’t hold up to a gym environment’s standard wear and tear, the warranty may cover it.
– Workmanship: This covers the build quality of the plates. If they fall apart because they weren’t made right, that’s usually hidden.
However, keep in mind that warranties often have limitations. They might not cover damage from improper installation, misuse, or accidents. And they probably won’t cover normal wear and tear over time – like if the plates start showing their age after a decade of gym-goers’ sweat and toil.
In wrapping up, joining plates are the unsung heroes of gym flooring – they keep everything tight, safe, and professional. Whether you’re a gym owner or a home workout enthusiast, understanding the role of joining plates, their installation, and the warranty that backs them up is critical to maintaining a top-notch fitness space.
Remember, a well-joined floor is the foundation of a great workout environment, so invest in quality joining plates and enjoy a seamless, worry-free gym experience. Keep those mats locked down; your focus can stay where it should – on your health and fitness goals.