![Install Artificial Grass For Dogs 1024x683[1]](https://meettfit.com/wp-content/uploads/2025/04/install-artificial-grass-for-dogs-1024x6831-1.jpg)
Installing artificial grass for dogs requires removing existing lawn, creating a 3-4 inch crushed stone drainage base, laying weed barrier fabric, installing pet-specific turf with antimicrobial properties, securing edges with galvanized stakes, and adding specialized infill. This process takes 2-3 days but creates a durable, odor-resistant surface lasting 10-15 years.
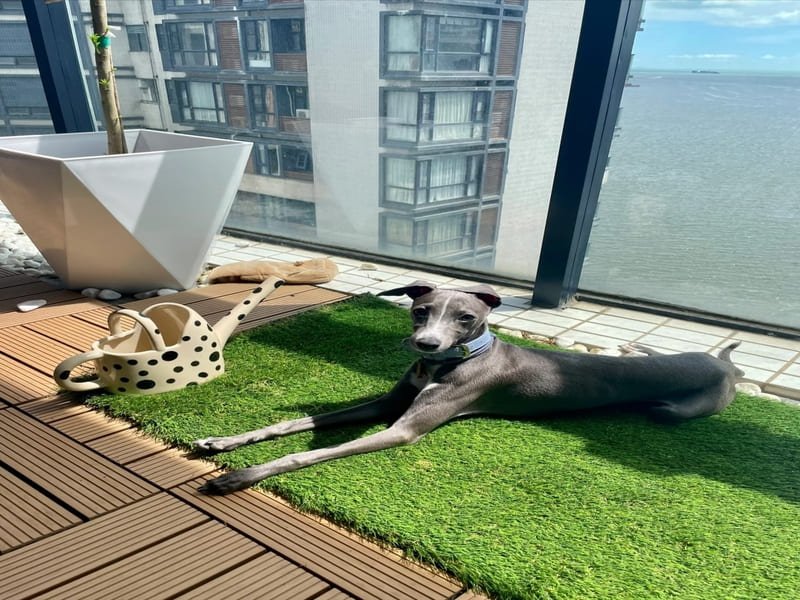
Artificial grass has become a popular choice for dog owners tired of dealing with muddy paws, yellow spots, and constant lawn maintenance. The installation process might seem difficult at first, but with the right approach, it’s a manageable DIY project that offers significant long-term benefits. The key to success is proper preparation and using pet-specific materials. Unlike regular artificial turf, dog-friendly versions have antimicrobial treatments, enhanced drainage systems, and special backing designed to handle the unique challenges pets create. I’ve installed artificial grass for my three dogs, and the improvement in yard cleanliness and reduction in maintenance time has been remarkable. The initial investment pays off quickly in both time saved and yard appearance.
If you’re considering artificial grass for your dogs, you’ve made a smart choice. Not only will it save countless hours on lawn maintenance, but it also provides a clean, safe play surface year-round. The installation process isn’t complicated, but it does require attention to detail to ensure long-term success and avoid costly mistakes.
What Are the Best Types of Artificial Grass for Dog Urine?
The best artificial grass for dogs has antimicrobial-treated fibers, enhanced drainage systems with at least 30 holes per square foot, shorter pile height (1-1.5 inches), and durable nylon/polyethylene blend fibers. Look for products specifically labeled "pet-friendly" with built-in odor control technology and UV protection for maximum durability.
When I was researching artificial grass for my backyard, I quickly realized that not all turf is created equal when it comes to dogs. The difference between standard landscape turf and pet-specific options is significant. Standard turf often lacks the drainage capacity and antimicrobial properties needed to handle regular pet use.
Understanding Pet-Friendly Artificial Grass Features
Dog-friendly turf typically features specialized backing with more drainage holes than standard options. This increased drainage is crucial for quickly removing urine from the surface and preventing odor buildup. The backing material matters more than the appearance of the grass itself when choosing a pet-friendly option.
I installed K9Grass in my backyard after my Labradors destroyed my natural lawn. The antimicrobial treatment in the blades has completely eliminated the urine odors we used to battle, even during hot summer days when smells typically intensify.
Comparing Popular Pet Turf Options
Each turf material has distinct advantages for dog owners:
- Polyethylene turf: Feels most natural and soft but less durable in high-traffic dog areas
- Nylon turf: Extremely durable with excellent shape memory but slightly rougher feel
- Polypropylene turf: Most affordable but wears out faster with active dogs
For most dog owners, I recommend a polyethylene/nylon blend with at least 80 ounces face weight. This provides the perfect balance of comfort and durability. My front yard installation with cheaper turf showed visible wear paths after just one year, while the premium blend in the backyard still looks new after two years with three active dogs.
Dog urine creates unique challenges for any lawn surface, but with the right artificial grass selection, these problems become much easier to manage. Beyond just the turf type, the installation method and base materials play equally important roles in creating a successful pet-friendly yard.
What Tools Do I Need to Install Artificial Grass Myself?
Essential tools for DIY artificial grass installation include: garden rake, square-edge shovel, utility knife with extra blades, lawn roller, power broom (rentable), wheelbarrow, tamper, measuring tape, safety gloves, and knee pads. For yards over 500 square feet, rent a turf cutter ($80-100/day) and plate compactor ($60-70/day).
The right tools make a massive difference in both the quality and speed of your installation. When I did my first installation, I tried to save money by using only basic tools, but I quickly realized this was a mistake that cost me extra time and physical strain.
Must-Have Tools for Ground Preparation
Ground preparation is the most labor-intensive part of the process. For this critical phase, you’ll need:
- Turf cutter/sod cutter: Removes existing grass efficiently (rental: $80-100/day)
- Heavy-duty rake: Clears debris and levels the area (steel-tine landscape rake works best)
- Tamper: Compacts the base material (hand tampers work for small areas, but powered versions save tremendous effort)
- 4-foot level and string line: Ensures proper drainage slopes
- Weed barrier pins: Secures the weed membrane (use approximately 1 pin per square foot)
I learned through painful trial that skimping on ground preparation tools makes the job much harder. For my first 300 square foot section, I used just a shovel and rake, spending nearly 8 hours on removal. The second section went three times faster when I rented a turf cutter, finishing the same area in under 3 hours with much less back strain.
Tools for Turf Installation and Finishing
Once your base is ready, you’ll need these specific tools for the turf installation:
- Sharp utility knife: Get at least 5-10 extra blades as cutting turf quickly dulls them
- Carpet kicker: Helps stretch the turf to prevent wrinkles
- Power broom: Essential for standing the grass fibers upright after installation
- Seaming materials: 6-inch seam tape and outdoor adhesive for joining sections
- Drop spreader: Applies infill material evenly
The utility knife was the tool I replaced most often. A dull blade makes clean cutting impossible and creates jagged edges that don’t join properly. Pro tip: warm the backing in sunlight for 15-20 minutes before cutting to make the process much easier.
Having the right tools ready before you start saves significant time and frustration. While the initial tool investment might seem high, many can be rented for the project duration. Proper tools also help ensure a professional-looking result that will last for years to come.
Can I Install Artificial Grass Over an Existing Lawn?
While technically possible, installing artificial grass directly over existing lawn is strongly discouraged. The underlying vegetation will decompose, creating an uneven surface, drainage problems, and odor issues. For a proper installation that lasts, remove 3-4 inches of existing material, add crushed stone base, and install weed barrier.
I’ve seen many homeowners attempt this shortcut, hoping to save time and effort, but it almost always leads to problems that require expensive fixes later. The proper preparation of the ground is the foundation of a successful installation.
Why Removing Existing Lawn Is Crucial
From my experience helping neighbors fix failed installations, here’s exactly why removing existing grass matters:
- Drainage problems: Decaying grass creates an impermeable layer that prevents proper drainage, leading to standing water and rapid breakdown of the turf backing
- Uneven settling: As organic material decomposes unevenly, the surface becomes bumpy and creates trip hazards
- Weed growth: Existing grass and weeds can grow through your new artificial turf, especially during rainy seasons
- Reduced lifespan: Improper installation can cut your turf’s lifespan from 15+ years to as little as 3-5 years
When I installed my dog run, I experimented by properly removing grass in one section while simply killing the grass and laying weed barrier in another. Within six months, the difference was dramatic. The properly prepared area remained flat while the shortcut area developed noticeable dips and puddles after rain. After a year, I ended up redoing the shortcut section, costing me more time and money than doing it right initially.
The Correct Approach to Ground Preparation
Instead of installing over existing lawn, follow these steps:
- Use a sod cutter to remove existing grass and roots (set to 2-3 inches deep)
- Remove any rocks, roots, or debris larger than 1 inch
- Grade the soil with a slight slope (1-2%) away from buildings for drainage (approximately 1/4 inch drop per foot)
- Add thick weed barrier (minimum 4oz material) before installing base material
- Overlap weed barrier sheets by at least 6 inches and secure with landscape pins every 12 inches
This approach requires more initial work but prevents expensive problems later and can save thousands in premature replacement costs.
Taking the time to properly prepare your ground may seem excessive, but it’s the most important factor in determining how long your artificial grass will last and how well it will perform with dogs. This foundation work pays dividends for years to come.
What Should I Put Down Before Installing Artificial Grass?
Before installing artificial grass, lay down a geotextile weed barrier fabric followed by a 3-4 inch layer of compacted 3/8-inch crushed stone or decomposed granite. For dog areas, add a 1-inch layer of specialized antimicrobial material like ZeoFill mixed with fine crushed stone to neutralize odors and improve drainage.
The base layers are what determine how well your artificial grass will drain, how level it will remain, and how it handles pet waste. I’ve tested different base materials in my yard, and the right combination makes a dramatic difference in odor control and longevity.
Creating a Proper Foundation System
A quality installation requires multiple layers working together:
- Compacted native soil: Your existing soil, properly graded and compacted
- Geotextile weed barrier: Non-woven fabric that prevents weeds while allowing water through
- Base aggregate: 3-4 inches of crushed stone or decomposed granite (avoid rounded pea gravel which shifts)
- Cushioning layer: 1-inch layer of fine decomposed granite or specialized pet turf padding
- Turf and infill: The visible surface and stabilizing material
When installing my dog’s play area, I added an extra layer of zeolite mixed with the top layer of base material. This has significantly reduced odors even in areas where my three dogs frequently urinate. After 18 months, we’ve had zero odor complaints from neighbors, even during hot summer months.
Specialized Materials for Pet Areas
For dog-specific installations, these specialized materials dramatically improve performance:
- Zeolite: Natural minerals that can be mixed with base material (15% zeolite to 85% base ratio) to neutralize urine odors
- Antimicrobial padding: Provides cushioning for joint health while fighting bacteria growth
- Enhanced drainage components: Such as drainage cells or mats creating air space beneath the turf
These materials add approximately 15-20% to initial costs but save money by extending installation life by 3-5 years and reducing maintenance needs. In my experience, these specialized materials are absolutely worth the extra cost when you have multiple dogs using the area daily.
The foundation layers are invisible once your project is complete, but they determine everything about how your artificial grass performs with dogs. Investing in quality materials for these unseen layers prevents the most common problems dog owners face with artificial turf.
What Is the Best Base and Underlayment for Artificial Grass for Dogs?
The best base for dogs is a 3-4 inch layer of 3/8-inch angular crushed stone or decomposed granite, compacted in 1-inch layers, topped with fine stone dust. Add antimicrobial underlayment like ZeoFill (2 pounds per square foot) for odor control. This system provides excellent drainage and stability for active dogs.
Dogs create unique challenges for artificial turf bases. Their concentrated urine spots and natural digging behaviors can quickly compromise standard installations. I’ve tested multiple base configurations with my three large dogs, and found that certain approaches work significantly better than others.
Drainage Considerations for Pet Areas
For areas heavily used by dogs, drainage becomes even more critical:
- Increased slope: Create a 2-3% slope in primary pet relief areas
- Larger aggregate size: Using 3/8-inch crushed stone improves drainage capacity by up to 30%
- Drainage aids: For problem areas, install perforated pipes beneath the base
In my backyard, I created a designated "potty area" with enhanced drainage features including a deeper 5-inch base layer and larger aggregate mixed with zeolite. I surrounded this area with decorative rocks, and after just two weeks of training, this became my dogs’ preferred spot, containing the majority of urine to one easily maintained area.
Antimicrobial Underlayment Options
Several specialized products significantly improve artificial grass performance with dogs:
- ZeoFill: Natural mineral that absorbs ammonia from urine (apply at 2 pounds per square foot)
- Envirofill: Antimicrobial-coated sand that fights bacteria and helps turf stand upright
- Durafill: Non-absorbent infill that doesn’t trap odors and rinses clean
- Specialized padding: Creates cushioning for joint health while allowing drainage
For my installation, I used a combination approach – standard crushed stone base with zeolite mixed into the top inch, plus antimicrobial padding in high-traffic areas where my older dog naps. This has worked extremely well for my three large dogs, with no noticeable odors even after two years of daily use.
The right base and underlayment system forms the foundation of a successful dog-friendly artificial grass installation. While these materials add cost upfront, they prevent the most common problems that cause pet owners to regret their artificial grass installation.
How Long Does It Take to Install Artificial Grass for a Small Yard?
Installing artificial grass in a small yard (400-500 square feet) typically takes 2-3 full days for DIY installation with 1-2 people. Day one: remove existing materials and prepare the ground. Day two: lay weed barrier, add and compact base materials. Day three: install turf, secure edges, and add infill material.
Many homeowners wonder if this is a weekend project or something requiring more extensive time. From my experience installing several sections in my yard, it’s definitely more than a single weekend job for most people, especially first-timers.
Realistic Timeline for DIY Installation
When planning your installation, break it down into these specific timeframes for a 500 square foot area:
Day 1: Site Preparation (6-8 hours)
- Measuring and marking the area (30 minutes)
- Removing existing grass with sod cutter (2-3 hours)
- Excavating to 3-4 inches depth (2-3 hours)
- Initial grading and slope creation (1-2 hours)
Day 2: Base Installation (5-7 hours)
- Laying weed barrier with proper overlaps (1 hour)
- Delivery and unloading of base materials (1 hour)
- Adding base material in 1-inch layers (2-3 hours)
- Compacting with plate compactor (1-2 hours)
- Final grading and smoothing (1 hour)
Day 3: Turf Installation (5-7 hours)
- Laying and cutting turf with rest period (2-3 hours)
- Seaming sections if necessary (1-2 hours)
- Securing edges with galvanized nails (1-2 hours)
- Adding infill and brushing (1-2 hours)
When I installed my 600 square foot dog run, it took nearly 4 full days working alone. Having a helper would have reduced the time by about 30%, especially during base material installation and handling heavy turf rolls. Working alone, the turf installation was the most challenging part, as the rolls weighed over 200 pounds and were awkward to position precisely.
Factors That Affect Installation Time
Several variables can change your installation timeline:
- Existing landscape: Removing concrete or dealing with tree roots adds 4-8 hours
- Soil conditions: Clay soil is more difficult to excavate, adding 2-3 hours
- Weather: Rain delays installation as wet base materials can’t compact properly
- Helpers: Each additional person reduces time by about 30% (up to 3 people)
- Equipment: Power tools like sod cutters and plate compactors save 4-6 hours
I recommend adding a 50% buffer to your estimated timeline for unexpected challenges like hitting irrigation lines or dealing with hidden rocks. These surprises almost always appear during landscape projects.
Understanding the realistic time commitment helps you plan appropriately. While artificial grass installation is definitely within the capabilities of most DIY homeowners, having realistic expectations about the time required will help avoid frustration and rushed work that compromises quality.
How Do I Maintain Artificial Grass to Prevent Dog Odor and Urine Smell?
To prevent dog odor in artificial grass, rinse urine spots immediately with water, remove solid waste promptly, apply enzymatic cleaners monthly, brush the turf weekly to prevent matting, and use antimicrobial deodorizers as needed. For heavily used areas, perform quarterly deep cleaning with specialized pet turf cleaners.
The "maintenance-free" promise of artificial grass can be misleading for dog owners. While it requires significantly less work than natural grass, some regular maintenance is essential to keep it odor-free and looking great.
Regular Maintenance Routine
I’ve developed this maintenance schedule for my dog-friendly artificial lawn:
Daily Maintenance (5 minutes):
- Remove solid waste immediately with a pooper scooper
- Rinse fresh urine areas with water (minimum 3:1 water to urine ratio)
Weekly Maintenance (15-20 minutes):
- Rinse the entire turf with water, focusing on high-use areas
- Brush with a stiff non-metal bristle broom to keep fibers upright
- Inspect for damage, loose edges, or areas needing attention
Monthly Maintenance (30-45 minutes):
- Apply enzymatic cleaner designed for artificial turf
- Check infill levels and replenish as needed in high-traffic areas
- Address odor issues with specialized pet turf deodorizer
This routine has kept my artificial grass fresh despite daily use by three large dogs for over two years. The key is consistency – skipping even a week can allow odors to develop, especially in hot weather.
Products and Solutions for Odor Control
These specialized products have proven effective in my experience:
- Enzymatic cleaners: Simple Green Outdoor Odor Eliminator breaks down urine compounds
- Turf deodorizers: Fresh Wave or ZeoFill contain minerals that absorb ammonia
- Antimicrobial sprays: OdoBan prevents bacteria growth in turf fibers
- Vinegar solution: 50/50 white vinegar and water works for spot cleaning
- Hydrogen peroxide: For stubborn stains, use diluted 3% solution (1:2 with water)
I keep a dedicated garden sprayer filled with enzymatic cleaner for quick application after rain or whenever I notice odor developing. This proactive approach prevents significant odor issues, even in summer heat. For stubborn spots, I use a pressure sprayer to force cleaning solution deeper into the base.
While artificial grass does require some maintenance with dogs, it’s still dramatically less work than natural grass. The key is staying on top of the cleaning routine rather than waiting until odors develop, which requires more intensive treatment.
Conclusion
Installing artificial grass for dogs requires proper preparation, quality materials, and consistent maintenance, but delivers a clean, safe yard surface that stays attractive year-round while dramatically reducing lawn care time.