![Activa Taak 01k30wb3vre609nz7gsxnwk9wz 1755597748 Img 1[1]](https://meettfit.com/wp-content/uploads/2025/07/assets_task_01k30wb3vre609nz7gsxnwk9wz_1755597748_img_11.jpg)
Het bouwen van een geluidsdichte ruimte vereist inzicht in drie belangrijke principes: massawet, demping en ontkoppeling. Het succes hangt af van de juiste materiaalkeuze, het structurele ontwerp en de nauwgezette aandacht voor details bij het afdichten en isoleren.
A soundproof room is more than just adding foam to walls. After managing dozens of acoustic projects across recording studios, home theaters, and industrial facilities, I’ve learned that effective soundproofing requires a systematic approach combining science with practical construction techniques.
De basis van een succesvolle geluidsisolerende ruimte ligt in het begrijpen hoe geluid zich verplaatst. Geluidsgolven verspreiden zich door lucht en vaste materialen, waardoor verschillende behandelingsstrategieën nodig zijn. Massa blokkeert luchtgeluid, terwijl ontkoppeling de overdracht van structurele trillingen voorkomt. Dempende materialen absorberen energie, waardoor de geluidsintensiteit afneemt.
De meeste mensen onderschatten de complexiteit ervan. Een geluidsdichte ruimte van professionele kwaliteit heeft meestal een reductie van 40-60 dB, wat een zorgvuldige planning en uitvoering vereist. Deze gids biedt het stappenplan dat ik met klanten gebruik om effectieve akoestische ruimtes te bouwen.

The journey from concept to completion involves multiple phases, each critical to achieving your acoustic goals. Let’s explore each step systematically.
Wat kost het bouwen van een geluidsdichte kamer eigenlijk?
De kosten voor geluidsisolatie variëren van $2.000 voor eenvoudige doe-het-zelf slaapkamerbehandelingen tot $25.000+ voor professionele opnamestudio's. Materiaal maakt meestal 60-70% van het totale budget uit. De materiaalkosten maken meestal 60-70% van het totale budget uit, terwijl de arbeidskosten de rest vormen voor professionele installaties.
Opsplitsing budget per projecttype
Based on hundreds of projects I’ve managed, here are realistic cost expectations:
Basiskantoor/slaapkamer aan huis (100 m²):
- Doe-het-zelf materialen: $1.500-3.000
- Professionele installatie: $4.000-7.000
- Prestaties: 25-35 dB reductie
Home Theater-kamer (200 m²):
- Doe-het-zelf materialen: $3.000-6.000
- Professionele installatie: $8.000-15.000
- Prestaties: 35-45 dB reductie
Professionele opnamestudio (300 m²):
- Alleen materialen: $8.000-15.000
- Compleet professioneel gebouwd: $20.000-40.000
- Prestaties: 50-65 dB reductie
Opsplitsing materiaalkosten
Ik verdeel materiaalkosten in categorieën om klanten te helpen effectief te budgetteren:
- Isolatiematerialen: $2-4 per sq ft (steenwol, glasvezel)
- Gipsplaten en akoestische panelen: $3-8 per sq ft (afhankelijk van de lagen)
- Dempende verbindingen: $1-2 per vierkante meter (groene lijm, vergelijkbare producten)
- Deuren en ramen: $800-3.000 per eenheid (akoestisch goedgekeurd)
- Afdichtmiddelen en bevestigingsmiddelen: $300-800 per kamer
Verborgen kosten om rekening mee te houden
Veel klanten zien deze extra kosten over het hoofd:
- Bouwvergunningen: $100-500 (indien structurele wijzigingen vereist)
- HVAC-aanpassingen: $500-2.000 (akoestische behandelingen voor kanalen)
- Elektrisch werk: $300-1.000 (stopcontacten verplaatsen, circuits toevoegen)
- Huur/aanschaf gereedschap: $200-800 (indien doe-het-zelf-aanpak)
- Afvalverwijdering: $200-500 (verwijdering van bouwpuin)

Ik raad altijd aan om 15-20% onvoorzien toe te voegen aan de eerste schattingen. Onverwachte omstandigheden zoals een slechte bestaande constructie of problemen met de naleving van de voorschriften verhogen vaak de kosten.
Hoe lang duurt het om een geluiddichte kamer te bouwen?
Doe-het-zelf projecten voor geluidsisolatie vereisen meestal 2-4 weekenden voor basisinstallaties, terwijl professionele bouw 1-3 weken in beslag neemt, afhankelijk van de complexiteit. De tijd varieert aanzienlijk afhankelijk van de grootte van de ruimte, de prestatiedoelen en de bestaande omstandigheden.
Tijdlijn per bouwmethode
Weekend doe-het-zelf projecten:
- Basisbehandeling slaapkamer: 2-3 weekenden
- Klein kantoor/werkkamer: 1-2 weekenden
- Voorbereiding en planning: Extra week
Professioneel installatieschema:
- Ontwerp en vergunningen: 1-2 weken
- Materiaalinkoop: 3-7 dagen
- Bouw: 5-15 werkdagen
- Testen en aanpassingen: 2-3 dagen
Gedetailleerde bouwtijdlijn
From my project experience, here’s a realistic week-by-week breakdown for a typical home theater project:
Week 1: Planning en voorbereiding
- Opmeten van de ruimte en afronden van het ontwerp
- Materiaal bestellen en levering coördineren
- Vergunningaanvragen (indien nodig)
- Bestaande ruimte voorbereiden en slopen
Week 2-3: Kernconstructie
- Aanpassingen aan het frame of nieuwe muurconstructie
- Isolatie-installatie en eerste gipsplaatlaag
- HVAC en elektrisch ruwbouwwerk
- Aanbrengen van dempingsmiddel en tweede laag gipsplaat
Week 4: Afwerking en testen
- Installatie van deuren en ramen
- Eindafdichting en akoestisch breeuwen
- Binnenafwerking en trimwerk
- Prestaties testen en aanpassen
Factoren die de tijdlijn verlengen
Verschillende omstandigheden kunnen het bouwschema aanzienlijk beïnvloeden:
- Bestaande structurele problemen: Problemen ontdekken tijdens het slopen
- Vertragingen door het weer: Van invloed op materiaallevering of buitenwerk
- Vertragingen bij vergunningen: Beoordelings- en goedkeuringstijden van de afdeling Bouw
- Materiaal nabestellingen: Gespecialiseerde akoestische producten kunnen een langere levertijd hebben
- Coördinatie-uitdagingen: Meerdere ambachten die achter elkaar werken

Ik houd gedetailleerde projectplanningen bij en communiceer regelmatig met klanten over de voortgang en mogelijke vertragingen.
Kun je zelf klussen of heb je professionele aannemers nodig?
De meeste projecten voor geluidsdichte kamers combineren doe-het-zelf-vriendelijke taken zoals isolatie installeren met professioneel werk zoals structurele aanpassingen en HVAC-integratie. Het succes hangt af van een eerlijke inschatting van je vaardigheden en de plaatselijke bouwvoorschriften.
Doe-het-zelf taken en vereiste vaardigheden
Veel geluidsisolatietaken zijn geschikt voor gemotiveerde huiseigenaren met basisvaardigheden in de bouw:
Eenvoudige doe-het-zelf-taken:
- Isolatie van glasvezel of steenwol installeren
- Akoestisch breeuwen en afdichten
- Veerkrachtige kanalen monteren (met het juiste gereedschap)
- Akoestische panelen en schuim installeren
Matige doe-het-zelftaken (enige ervaring vereist):
- Installatie en afwerking van gipsplaten
- Basis aanpassingen aan het frame
- Deur- en raamrubber
- Eenvoudige verplaatsing van stopcontacten
Skills You’ll Need:
- Nauwkeurig meten en markeren
- Gebruik van elektrisch gereedschap (boor, zaag, waterpas)
- Basiskennis van bouwmaterialen
- Geduld voor gedetailleerd precisiewerk
Wanneer moet je professionals bellen?
Bepaalde aspecten vereisen professionele expertise en worden mogelijk vereist door bouwvoorschriften:
Constructiewerkzaamheden:
- Dragende muur aanpassingen
- Funderingswerkzaamheden voor isolatiesystemen
- Complexe kozijnverbouwingen
- Aanvragen bouwvergunningen
Mechanische systemen:
- Aanpassingen HVAC-systeem
- Elektrisch werk dat verder gaat dan alleen stopcontacten
- Verhuizingen van sanitair
- Integratie brandveiligheidssysteem
Gespecialiseerde installaties:
- Professionele akoestische deursystemen
- Complexe verlaagde plafondsystemen
- Geïntegreerde geluidsmaskeringssystemen
- Prestatietesten en certificering
Kostenvergelijking: Doe-het-zelf vs. professioneel
Doe-het-zelf-aanpak Voordelen:
- 40-60% kostenbesparing op arbeid
- Flexibele tijdlijn die bij jouw schema past
- Leerervaring en ontwikkeling van vaardigheden
- Volledige controle over kwaliteit en details
Voordelen van professionele installatie:
- Gegarandeerde prestaties en garanties
- Naleving van codes en afhandeling van vergunningen
- Snellere voltooiing met de juiste gereedschappen
- Ervaring met het vermijden van veelgemaakte fouten

Ik raad veel klanten een hybride aanpak aan: Doe het basiswerk zelf en huur professionals in voor gespecialiseerde taken waarvoor expertise of vergunningen nodig zijn.
Wat zijn echte geluidswerende toepassingen?
Succesvolle geluidsisolerende ruimtes variëren enorm afhankelijk van het beoogde gebruik, de bestaande omstandigheden en de budgetbeperkingen. Inzicht in veelvoorkomende scenario's helpt bij het stellen van realistische verwachtingen en het kiezen van geschikte strategieën voor uw specifieke situatie.
Home Theater in Afgewerkte Kelder
De uitdaging: Bestaande afgewerkte kelder verbouwen met betonnen muren, verlaagd plafond en aangrenzende bijkeuken.
Klantdoelen: Verminder de geluidsoverdracht naar slaapkamers boven als je 's avonds laat films kijkt.
Onze oplossing:
- Gericht op plafondisolatie met behulp van veerkrachtige kanalen
- Akoestische isolatie toegevoegd boven bestaand verlaagd plafond
- Geïnstalleerde akoestische deur met automatische deurbodem
- Alle HVAC-doorvoeringen afgedicht met akoestisch afdichtingsmiddel
Bereikte resultaten:
- 38 dB reductie in uitgezonden geluid
- Projectkosten: $4.200 (materialen en professioneel advies)
- Bouwtijd: 2 weekenden plus 3 avonden
- Klanttevredenheid: Overtrof verwachtingen
Lawaaibestrijding in appartementenslaapkamer
De uitdaging: Vermindering van verkeerslawaai in de slaapkamer van een appartement op de derde verdieping zonder structurele aanpassingen.
Klantdoelen: Verbeter de slaapkwaliteit met behoud van huurwaarborg en naleving van de huurovereenkomst.
Onze oplossing:
- Verwijderbare akoestische panelen met Command strips
- Zware akoestische gordijnen met afgedichte randen
- Upgrades voor deurrubbers en weerbestendige strips
- Systeem met witte ruis om resterende geluiden te maskeren
Bereikte resultaten:
- 22 dB vermindering van verkeerslawaai
- Projectkosten: $800 (volledig verwijderbaar)
- Installatietijd: Een weekend
- Bonus: Verbeterde kamerakoestiek voor videogesprekken
Home Opnamestudio in Garage
De uitdaging: Vrijstaande garage ombouwen tot opnameruimte met behoud van toegang voor voertuigen en conformiteit met de buurt.
Klantdoelen: Professioneel opnemen zonder buren of familie te storen.
Onze oplossing:
- Kamer-in-de-kamer constructie met veerkrachtig frame
- Akoestische deuren met zichtpanelen
- Gespecialiseerd HVAC-systeem met akoestische geluiddempers
- Zwevend vloersysteem over betonplaat
Bereikte resultaten:
- 52 dB isolatie van externe omgeving
- Projectkosten: $18.500 (volledige professionele bouw)
- Bouwtijd: 4 weken
- Bijkomend voordeel: hogere waarde van het onroerend goed
Elk project leert waardevolle lessen over het afstemmen van oplossingen op specifieke behoeften en beperkingen.
Welke veelgemaakte fouten moet je vermijden?
De duurste fouten bij geluidsisolatie zijn onvolledige afdichting, structurele geluidsbruggen en niet op elkaar afgestemde prestatieverwachtingen. Leren van veelvoorkomende fouten voorkomt kostbare reconstructie en teleurstellende resultaten.
Fouten in afdichting en luchtspleet
De fout: Assuming small gaps don’t matter for soundproofing performance.
Werkelijkheid: A 1% opening can reduce soundproofing effectiveness by 50%. I’ve seen $10,000 projects fail because of unsealed electrical outlets.
Preventiestrategieën:
- Gebruik akoestisch breeuwmiddel rond elke doorvoer
- Installeer akoestische elektriciteitskasten met afdichtingspakkingen
- Boven- en onderplaten van wandsystemen afdichten
- Controleer op gaten met rookpotloden of wierook
Structurele geluidsproblemen bij bruggen
De fout: Geluidswerende oppervlakken rechtstreeks op de bestaande structuur aansluiten.
Een echt voorbeeld: De klant bevestigde de nieuwe gipsplaat rechtstreeks op de bestaande balken, waardoor een direct pad voor de overdracht van trillingen ontstond dat 80% van de akoestische verbetering tenietdeed.
Preventiemethoden:
- Gebruik veerkrachtige kanalen of isolatieclips
- Handhaaf luchtspleten tussen nieuwe en bestaande oppervlakken
- Vermijd starre verbindingen tussen geïsoleerde assemblages
- Test verbindingen tijdens de bouw op ongewenst contact
Mismatches in prestatieverwachtingen
De fout: Verwachten dat oplossingen met één laag professionele resultaten opleveren.
Veelvoorkomend scenario: Akoestisch schuim op muren aanbrengen en 40 dB reductie verwachten. Schuim zorgt voor absorptie, niet voor isolatie.
Reality Check:
- Basisbehandelingen: 15-25 dB reductie
- Matige systemen: 25-40 dB reductie
- Professionele systemen: 40-65 dB reductie
- Elk vereist een steeds complexere constructie
Fouten bij materiaalselectie
De fout: Materialen kiezen op basis van marketingclaims in plaats van testgegevens.
Voorbeeld: "Geluidswerende verf" op de markt gebracht als complete oplossing. Werkelijkheid: 2-3 dB verbetering op zijn best.
Slimme selectiecriteria:
- Controleer onafhankelijke testgegevens (STC-classificaties)
- Materialen koppelen aan specifieke geluidsproblemen
- Houd rekening met prestaties en onderhoud op lange termijn
- Budget voor complete systemen, niet voor afzonderlijke producten

Ik onderhoud een database met storingsanalyses om klanten te helpen kostbare fouten van anderen te voorkomen.
Wat zijn de basisprincipes van geluidsisolatie?
Geluidsisolatie werkt volgens drie basisprincipes: massawet (zwaardere materialen houden meer geluid tegen), demping (materialen die trillingsenergie absorberen) en ontkoppeling (structurele isolatie om geluidsoverdracht te voorkomen). Inzicht in deze principes vormt een leidraad bij de keuze van materialen en constructiemethoden.
Massawet en materiaalselectie
De massawet zegt dat een verdubbeling van het materiaalgewicht de geluidsisolatie met ongeveer 6 dB verhoogt. Dit principe bepaalt mijn materiaalaanbevelingen voor verschillende toepassingen. Voor woonprojecten specificeer ik meestal materialen met een oppervlaktedichtheid tussen 10-20 kg/m², terwijl professionele studio's 25-40 kg/m² vereisen.
Veelgebruikte materialen die ik aanbeveel zijn onder andere:
- Akoestische gipsplaten: 15-20% dichter dan standaard gipsplaat
- Massa geladen vinyl (MLV): 1-2 kg/m² flexibele barrière
- Betonblokken: 150-200 kg/m² voor extreme isolatie
- Gespecialiseerde akoestische panelen: Ontworpen voor specifieke frequentiebereiken
Demping en trillingsregeling
Dempende materialen zetten geluidsenergie om in warmte, waardoor de overdracht wordt verminderd. Ik gebruik dempingssystemen met beperkte lagen waarbij visco-elastische materialen tussen harde lagen worden aangebracht. Green Glue compound, aangebracht tussen gipsplaten, biedt uitstekende dempingsprestaties.
The key is proper application thickness. Too little damping reduces effectiveness, while excess creates diminishing returns. I typically specify 1-2 tubes of damping compound per 4×8 sheet, creating optimal energy dissipation.
Ontkoppeling en structurele isolatie
Ontkoppeling voorkomt de overdracht van trillingen via structurele verbindingen. Dit omvat het creëren van fysieke openingen tussen oppervlakken met behulp van veerkrachtige kanalen, isolatieclips of volledige structurele scheiding. Het "kamer in een kamer" concept vertegenwoordigt de ultieme ontkoppeling.

Als je deze principes begrijpt, voorkom je veelgemaakte fouten en neem je effectieve ontwerpbeslissingen tijdens je hele project.
Welke bouwvaardigheden heb je nodig voor doe-het-zelf geluidsisolatie?
Voor succesvolle doe-het-zelf geluidsisolatie heb je basisvaardigheden nodig als timmerman, nauwkeurige meetvaardigheden en geduld voor gedetailleerd werk. De meeste huiseigenaren kunnen omgaan met isolatie- en afdichtingstaken, terwijl voor gipsplaten en skeletbouw enige bouwervaring nodig is.
Beoordeling van essentiële vaardigheden
Vaardigheden op beginnersniveau (iedereen kan het leren):
- Nauwkeurig meten met meetlint en waterpas
- Basis handgereedschap gebruiken (schroevendraaiers, hobbymes)
- Schriftelijke instructies en diagrammen volgen
- Veiligheidsbewustzijn met beschermende uitrusting
Intermediaire vaardigheden (enige ervaring is nuttig):
- Boormachinegebruik en bitselectie
- Snijden en installeren van gipsplaten
- De eigenschappen van bouwmaterialen begrijpen
- Problem-solving when plans don’t match reality
Gevorderde vaardigheden (aanzienlijke ervaring vereist):
- Raamwerk en structurele aanpassingen
- Elektrisch werk en naleving van de code
- Integratie HVAC-systeem
- Prestatie testen en problemen oplossen
Vereisten en kosten van gereedschap
Basisgereedschapsset ($200-400):
- Meetlint en waterpas van 4 meter
- Boormachine met bits
- Officemes en gipsplaatzaag
- Kitpistool en applicatiegereedschap
- Veiligheidsuitrusting (bril, stofmasker)
Gereedschapsset voor tussenschakels ($400-800):
- Cirkelzaag of verstekzaag
- Spijkerzoeker en laserwaterpas
- Hijsgereedschap voor gipsplaten
- Akoestische testapparatuur (geluidsmeter)
- Professioneel meetgereedschap
Huurgereedschap (indien nodig):
- Pneumatisch spijkerapparaat voor lijsten: $40-60/dag
- Gipsplaatlift: $35-50/dag
- Isolatieblazer: $30-45/dag
- Professioneel akoestisch testen: $100-200/dag
Leermiddelen en voorbereiding
Ik raad deze voorbereidende stappen aan voordat je begint:
- Online tutorials bekijken die specifiek zijn voor je geplande taken
- Oefenen op afvalmateriaal voordat je aan het echte project werkt
- De plaatselijke bouwverordeningen en vergunningsvereisten begrijpen
- Plan voor fouten en materiaalverspilling (voeg 10-15% toe aan bestellingen)
Een eerlijke beoordeling van vaardigheden voorkomt frustratie en zorgt voor een succesvol project. Raadpleeg bij twijfel professionals voor begeleiding of het voltooien van specifieke taken.
What’s the Optimal Construction Sequence?
De bouw van geluiddichte ruimtes volgt een specifieke volgorde: eerst de constructie, dan isolatie en barrières, gevolgd door afdichting en afwerking. De juiste volgorde voorkomt dubbel werk en zorgt voor optimale akoestische prestaties.
Fase 1: Planning en voorbereiding (week 1)
Dag 1-2: Ontwerpafronding
- Verifieer metingen en materiaalberekeningen
- Verkrijgen van bouwvergunningen indien nodig
- Leveringen van materiaal plannen
- Gereedschap huren of kopen
Dag 3-5: Voorbereiding van de locatie
- Verwijder bestaande afwerkingen en armaturen
- Ontbloot het frame voor inspectie
- Locaties van nutsvoorzieningen identificeren en markeren
- Werkgebied en veiligheidsuitrusting inrichten
Fase 2: Constructie- en ruwbouwwerkzaamheden (week 2)
Dag 1-3: Aanpassingen aan het frame
- Nieuw framewerk of veerkrachtige systemen installeren
- Rough-in elektrische en HVAC-aanpassingen
- Installeer de eerste laag gipsplaat als je meerdere lagen gebruikt
- Controleer of alle structurele verbindingen goed zijn geïsoleerd
Dag 4-5: Isolatie installeren
- Installeer akoestische isolatie in alle holtes
- Zorg voor volledige vulling zonder compressie
- Afdichten rond elektriciteitskasten en doorvoeren
- Inspecteer op spleten of installatiefouten
Fase 3: Installatie van barrières (week 3)
Dag 1-2: Demping en tweede barrières
- Breng dempingsmiddelen aan tussen lagen
- Installeer vinyl met massabelasting indien gespecificeerd
- Monteer de tweede laag gipsplaat met offset naden
- Zorg voor een goede isolatie van de structuur
Dag 3-5: Deuren en ramen
- Installeer akoestische deuren met goede afdichting
- Ramen vervangen of upgraden indien nodig
- Raam- en dorpelafdichtingen installeren
- Test de werking en pas aan indien nodig
Fase 4: Verzegelen en afwerken (week 4)
Dag 1-3: Akoestische afdichting
- Dicht alle voegen af met akoestisch breeuwmiddel
- Installeer akoestische elektriciteitskasten en -deksels
- Volledige HVAC-integratie en -afdichting
- Voer visuele inspectie uit op openingen
Dag 4-5: Testen en laatste aanpassingen
- Akoestische prestatietests uitvoeren
- Identificeer en corrigeer alle tekortkomingen
- Volledige binnenafwerking
- Documenteren van prestaties en garantie-informatie
Het volgen van deze volgorde voorkomt veelvoorkomende problemen en zorgt ervoor dat elke fase goed voortbouwt op het vorige werk.
Hoe ontwerp je een effectieve geluidsdichte kamerindeling?
Een effectief ontwerp van geluidsdichte ruimtes begint met het identificeren van geluidsbronnen, het bepalen van de vereiste isolatieniveaus en het maken van structurele plannen met strategieën voor massa, demping en ontkoppeling. Professioneel ontwerp volgt meestal "doos-in-doos" constructieprincipes.
Akoestische doelstellingen en prestatiedoelen
Voordat ik materialen selecteer, stel ik samen met klanten duidelijke prestatiedoelen vast. Opnamestudio's hebben meestal 50-70 dB isolatie nodig, terwijl thuisbioscopen 35-50 dB reductie nodig hebben. Deze doelstellingen beïnvloeden direct de constructiemethoden en materiaalspecificaties.
Ik gebruik het volgende classificatiesysteem:
- Basisisolatie (25-35 dB): Geschikt voor oefenruimtes
- Matige isolatie (35-50 dB): Thuisbioscopen, podcasting
- Hoge isolatie (50-65 dB): Professionele opname
- Extreme isolatie (65+ dB): Mastering suites, uitzending
Kamerlocatie en structurele analyse
De keuze van de ruimte heeft een grote invloed op de complexiteit en de kosten van de constructie. Ik geef de voorkeur aan binnenruimtes met minimale blootstelling aan buitenmuren, waardoor potentiële geluidslekken worden beperkt. Kelderruimten bieden natuurlijke massa van beton, terwijl bovenverdiepingen extra structurele overwegingen vereisen.
Kritische evaluatiepunten zijn onder andere:
- Bestaande muurconstructie: Frame vs. metselwerk
- Nabijheid HVAC-systeem: Geluidstransmissie van kanalen
- Elektrische doorvoeringen: Locaties stopcontacten en schakelaars
- Overwegingen met betrekking tot sanitair: Geluidstransmissie waterleiding
De structurele analyse bepaalt of bestaande muren extra massa kunnen dragen of dat er een nieuw frame nodig is. Dragende muren beperken de aanpassingsmogelijkheden, waardoor creatieve oplossingen zoals veerkrachtige montagesystemen nodig zijn.

Box-in-box constructie creëert een volledig geïsoleerde binnenstructuur binnen de bestaande ruimte. Deze methode bereikt maximale isolatie, maar vermindert de afmetingen van de ruimte met 6-12 inch per oppervlak. Voor klanten met beperkte ruimte raad ik een hybride aanpak aan die structurele isolatie combineert met hoogwaardige materialen.
Welke materialen en gereedschappen zijn essentieel voor geluidsdicht bouwen?
Essentiële materialen voor geluidsisolatie zijn akoestische isolatie, barrières met massabelasting, dempingscompounds en speciale bevestigingsmiddelen. Professionele installatie vereist precisiemeetgereedschap, geschikte snijapparatuur en veiligheidsuitrusting voor het hanteren van akoestische materialen.
Akoestische isolatie en opvulmaterialen
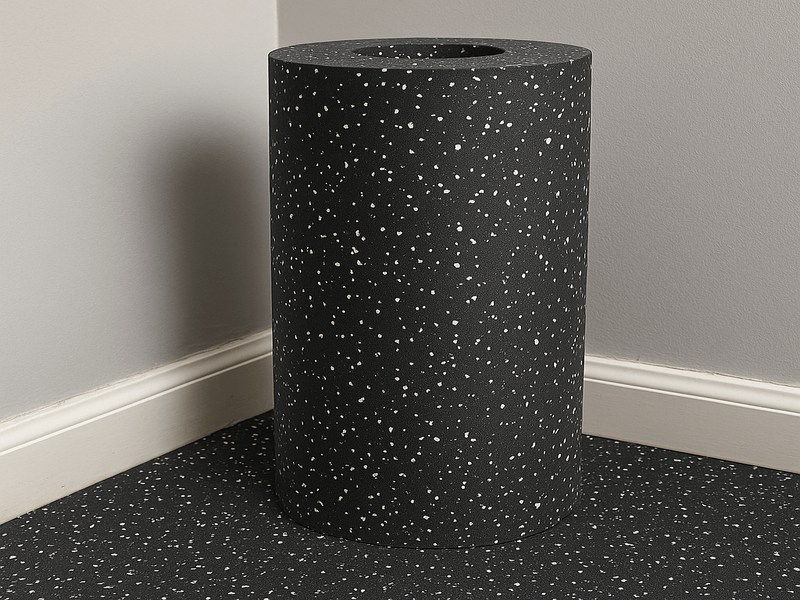
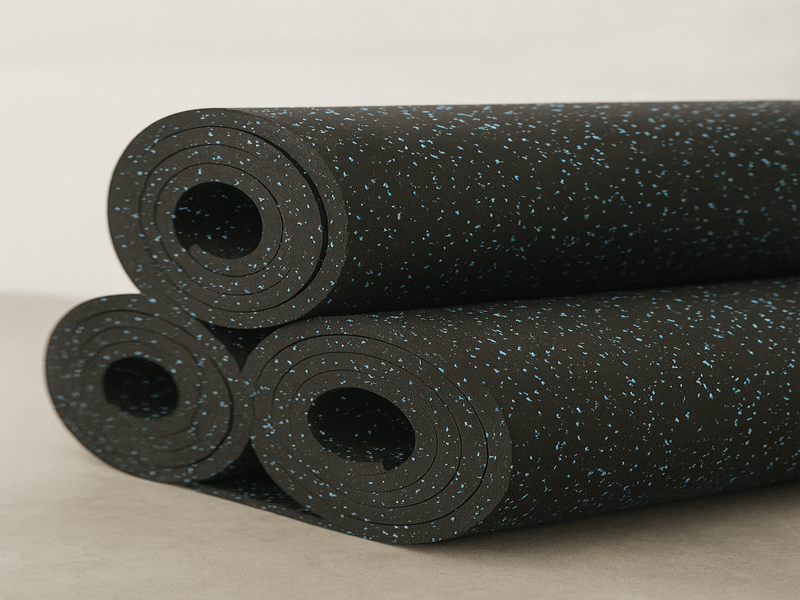
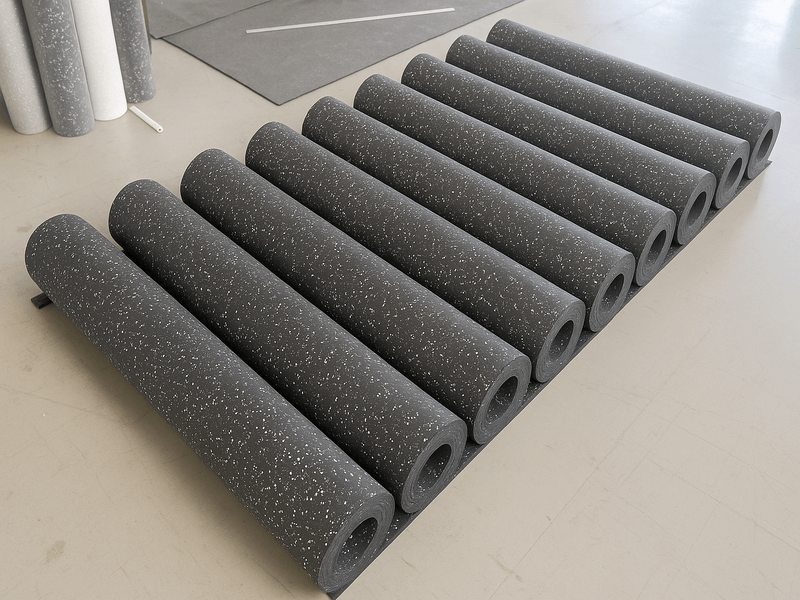
Akoestische isolatie verschilt aanzienlijk van thermische isolatie. Ik specificeer materialen met een optimale dichtheid voor geluidsabsorptie met behoud van luchtweerstand. Steenwol- en glasvezelisolatie leveren uitstekende akoestische prestaties als ze op de juiste manier worden geïnstalleerd.
Materiaalspecificaties die ik vaak gebruik:
- Rockwool Safe’n’Sound: 3,5" dikte, 2,5 lb/ft³ dichtheid
- Owens Corning 703: 2" dikte, 3 lb/ft³ dichtheid
- Isolatie van gerecycled denim: Milieuvriendelijke optie met goede prestaties
- Polyester akoestische isolatie: Niet-irriterend alternatief
Correcte installatie vereist volledige spouwvulling zonder compressie. Gecomprimeerde isolatie verliest akoestische prestaties door verminderde luchtspleten. Ik train installateurs om 95% spouwvulling te bereiken met behoud van de materiaalzolder.
Barrièrematerialen en oppervlaktebehandelingen
Massa-geladen vinyl (MLV) dient als flexibele geluidsbarrière, ideaal voor onregelmatige oppervlakken of tijdelijke installaties. MLV van professionele kwaliteit bevat geen lood en gebruikt bariumsulfaat of calciumcarbonaat als massa. Ik specificeer 1 lb/ft² MLV voor gemiddelde isolatie, 2 lb/ft² voor toepassingen met hoge prestaties.
Akoestische gipsplaten combineren gips met visco-elastische polymeren, waardoor de demping toeneemt terwijl de massa toeneemt. QuietRock en soortgelijke producten maken in veel toepassingen aparte dempingscompounds overbodig, waardoor de installatie wordt vereenvoudigd met behoud van de prestaties.
Gespecialiseerde bevestigingsmiddelen en montagesystemen
Veerkrachtige montagesystemen voorkomen de overdracht van trillingen via structurele verbindingen. Whisper Clips, RSIC clips en soortgelijke producten isoleren de gipsplaat van het frame en verminderen de geluidsoverdracht met 5-15 dB, afhankelijk van de toepassing.
Voor installatie zijn specifieke soorten bevestigingsmiddelen nodig:
- Zelfborende schroeven: Penetreert stalen studs zonder voorboren
- Akoestisch afdichtmiddel: Behoudt flexibiliteit, voorkomt barsten
- Isolatie ringen: Voorkom door de schroef overgebrachte trillingen
- Structurele lijmen: Ongelijke materialen effectief verlijmen
Kwaliteitsgereedschap garandeert een nauwkeurige installatie en professionele resultaten. Professioneel meetgereedschap, scherpe snijwerktuigen en de juiste veiligheidsuitrusting beschermen installateurs en zorgen voor optimale prestaties.
Hoe voer je professionele geluidsisolatie van vloeren uit?
Professionele geluidsisolatie van vloeren maakt gebruik van zwevende vloersystemen met akoestische onderlaag, isolatiematerialen en een goede randisolatie. Voor contactgeluid zijn andere strategieën nodig dan voor luchtgeluid, waarbij vaak meerdere materiaallagen worden gecombineerd.
Zwevende vloersystemen en isolatiemethoden
Zwevende vloeren ontkoppelen de afwerkvloer van de structurele ondervloer, waardoor de overdracht van contactgeluid wordt voorkomen. Ik ontwerp systemen met veerkrachtige ondervloermaterialen die samenpersen onder belasting met behoud van akoestische eigenschappen.
Mijn standaard zwevende vloersamenstelling omvat:
- Akoestisch ondertapijt: 3-6 mm dik schuim met gesloten cellen of rubber
- Vochtbarrière: Voorkomt degradatie van akoestisch materiaal
- Afwerking vloer: Parket, luxe vinyl of tapijt
- Randisolatie: Schuimrubberen strips die contact met de muur voorkomen
De sleutel is het behoud van volledige isolatie rond de omtrek van de ruimte. Elk direct contact tussen zwevende vloer en muren creëert geluidsbruggen, waardoor het systeem minder effectief wordt. Ik gebruik 1/4" schuimstrips langs alle randen, bedekt met plinten voor een afgewerkt uiterlijk.
Structurele ontkoppeling en trillingscontrole
Voor maximale isolatie raad ik structurele ontkoppeling aan met behulp van veerkrachtige gootsystemen of volledige isolatie van de ondervloer. Deze aanpak vermindert de overdracht van luchtgeluid en contactgeluid, ideaal voor gebouwen met meerdere verdiepingen of gevoelige toepassingen.
Geavanceerde systemen bevatten:
- Veerkrachtige pads: Structurele elementen ondersteunen en trillingen isoleren
- Zwevende ondervloer: Multiplex of OSB op verende steunen
- Dempende lagen: Structurele resonantie verminderen
- Luchtgaten: Extra akoestische barrière tussen verdiepingen
Installatie vereist nauwkeurige aandacht voor detail. Veerkrachtige materialen moeten de ontwerpbelastingen ondersteunen zonder uit te zakken, terwijl de akoestische prestaties gedurende de hele levensduur van het gebouw behouden moeten blijven.

Testen bevestigen de prestaties van het systeem voordat het definitief wordt geïnstalleerd. Ik gebruik botsproeven om de effectiviteit van isolatie te verifiëren en pas het systeem zo nodig aan om aan de projectspecificaties te voldoen.
Wat zijn de belangrijkste stappen bij het bouwen van geluidsisolerende muren?
Geluidsisolatie van muren bestaat uit het creëren van massabelaste, gedempte en ontkoppelde assemblages. Professionele installatie vereist nauwkeurig framewerk, de juiste plaatsing van isolatie, meerdere lagen gipsplaat met dempingscompound en zorgvuldige afdichting van alle doorvoeren.
Constructiesystemen en structurele overwegingen
De dubbelwandige constructie zorgt voor maximale isolatie door het elimineren van structurele verbindingen tussen ruimteoppervlakken. Ik plaats parallelle wanden 2-4 inches uit elkaar, met aparte boven- en onderplaten om trillingsoverdracht te voorkomen.
Alternatieve inlijstmethoden zijn onder andere:
- Verspringende stud-wanden: Afwisselende tapeinden tussen de platen, waardoor het contact wordt verminderd
- Veerkrachtige kanaalsystemen: Metalen kanalen isoleren de gipsplaat van het frame
- Isolatieclipsystemen: Veerbelaste clips zorgen voor superieure ontkoppeling
- Hat kanaal toepassingen: Secundair frame vermindert direct contact
Elke methode biedt verschillende prestatie- en kostenkenmerken. Dubbele wanden leveren de hoogste isolatie maar nemen de meeste ruimte in beslag. Veerkrachtige systemen leveren goede prestaties met minimaal ruimtebeslag.
Isolatie en spouwbehandeling
Voor een juiste installatie van isolatie moet de spouw volledig worden gevuld en moet samendrukking worden vermeden. Ik train installateurs om de isolatie met wrijving aan te brengen, zodat er contact is met alle oppervlakken zonder het materiaal overmatig aan te vullen.
Kritische installatiepunten zijn onder andere:
- Doorlopende dekking: Geen kieren of leemtes in de isolatie
- Juiste dichtheid: Behoudt akoestische eigenschappen zonder compressie
- Vochtbescherming: Dampschermen waar vereist door bouwvoorschriften
- Elektrische coördinatie: Isolatie rond stopcontacten en schakelaars
Akoestische isolatie werkt door het absorberen van geluidsenergie in de holtes van muren. Luchtspleten verminderen de prestaties, terwijl compressie de gunstige luchtspleten elimineert. Een juiste installatie zorgt voor optimale akoestische prestaties en voldoet aan de bouwvoorschriften.
Meerlaagse gipsplaten
Meerdere lagen gipsplaat met dempend materiaal creëren effectieve geluidsbarrières. Ik specificeer meestal twee lagen per kant, met dempingsmiddel tussen de platen en akoestische kit rondom.
Mijn standaard wandmontage omvat:
- Basislaag: 5/8" gipsplaat bevestigd aan frame
- Dempingscompound: Aangebracht in willekeurig patroon, 1-2 tubes per vel
- Eindlaag: 5/8" gipsplaat met offset naden
- Akoestisch afdichtmiddel: Alle randen en doorvoeren afgedicht
De dempingscompound moet op de juiste manier worden aangebracht voor optimale prestaties. Ik specificeer zigzagpatronen die 80% van het plaatoppervlak beslaan, waardoor een goede hechting mogelijk is met behoud van verwerkbaarheid.
Kwaliteitscontrole tijdens de installatie garandeert de prestaties van het systeem. Ik inspecteer elke laag voordat ik verder ga en controleer of het materiaal goed is aangebracht en afgedicht voor de uiteindelijke afwerking.
Hoe bereik je een effectieve geluidsisolatie van het plafond?
Voor geluidsisolatie van plafonds zijn verlaagde systemen nodig met akoestische isolatie, barrières die de massa belasten en structurele isolatie. Professionele installatie pakt zowel de overdracht van luchtgeluid als contactgeluid aan terwijl de structurele integriteit en de naleving van de bouwvoorschriften gehandhaafd blijven.
Verlaagde plafondsystemen en isolatiemethoden
Verlaagde plafonds creëren luchtspleten tussen het structurele plafond en het afgewerkte oppervlak, waardoor ruimte ontstaat voor akoestische materialen en tegelijkertijd toegang tot nutsvoorzieningen. Ik ontwerp systemen met veerkrachtige hangers die het verlaagde rooster isoleren van structurele elementen.
Standaard verlaagde plafondcomponenten omvatten:
- Veerkrachtige hangers: Isoleer het rooster van het structurele plafond
- Akoestische isolatie: Vult holle ruimte boven plafondtegels
- Massa belaste barrières: Extra blokkering boven tegels
- Verzegelde omtrek: Voorkomt flankerend geluid rond randen
De diepte van de luchtspleet beïnvloedt de akoestische prestaties. Diepere spouwen bieden plaats aan dikkere isolatie en zorgen voor een betere absorptie van lage frequenties. Ik specificeer meestal spleten van 6-12 inch, afhankelijk van de akoestische doelstellingen en de beschikbare ruimte.
Structurele plafondwijziging
Directe plafondbevestiging biedt ruimtebesparing, maar vereist een zorgvuldig ontwerp om geluidsoverdracht via structurele verbindingen te voorkomen. Ik gebruik veerkrachtige kanaalsystemen of isolatieclips om de gipsplaat los te koppelen van de plafondbalken.
Overwegingen bij de installatie zijn onder andere:
- Richting draagbalk: Kanalen installeren loodrecht op draagbalken
- Afstand bevestigingsmiddelen: Behoudt structurele integriteit terwijl het isolatie biedt
- Elektrische integratie: Uitgangen en armaturen vereisen speciale montage
- HVAC-coördinatie: Kanalen en registers moeten akoestisch worden behandeld
De juiste bevestiging voorkomt dat het systeem faalt terwijl de akoestische prestaties behouden blijven. Ik specificeer de juiste soorten bevestigingen en afstanden op basis van het gewicht van de gipsplaat en de seismische vereisten.
Integratie akoestische behandeling
Plafondoppervlakken hebben baat bij zowel geluidsisolatie als akoestische behandeling. Ik integreer absorberende materialen die de nagalm verminderen en tegelijkertijd geluid blokkeren.
Behandelingsopties zijn onder andere:
- Akoestische plafondtegels: Absorbeert geluid en ziet er afgewerkt uit
- Met stof omwikkelde panelen: Aangepaste kleuren en patronen voor esthetische integratie
- Geperforeerde metalen systemen: Duurzame optie voor commerciële toepassingen
- Geïntegreerde verlichting: Akoestische armaturen bieden zowel verlichting als behandeling

De combinatie van geluidsisolatie en akoestische behandeling creëert een optimale ruimteakoestiek. De juiste integratie zorgt voor zowel geluidsbeheersing als een aangename luisteromgeving.
Welke speciale overwegingen zijn van toepassing op deuren en ramen?
Voor geluidsisolatie van deuren en ramen zijn speciale producten nodig die zijn ontworpen voor akoestische prestaties. Professionele installatie houdt rekening met kozijnafdichting, drempeldetails en glasspecificaties terwijl de operationele functionaliteit en de naleving van de bouwvoorschriften behouden blijven.
Akoestische deursystemen en hardware
Akoestische deuren combineren massa, demping en afdichtingssystemen in geïntegreerde producten. Ik specificeer deuren met een akoestische beoordeling die overeenkomt met de prestaties van de wandmontage, waardoor een consistente geluidsisolatie in de hele ruimte wordt gegarandeerd.
Professionele akoestische deurfuncties zijn onder andere:
- Stevige kernconstructie: Elimineert holle ruimtes die geluid doorgeven
- Geïntegreerde afdichtingen: Automatische deurbodem en magnetische weerbestendigheid
- Akoestisch glas: Gelaagd glas met geluiddempende tussenlaag
- Zware hardware: Ondersteunt extra deurgewicht en afdichtingsdruk
De installatie van de deur vereist een nauwkeurige voorbereiding en afstelling van het frame. De deur moet rondom volledig afdichten en tegelijkertijd soepel werken. Ik specificeer deuren met een STC-waarde van 35-45 voor professionele toepassingen.
Oplossingen voor geluidsisolatie van ramen
Ramen zijn belangrijke zwakke punten in akoestische barrières. Ik raad gespecialiseerde akoestische ramen aan met gelaagd glas, geoptimaliseerde luchtruimten en akoestische afdichtingssystemen.
Raamspecificaties zijn onder andere:
- Gelaagd glas: PVB-tussenlaag zorgt voor demping en veiligheid
- Dikte van ongelijk glas: Vermindert het toevalseffect resonantie
- Akoestische beglazingsmassa: Dicht glas af op kozijn met akoestische eigenschappen
- Thermische onderbrekingen: Voorkom geluidsoverdracht door framematerialen
Voor bestaande ramen ontwerp ik secundaire raamsystemen die akoestische luchtspleten creëren. Deze systemen handhaven de bestaande ramen en zorgen tegelijkertijd voor een aanzienlijke akoestische verbetering.
Afdichting en weersbestendigheid
Volledige perimeterdichting voorkomt geluidslekkage rond deuren en ramen. Ik gebruik akoestische afdichtmiddelen die flexibel blijven en toch langdurige prestaties leveren.
Afdichtingslocaties zijn onder andere:
- Frame tot ruwe opening: Voorkomt flankerend geluid rond frames
- Raam tot kozijn: Weerstrip zorgt voor afdichting tijdens gebruik
- Beglazingssamenstelling: Dicht glas af op kozijn met akoestische eigenschappen
- Details drempel: Voorkomt geluidsoverdracht onder deuren

Regelmatig onderhoud zorgt voor blijvende akoestische prestaties. Ik voorzie klanten van inspectiechecklists en vervangingsschema's voor slijtageonderdelen zoals tochtstrips en deurafdichtingen.
Hoe pak je HVAC en elektrische penetraties aan?
HVAC- en elektriciteitsdoorvoeren vereisen speciale akoestische behandelingen, zoals geluiddempers, flexibele verbindingen en afgedichte doorvoermethoden. Professionele installatie zorgt ervoor dat het systeem goed blijft functioneren en voorkomt tegelijkertijd dat er geluid wordt doorgegeven via de doorgangen van de nutsvoorzieningen.
Akoestische behandeling HVAC-systeem
HVAC-systemen creëren geluidstransmissiepaden door toevoer- en retourkanalen. Ik ontwerp akoestische behandelingen zoals geluiddempers, flexibele verbindingen en akoestische kanaalbekleding die de luchtstroom in stand houden en tegelijkertijd de geluidsoverdracht verminderen.
Akoestische HVAC-componenten zijn onder andere:
- Geluiddempers: Absorberende baffles verminderen het doorgelaten geluid
- Flexibele verbindingen: Isoleer trillingen tussen apparatuur en kanalen
- Akoestische kanaalbekleding: Absorbeert geluid binnen kanaalsystemen
- Geluidsdempers: Verminder het geluid van de ventilator en apparatuur
De juiste dimensionering zorgt voor voldoende luchtstroom en tegelijkertijd voor akoestische prestaties. Ik bereken drukverliezen om de capaciteit van het HVAC-systeem te garanderen en tegelijkertijd te voldoen aan de akoestische doelstellingen.
Elektrische afdichting
Stopcontacten, schakelaars en armaturen creëren geluidslekken die speciale afdichtingsmethoden vereisen. Ik gebruik akoestische stopcontactdozen, afdichtingsmaterialen en back-to-back montagetechnieken die de elektrische veiligheid waarborgen en tegelijkertijd geluidsoverdracht voorkomen.
Afdichtingsmethoden zijn onder andere:
- Akoestische uitblaasdozen: Afgedichte elektriciteitskasten met geluidsabsorberende vulling
- Akoestische kit: Flexibele afdichtingskit rond elektrische doorvoeringen
- Rug-aan-rug montage: Voorkomt directe penetratie door akoestische barrières
- Verzegelde armatuurmontage: Inbouwspots en ventilatoren met akoestische afdichting
De installatie vereist coördinatie met elektriciens om te voldoen aan de voorschriften met behoud van de akoestische prestaties.

Testen controleert de prestaties van het systeem na installatie. Ik gebruik akoestische tests om eventuele resterende lekkagepaden te identificeren en indien nodig correcties aan te brengen.
Welke test- en kwaliteitscontrolemaatregelen garanderen succes?
Professionele geluidsisolatie vereist systematisch testen met gekalibreerde apparatuur om de akoestische prestaties te verifiëren. Kwaliteitscontrolemaatregelen omvatten materiaalinspectie, installatieverificatie en prestatietests die bevestigen dat aan de projectspecificaties is voldaan.
Akoestische testmethoden en apparatuur
Ik gebruik gekalibreerde geluidsniveaumeters en akoestische testapparatuur om de prestaties van geluidsisolatie te controleren. Het testen omvat zowel metingen van de geluidsoverdracht via de lucht als impactmetingen volgens gestandaardiseerde procedures.
Akoestische testmethoden en apparatuur
Ik gebruik gekalibreerde geluidsniveaumeters en akoestische testapparatuur om de prestaties van geluidsisolatie te controleren. Het testen omvat zowel metingen van de geluidsoverdracht via de lucht als impactmetingen volgens gestandaardiseerde procedures.
De testapparatuur omvat:
- Geluidsniveaumeters: Gekalibreerde instrumenten die voldoen aan de ANSI-normen
- Signaalgeneratoren: Testsignalen produceren voor akoestische metingen
- Microfoon arrays: Meerdere meetposities voor nauwkeurige resultaten
- Systemen voor gegevensregistratie: Testresultaten over langere perioden registreren en analyseren
Professionele testprocedures
Mijn testprotocol volgt de industrienormen om nauwkeurige, herhaalbare resultaten te garanderen:
Baseline testen vóór de bouw:
- Meet bestaande geluidsniveaus in alle frequentiebereiken
- Identificeer primaire geluidsbronnen en transmissiepaden
- Documenteer omgevingsomstandigheden en achtergrondgeluid
- Prestatiedoelen vaststellen op basis van beoogd gebruik
Verificatie tijdens de bouw:
- Test elke bouwfase op tussentijdse prestaties
- Controleer de juiste installatie van het materiaal en de afdichtingseffectiviteit
- Problemen identificeren en corrigeren vóór de eindassemblage
- Conformiteit met ontwerpspecificaties documenteren
Definitieve prestatiecertificering:
- Comprehensive testing across full frequency spectrum (125 Hz – 4000 Hz)
- Meerdere meetposities om consistente prestaties te verifiëren
- Botsproeven voor vloersystemen en structurele isolatie
- Documentatiepakket met prestatiecertificaten
Testnormen en meetmethoden
Ik volg vastgestelde testnormen die zorgen voor betrouwbare, vergelijkbare resultaten:
- ASTM E90: Standaard testmethode voor laboratoriummetingen van geluidsoverdracht via de lucht
- ASTM E492: Standaard testmethode voor laboratoriummetingen van de overdracht van contactgeluid
- ISO 717: Beoordeling van geluidsisolatie in gebouwen en bouwelementen
- ASTM E336: Standaard testmethode voor het meten van luchtgeluiddemping tussen ruimtes
Procedures voor veldproeven:
Testen in voltooide ruimtes vereist een andere aanpak dan laboratoriumomstandigheden. Ik gebruik gestandaardiseerde veldtestmethoden die rekening houden met echte variabelen zoals flankerende transmissie, HVAC-geluid en variaties in de constructie.
Frequentieanalyse:
Verschillende frequenties vereisen verschillende behandelingsmethoden. Lage frequenties (onder 250 Hz) zijn het moeilijkst te beheersen en vereisen massa en structurele isolatie. Hoge frequenties (boven 1000 Hz) reageren goed op absorptie- en afdichtingsbehandelingen.
Documentatie kwaliteitscontrole
Elk project krijgt uitgebreide documentatie, inclusief:
- Resultaten prestatietest: Gemeten vs. ontworpen prestaties
- Materiaalcertificaten: Verificatie van gespecificeerde producten
- Installatiefoto's: Documentatie van de juiste constructiemethoden
- Garantie-informatie: Dekking voor materiaal en vakmanschap
Deze documentatie levert het bewijs van de prestaties en ondersteunt garantieclaims als er problemen optreden. Ik lever ook onderhoudsschema's en inspectiechecklists om de akoestische prestaties op de lange termijn te handhaven.
Regelmatige kalibratie van testapparatuur zorgt voor nauwkeurige metingen gedurende de hele levenscyclus van het project. Ik houd certificeringsgegevens bij en volg de aanbevelingen van de fabrikant voor onderhouds- en kalibratieschema's voor apparatuur.
Conclusie
Het bouwen van een effectieve geluidsdichte ruimte vereist een systematische toepassing van massa, demping en ontkoppelingsprincipes in combinatie met nauwgezette aandacht voor constructiedetails, realistische budgetplanning en grondige prestatietests om uw specifieke akoestische doelen te bereiken.
Klaar om je project voor een geluiddichte kamer te starten? Don’t let noise compromise your comfort, productivity, or creativity any longer. Contact our team today for a free consultation and material samples. We’ll help you design and build the perfect acoustic space for your specific needs and budget.
Vraag vandaag nog een gratis adviesgesprek aan:
- Deskundige projectbeoordeling en het stellen van prestatiedoelen
- Gedetailleerde kostenramingen zonder verborgen verrassingen
- Professionele materiaalmonsters om te testen in uw ruimte
- Volledige ondersteuning van planning tot en met uiteindelijke tests
Our experienced professionals provide complete support from initial planning through final testing and verification. We’ll work with your budget and timeline to deliver the acoustic performance you need, whether it’s a weekend DIY project or a complete professional build.
Neem nu contact met ons op – Your peaceful, productive space is just one call away. Let’s turn your noise problems into acoustic solutions that exceed your expectations.