Om kieren in in elkaar grijpende rubber vloertegels te repareren, moet u eerst de grootte van de kier vaststellen: voor kleine kieren (1-3 mm) volstaat een eenvoudige schoonmaakbeurt en een tik met een rubberen hamer. Voor middelgrote kieren (3-8 mm) moet u waarschijnlijk de hele rij van de muur verschuiven. Als de kieren blijven bestaan, breng dan dubbelzijdige vloertape aan voor een semi-permanente fixatie of polyurethaanlijm voor een permanente hechting.
Kijk, ik heb jarenlang deze tegels in de fabriek ontworpen en ik zal je een geheim vertellen: rubber "leeft". Het zet uit, het krimpt en het reageert op elke zware voetstap. Als je een gat ziet, is dat niet alleen een doorn in het oog - het is een teken dat de wrijving tussen je vloer en de tegel de strijd heeft verloren. De meeste mensen maken de fout om de tegel gewoon terug te schoppen en er het beste van te hopen. Maar als er een klein steentje of een laagje stof vastzit in die in elkaar grijpende "tand", zal hij nooit dicht blijven zitten. Ik zal je laten zien hoe je dit als een professional kunt oplossen, zodat je niet elke zaterdagochtend achter de gaten aan hoeft.
Voordat je je gereedschap pakt, moet je precies weten met wat voor "kiermonster" je te maken hebt. Niet elk gat wordt op dezelfde manier gerepareerd.
De snelle reactiematrix: Welke oplossing heb je nodig?
Bepaal de ernst van de spleet voordat je actie onderneemt: Kleine spleten (1-3 mm) zijn meestal slechts kleine verschuivingen - maak ze schoon en tik ze terug. Middelgrote kieren (3-8 mm) betekenen dat een hele rij is verschoven, dus je moet de spanning van de buitenmuur opnieuw instellen. Als er steeds gaten op dezelfde plek terugkomen, heb je "wrijvingshulp" nodig zoals vloertape. Maar als de puzzeltanden fysiek verbrijzeld zijn, is de enige veilige oplossing een volledige vervanging van de tegels.
Mijn ervaring met druk belopen sportschoolvloeren is dat mensen dit vaak te ingewikkeld maken. Ze denken dat ze de hele vloer moeten vastlijmen. Doe dat alstublieft niet. Je zult er spijt van krijgen op de dag dat je één beschadigde tegel moet vervangen. Gebruik in plaats daarvan mijn "graduele oplossing". Begin met de makkelijkste oplossing en ga pas agressief te werk als de opening weigert dicht te blijven. Zie het als een puzzel: als u de stukjes forceert wanneer er rommel in de weg zit, breekt u de lipjes en dan is de tegel in feite afval.
De snelle reparatietabel
| Wat je ziet | Wat er werkelijk gebeurt | De professionele oplossing | Gereedschap dat je nodig hebt |
|---|---|---|---|
| Klein gat (1-3 mm) | Lichte migratie of opbouw van stof | Maak de naad schoon + Tik met hamer | Rubberen hamer |
| Middelgrote opening (3-8 mm) | De hele rij is "gelopen". | Resetten van de omtrek (tegen de muur duwen) | Koevoet + je laarzen |
| De "Zombie"-kloof | Geen grip op de ondervloer | Semi-permanente stabilisatie | Dubbelzijdige tape |
| Gescheurde of golvende tanden | Mechanisch defect / Hitteschade | Vervang de tegel volledig | Hobbymes + nieuwe tegel |
Een waarschuwing: soms kan je "oplossing" een perfect goede vloer verpesten als je niet weet wanneer je moet stoppen.
De "rode vlaggen": Wanneer afluisteren het erger maakt
Blijf niet hameren als de in elkaar grijpende lipjes er opgekauwd, uitgerekt of wit uitzien aan de basis. Als je ondervloer bobbelig is of dips heeft dieper dan 3 mm, zal geen enkele hoeveelheid kloppen de opening repareren omdat de tegel uit elkaar wordt getrokken door de zwaartekracht. Als uw sportschool ijskoud is, is het rubber bovendien gekrompen; als u het rubber nu vastdraait, zal de vloer "bergen" of knikken als het weer warmer wordt.
Ik heb veel eigenaren gezien die hun vloer met een zware voorhamer te lijf gingen en tot de ontdekking kwamen dat ze de precisievertanding, waar we in de fabriek zo hard aan hebben gewerkt, hadden afgevlakt. Als de tegel "verend" aanvoelt en steeds terugkaatst naar een opening, stop dan en controleer of u oorspronkelijk de juiste tegels hebt gebruikt. de optimale in elkaar grijpende sportschoolmatten geselecteerd. Controleer de vloer eronder. Is er een holle plek? Is het beton bedekt met stof? Rubber heeft wrijving nodig om goed te blijven liggen. Als de ondervloer bedekt is met gipsplaatstof van een recente renovatie, dan lopen je tegels in feite op schaatsen. Repareer de ondervloer en repareer daarna de tussenruimte.
4 tekenen dat je de hamer moet laten zakken
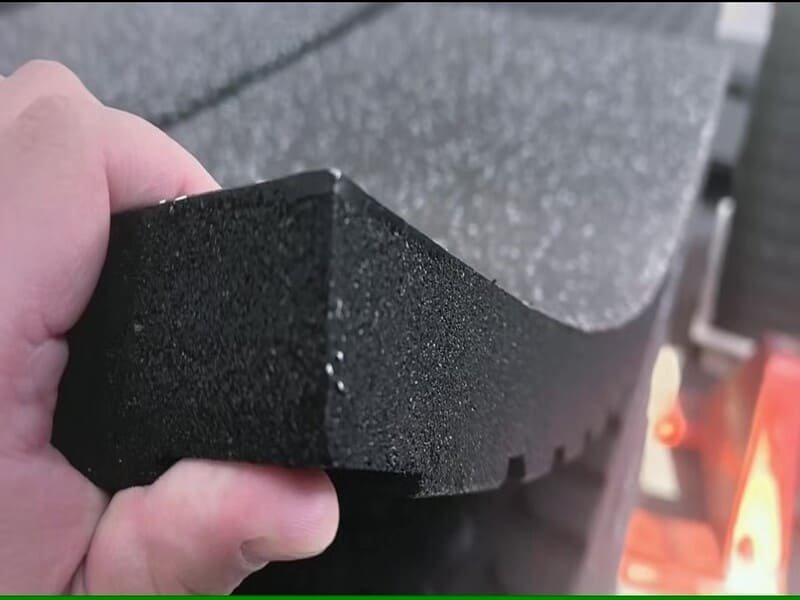
- De "tand" is versnipperd: Als het vergrendelingslipje aan een draadje hangt, is de mechanische vergrendeling weg. Vervang het.
- De "Rollercoaster"-vloer: Als de ondervloer niet vlak is, zullen de tegels nooit aan elkaar blijven zitten.
- De U-vormige krul: Als de randen omkrullen, is de tegel beschadigd door vocht of chemicaliën.
- Oude lijmkorst: Als er opgedroogde lijm in de naden zit, ben je gewoon rommel in het slot aan het rammen.
Een van de meest voorkomende discussies die ik hoor is of je lijm, tape of gewoon hoop moet gebruiken. Laten we dat nu regelen.
Tijdelijk vs. Permanent: Aan welke moet je je verbinden?
Een tijdelijke oplossing (schoonmaken en kloppen) is prima voor thuisgymzalen met licht verkeer. Een semi-permanente oplossing met dubbelzijdige vloerplakband voor zwaar gebruik is mijn "keuze voor ingenieurs" - hiermee stop je het schuiven maar kun je de tegels later nog verplaatsen. Permanente polyurethaanlijm (PU) is voor "oorlogsgebieden" zoals commerciële HIIT-ruimtes, maar onthoud: als het er eenmaal op ligt, is die tegel een permanent onderdeel van het gebouw.
In mijn eigen garage gebruik ik altijd de tapemethode. Waarom? Omdat ik over twee jaar misschien een plank wil verplaatsen of de indeling wil veranderen. Als je permanente lijm gebruikt, ben je met die vloer getrouwd. Als je besluit om lijm te gebruiken, doe dat dan alleen ter plekke - een klein beetje lijm op de hoeken is genoeg. Dit geeft het rubber net genoeg ruimte om uit te zetten en samen te trekken met de seizoenen zonder dat de naden openscheuren tijdens een hittegolf.
Welke Fix past bij jouw gebruik?
| Type bevestiging | Het beste voor... | De "Vangst |
|---|
Voor zones die meer flexibiliteit nodig hebben dan rubber, vergelijken sommige faciliteiten ook het met elkaar verbinden kunstmatige grastegels voor gymnastiek bij het plannen van modulaire trainingsgebieden.
| Vloer Tape | Je moet de tegel optillen om hem aan te brengen. |
| Puntlijm | Het is moeilijk te verwijderen en vernielt de ondervloer. |
In de loop der jaren heb ik alle vragen uit het boekje gehoord. Laten we het hebben over de "echte wereld" waar sportschoolhouders 's nachts wakker van liggen.
Echte gesprekken: De veelgestelde vragen die mensen me echt stellen
Kloven "genezen" zelden vanzelf; ze worden meestal erger naarmate er meer vuil in vast komt te zitten. Hoewel je niet de hele vloer moet lijmen (hij moet ademen!), moet je "krachtzones" met een hoge impact absoluut stabiliseren. Als je in een garage staat, zijn de hitte van je autobanden en de torsie van het draaien aan het stuur de ergste vijanden van je vloer.
Mensen vragen vaak: "Kan ik niet gewoon wat zwarte kit in de kier smeren?". Technisch gezien kan dat, maar het ziet er vreselijk uit en voorkomt niet dat de tegels verschuiven. Het is een pleister op een gebroken been. Nog een grote: "Moet ik echt acclimatiseren?" JA. Als u tegels uit een koude vrachtwagen haalt en ze in een warme kamer legt, zullen ze gaan groeien. Geef ze 48 uur de tijd om te "ontspannen" in hun nieuwe thuis voordat je ze aan elkaar vastmaakt.
Het spiekbriefje voor ingenieurs
- Superlijm? Nooit. Het is te stijf; rubber moet kunnen buigen anders breekt de verbinding.
- Wintergaten? In de zomer sluiten ze misschien een beetje, maar het vuil binnenin verhindert een perfecte pasvorm. Maak ze nu schoon.
- Garage? Autobanden creëren "torsiestress". Je moet tape of lijm gebruiken op de parkeerplekken.
- Gladde tegels? Als je vloer glijdt, is je ondervloer waarschijnlijk vuil. Dweil het beton voordat je de vloer opnieuw legt.
Conclusie
Kleine openingen? Schoonmaken en tikken. Terugkerende kieren? Gebruik plakband of puntlijm. Als de lipjes gescheurd zijn, vervangt u gewoon de tegel. Het allerbelangrijkste is dat u uw tegels 48 uur de tijd geeft om te acclimatiseren voordat u ze plaatst, om 90% van deze problemen te voorkomen.
Heb je een professioneel oog nodig voor je vloerproject?
Als je genoeg hebt van het najagen van hiaten of als je een grootschalige commerciële installatie plant en het in één keer goed wilt doen, privébericht vandaag. Als productie-ingenieur kan ik je helpen om je ondervloer te evalueren en de beste stabilisatiemethode te kiezen voor jouw specifieke omgeving.