Ja, rubberen sportschooltegels zijn een uitstekende keuze vanwege hun superieure duurzaamheid, veiligheid en schokabsorptie. Ze beschermen de ondervloer tegen vallende gewichten, verminderen het geluid en bieden een stabiel, antislip oppervlak, waardoor ze een eersteklas investering zijn voor elke serieuze thuis- of commerciële sportschool.
Als manager kwaliteitscontrole in de rubbervloerenindustrie heb ik uit eerste hand gezien wat het verschil is tussen een goed presterende sportschoolvloer en een vloer die het laat afweten. De belangrijkste functie van rubber is het beheersen van energie - de impact van een vallende halter, de kracht van een plyometrische sprong of de constante druk van een zwaar squatrek. Ons kwaliteitscontroleproces omvat strenge tests. We gebruiken durometertests om de hardheid te controleren, zodat we zeker weten dat de tegels niet indeuken onder belasting. We testen hun treksterkte om er zeker van te zijn dat ze niet scheuren. Het belangrijkste is dat we de schokabsorptie meten om te bevestigen dat ze de betonnen ondervloer beschermen. Deze combinatie van veerkracht en veiligheid is de reden waarom rubber het consequent beter doet dan andere opties zoals schuim, dat samenperst en degradeert, of kaal beton, dat geen bescherming biedt.
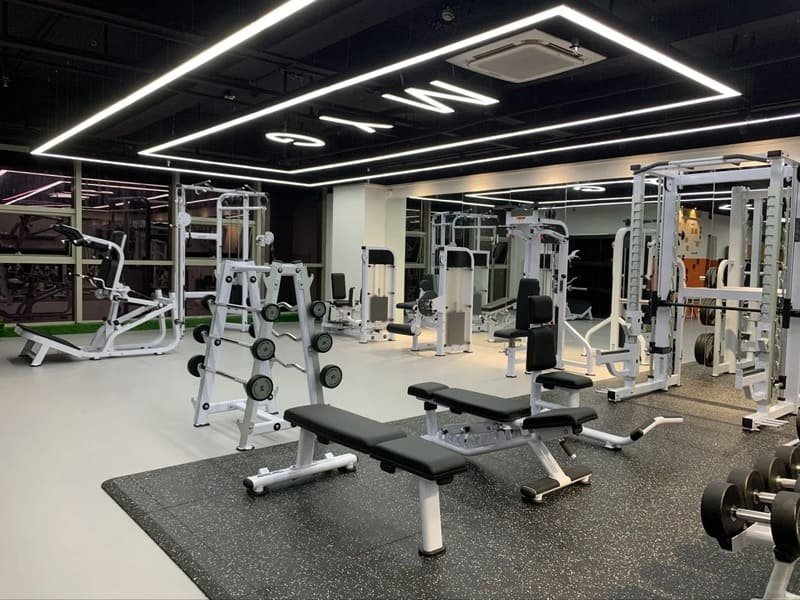
De juiste vloer kiezen is een fundamentele beslissing voor elke sportschool. Het heeft directe gevolgen voor je veiligheid tijdens het trainen, de levensduur van je dure apparatuur en zelfs de structurele integriteit van je gebouw. Laten we de details bekijken zodat je een weloverwogen keuze kunt maken.
Hoe kies ik de juiste dikte voor mijn workouts?
De dikte van de tegels moet overeenkomen met uw primaire activiteiten. Dikkere tegels bieden meer schokdemping voor zwaar gewichtheffen, terwijl dunnere tegels volstaan voor algemene fitness en cardiozones. Dit is de meest cruciale beslissing die u zult nemen.
Vanuit het oogpunt van kwaliteitscontrole houdt de dikte rechtstreeks verband met de dissipatie van de impactkracht. Een dikkere tegel heeft meer materiaal om de energie van een vallend gewicht te absorberen en te verdelen, zodat de kracht de betonnen ondervloer niet kan scheuren.
| Soort activiteit | Aanbevolen dikte | Beschermingsniveau |
|---|---|---|
| Yoga, Lichaamsgewicht, Lichte cardio | 6-8 mm | Laag |
| Fitnessruimte voor algemeen gebruik, gemiddelde gewichten | 3/8" (10mm) | Goed |
| CrossFit, Olympisch tillen | 1/2" (12mm) | Beter |
| Powerlifting, speciale deadliftgebieden | 3/4" (20mm+) | Maximaal |
Algemene fitness en cardio
Voor ruimtes met loopbanden, elliptische toestellen of waar je lichaamsgewichtoefeningen doet en lichte halters gebruikt, volstaat een dunnere tegel van 8 mm. Hier is het belangrijkste doel een stabiel, antislip oppervlak dat gemakkelijk schoon te maken is en meer comfort biedt dan kaal beton. De impactkrachten zijn minimaal, dus maximale schokabsorptie is niet de prioriteit. In onze tests zorgen we ervoor dat deze dunnere tegels nog steeds een hoge dichtheid hebben om te voorkomen dat poten van apparatuur wegzakken en permanente inkepingen veroorzaken.
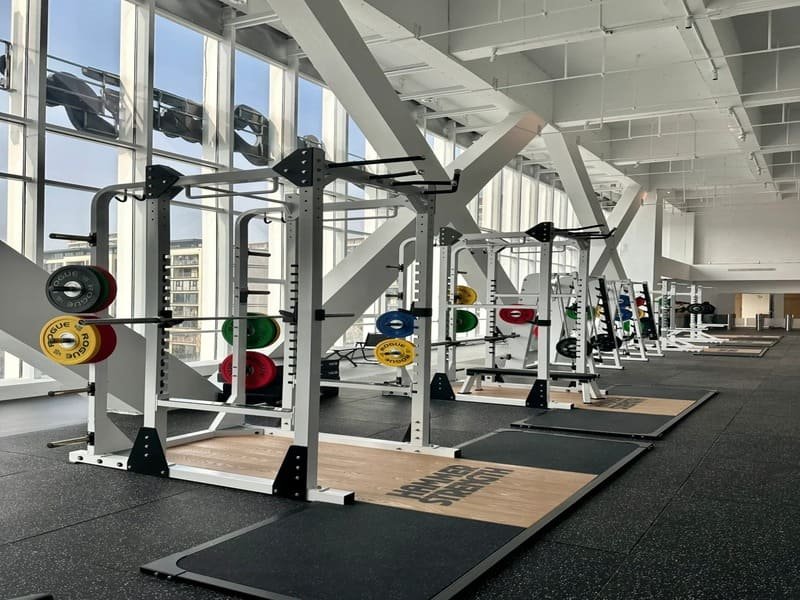
Zwaar gewichtheffen en vallen
Dit is waar de dikte ononderhandelbaar wordt. Voor ruimtes gewijd aan deadliften, olympisch gewichtheffen of CrossFit heb je minimaal 12 mm nodig, waarbij 20 mm of meer de professionele standaard is. Wanneer een 200 lb halterstang valt, kan de kracht enorm zijn. Een dikke rubberen tegel met een hoge dichtheid absorbeert deze impact. Ons kwaliteitsgarantieproces voor deze eersteklas tegels bestaat uit "valtests", waarbij we herhaaldelijk zware gewichten van een vaste hoogte laten vallen om er zeker van te zijn dat de tegel niet barst en dat de kracht die wordt overgebracht op de sensor eronder onder de drempel blijft die beton zou beschadigen.

Nu je weet hoe je de juiste dikte kiest, is de volgende praktische overweging hoe je de vloer in je ruimte krijgt en hoe je hem in elkaar zet.
Zijn rubberen sportschooltegels moeilijk te installeren?
Nee, in elkaar grijpende rubberen tegels zijn ontworpen voor eenvoudige doe-het-zelf-installatie. Ze hebben geen lijm nodig en sluiten als puzzelstukjes op elkaar aan, waardoor elke sportschoolhouder ze eenvoudig zelf kan leggen. Rollen zijn echter veel moeilijker.
Het gemak waarmee in elkaar grijpende tegels kunnen worden geïnstalleerd is een belangrijk ontwerpeigenschap die we controleren. Het vergrendelingsmechanisme moet nauwkeurig zijn. Tijdens een productierun trek ik monsters om de toleranties van de vergrendelingslipjes te controleren. Als ze te strak zitten, kunnen ze niet worden aangesloten. Als ze te los zitten, kunnen ze tijdens het gebruik verschuiven en uit elkaar trekken, wat een ernstig struikelgevaar oplevert.
| Stap | Belangrijkste actie | QC Tip |
|---|---|---|
| 1. Bereid voor. | Zorg ervoor dat de ondervloer schoon, droog en vlak is. | Een ongelijke ondervloer is de #1 oorzaak van loslatende tegels. |
| 2. Acclimatiseren | Laat de tegels 24-48 uur in de kamer liggen. | Dit voorkomt uitzettings- en krimpproblemen na de installatie. |
| 3. Indeling | Begin in het midden van de kamer en werk naar buiten toe. | Dit zorgt ervoor dat de sneden tegen de muur aan beide kanten gelijk zijn. |
| 4. Installeer | Verbind de tegels met elkaar en gebruik een rubberen hamer om ze vast te tikken. | Gebruik geen metalen hamer, want die kan de randen beschadigen. |
Voorbereiding van de ondervloer
Je moet beginnen met een solide basis. De ondervloer moet schoon, droog en vlak zijn. U kunt rubbertegels rechtstreeks op beton, hout of keramische tegels leggen, maar nooit op tapijt. Installeren over tapijt is een veelgemaakte fout; de vulling eronder is te zacht en de tegels zullen verschuiven en loskomen.
Waarom acclimatisering cruciaal is
Rubber zet, net als elk ander materiaal, uit en krimpt bij veranderingen in temperatuur en vochtigheid. Door de tegels een dag of twee in de kamer te laten liggen, kunnen ze zich aanpassen aan de omgeving. voor je ze aan elkaar vastmaakt. Als u deze stap overslaat, kan de vloer later gaan knikken of kunnen er kieren ontstaan tussen de tegels. Dit is geen productdefect; het is een bekende materiaaleigenschap die een eenvoudige, maar cruciale installatiestap vereist.

Als je vloer eenmaal ligt, wil je weten hoe je hem goed moet onderhouden om ervoor te zorgen dat hij jarenlang meegaat.
Hoe maak ik rubbertegels schoon en gaan ze stinken?
Schoonmaken is eenvoudig: regelmatig vegen of stofzuigen en vochtig dweilen met een pH-neutraal schoonmaakmiddel. Een tijdelijke geur van gerecycled rubber is normaal en verdwijnt met goede ventilatie en een paar eerste schoonmaakbeurten.
De geur die sommige mensen ruiken, komt door de uitgassing van bindmiddelen die worden gebruikt bij de productie van gerecyclede rubbertegels. Als QC manager specificeren we bindmiddelen met een laag VOC-gehalte (vluchtige organische verbindingen) om dit tot een minimum te beperken. We laten de tegels ook uitharden in een goed geventileerde ruimte voordat ze worden verpakt. Toch kan er een vage geur achterblijven, maar die is niet schadelijk en verdwijnt vanzelf.
| Schoonmaken | Schoonmaken |
|---|---|
| Gebruik een pH-neutrale reinigingsoplossing. | Gebruik geen zure reinigers of ontvetters. |
| Gebruik een vochtige mop, geen drijfnatte. | Gebruik buitensporige hoeveelheden water. |
| Ventileer de ruimte na het schoonmaken. | Gebruik agressieve oplosmiddelen zoals aceton. |
Juiste reiniging beschermt het materiaal
De reden waarom we zo specifiek zijn over het gebruik van een pH-neutraal reinigingsmiddel is technisch. Gerecyclede rubbertegels zijn gemaakt van rubbergranulaat dat bijeengehouden wordt door een bindmiddel van polyurethaan. Harde reinigers, reinigers met oplosmiddelen of zure reinigers kunnen dit bindmiddel na verloop van tijd aantasten en afbreken. Hierdoor wordt het oppervlak broos en laten de korrels los. Een eenvoudig mengsel van milde zeep en water is alles wat je nodig hebt om je vloer in topconditie te houden zonder de structurele integriteit aan te tasten.
Rubbergeur aanpakken
Als je gevoelig bent voor de eerste geur, zijn er een paar eenvoudige stappen om de geur sneller te laten verdwijnen. Ten eerste, zorg ervoor dat de kamer de eerste twee weken een goede luchtstroom heeft. Ten tweede, dweil de vloer een paar keer met je neutrale schoonmaakmiddel. Dit helpt bij het verwijderen van achtergebleven stoffen van de fabricageschimmels en versnelt het ontgassingsproces. Bij de meeste mensen is de geur binnen een paar weken verdwenen.

Nu we de praktische aspecten van selectie en onderhoud hebben behandeld, gaan we in op een van de meest voorkomende veiligheids- en milieuvragen die we van klanten krijgen.
Kan schimmel onder rubbertegels groeien?
Nee, het rubber zelf is niet poreus en schimmelbestendig. Schimmelgroei wordt veroorzaakt door reeds bestaande vochtproblemen in de ondervloer, zoals in een vochtige kelder. Een dampscherm onder de tegels is de juiste manier om dit te voorkomen.
Dit is een kwestie van omgeving, niet van materiaal. Ik heb talloze garantieclaims geïnspecteerd en in alle gevallen waarin er sprake was van schimmel, was de hoofdoorzaak vocht dat door de betonplaat omhoog kwam en vast kwam te zitten. De rubberen tegel veroorzaakte het vocht niet; het voorkwam alleen dat het verdampte.
| Toestand ondervloer | Risico op schimmel | Oplossing |
|---|---|---|
| Droge kamer op de bovenverdieping | Zeer laag | Geen actie nodig. |
| Ondergrondse kelder | Hoog | Een dampscherm is vereist. |
| Gebied met bekende lekken | Zeer hoog | Het lek repareren voor het installeren van een vloerbedekking. |
De ondervloer is de bron
Schimmel heeft vocht en een organische voedselbron (zoals stof of vuil op de ondervloer) nodig om te groeien. Rubber is anorganisch en biedt geen voedsel voor schimmels. Beton is echter poreus en kan vocht uit de grond opnemen. Als je een ondoordringbare vloer zoals rubber rechtstreeks op een vochtige betonplaat legt, houd je dat vocht vast. Dit creëert de perfecte donkere, vochtige omgeving voor schimmel om op het beton te groeien.
De oplossing voor dampschermen
De oplossing is eenvoudig en goedkoop: een dampscherm. Dit is een vel polyethyleenplastic van 6 mm dat je op het beton legt voordat je je rubberen tegels installeert. Het creëert een ondoordringbare laag die fysiek verhindert dat vochtdamp opstijgt en vast komt te zitten onder je vloer. Bij elke installatie in een kelder of op een betonnen plaat beschouw ik een dampscherm als een verplichte stap voor kwaliteitsgarantie. Het garandeert het succes van het vloersysteem op lange termijn.

Als je al deze factoren in overweging neemt, kun je een definitieve beslissing nemen.
Conclusie
Rubber sportschooltegels zijn een duurzame, veilige en beschermende investering. Als je de juiste dikte kiest en zorgt voor een goede voorbereiding van de ondervloer, krijg je gegarandeerd een vloer met hoge prestaties die jarenlang meegaat.
Klaar om een betere fitnessruimte vanaf de grond op te bouwen? De duurzaamheid en veiligheid van rubber tegels zijn een bewezen investering voor elke fitnessruimte. Als je vragen hebt over je project of hulp nodig hebt bij het kiezen van de juiste dikte, staan onze vloerexperts klaar om je te helpen. Neem vandaag nog contact op met ons team voor een persoonlijke offerte of om een gratis staal aan te vragen.