


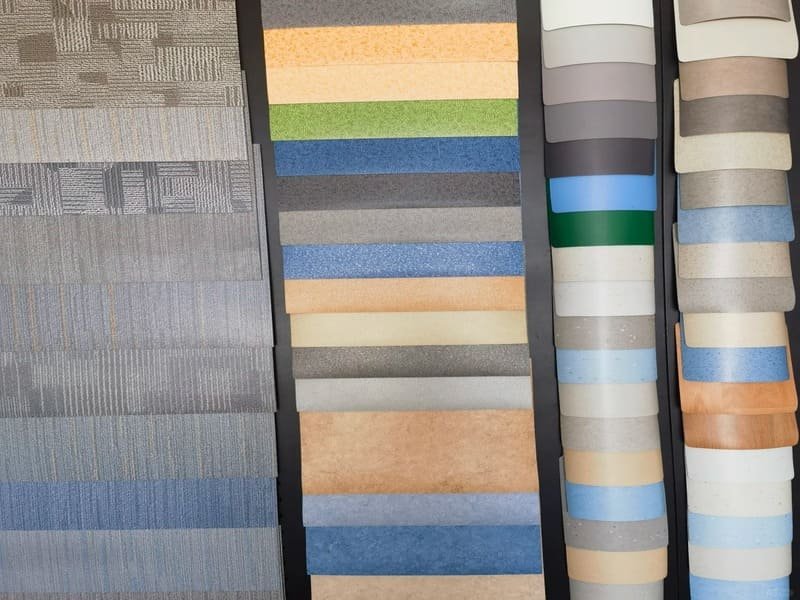
Un controllo su un campione consente di verificare il colore, le giunture, la compatibilità con il sottofondo e i criteri di accettazione o rifiuto prima della posa in serie. Se si salta questa fase, anche una piccola discrepanza nel campione può comportare il rifacimento dell’intero pavimento.
Da anni mi occupo di classificare i lotti di pavimenti sulla linea di produzione, e lo schema è sempre lo stesso. Un cliente si innamora di un campione delle dimensioni di un sottobicchiere, dà l’ok, poi si ritrova con un risultato completamente diverso una volta posati migliaia di metri quadrati. Un mock-up colma questa lacuna. Si tratta di un'anteprima a grandezza naturale del pavimento reale, realizzata con il vero sottofondo, il vero sistema di incollaggio e il vero posatore. Un piccolo campione ti mostra come appare la superficie quando la tieni in mano. Un mock-up ti mostra come apparirà sotto i tuoi piedi, nel tuo edificio, per i prossimi dieci anni. Saltare questo passaggio, o verificarlo senza criteri chiari di accettazione o rifiuto, è la causa principale delle costose sorprese: alterazioni cromatiche sotto l’illuminazione degli uffici, giunture che si aprono ai bordi o irregolarità del sottofondo che si percepiscono chiaramente attraverso lo strato di usura.
Questa guida illustra tutti i criteri di valutazione che utilizzo personalmente: come impostare correttamente il mock-up, quali sono i requisiti per considerarlo superato e quando rifiutarlo senza esitazione.
Prima ancora di prendere in mano un calibro o una torcia, il tipo di pavimento in PVC che stai acquistando determina quali siano gli aspetti realmente importanti nel modello di prova.
Quali prove di simulazione sono più importanti per il tuo tipo di pavimento?
I fogli omogenei richiedono controlli sulla saldatura e sulla curvatura. I pavimenti LVT/SPC con sistema a incastro richiedono controlli sui giunti e sulla planarità. Adatta le tue priorità al prodotto prima di procedere all’ispezione.
Non tutti i prodotti in PVC presentano gli stessi difetti, quindi inizio sempre da qui prima di eseguire qualsiasi test.
| Tipo di pavimentazione | Priorità del mock-up |
|---|---|
| Vinile in fogli omogeneo | Qualità della saldatura, effetto “telegrafico” del substrato, formatura a concavità |
| Vinile in fogli eterogeneo | Allineamento delle cuciture, corrispondenza dei motivi, rientranze, adesione |
| LVT incollato | Adesione, rigidità articolare, trasmissione delle vibrazioni, schema |
| Clicca su LVT / SPC | Inserimento a incastro a scatto, planarità, fessure di dilatazione |
Una volta stabilite le priorità, è fondamentale che la configurazione del prototipo sia corretta, altrimenti nessuno dei risultati che ne deriveranno potrà essere considerato attendibile.
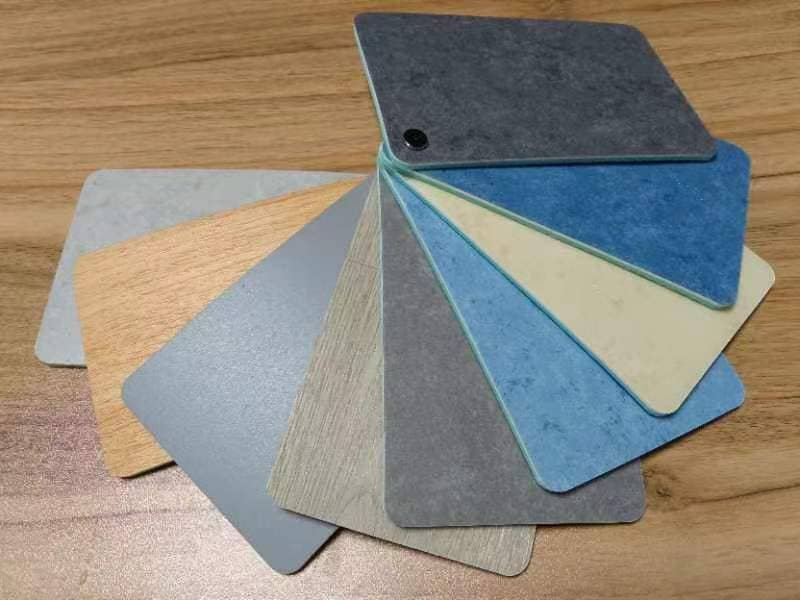
Una volta stabilite le priorità, il passo successivo consiste nell’assicurarsi che il prototipo sia effettivamente rappresentativo del progetto reale.
Come si dovrebbe allestire un modello prima di ispezionarlo?
Installatelo in loco, in dimensioni sufficienti a mostrare le cuciture reali e le ripetizioni del motivo, su un sistema di sottofondo che corrisponda al vostro progetto. Qualsiasi soluzione meno accurata fornirà dati inaffidabili.
Location is the first thing I check. A mock-up built in a vendor showroom under warm halogen lighting will never match how the floor reads under your building’s fluorescent or daylight-heavy windows. I always push for on-site installation, or at minimum a space with near-identical lighting and subfloor conditions.
Le dimensioni non sono stabilite da una regola universale: cerco un campione abbastanza grande da mostrare le cuciture rappresentative, le ripetizioni del motivo, i dettagli perimetrali e la qualità della posa. Per molti progetti le dimensioni si aggirano intorno ai 2 m x 2 m, ovvero da quattro a sei listoni interi, ma un prodotto con motivi molto elaborati o un progetto con angoli stretti potrebbero richiedere dimensioni maggiori.
| Fattore di configurazione | Cosa controllo |
|---|---|
| Posizione | Illuminazione in loco o abbinata / sottofondo |
| Dimensioni del modello | Abbastanza da mostrare le cuciture, la ripetizione del motivo e i dettagli |
| Acclimatazione | Per the manufacturer’s installation instructions, commonly 24–48 hours where specified |
| Corrispondenza per lotti | Stesse specifiche di produzione e stesso lotto dell'ordine approvato |
Il tempo di acclimatazione varia a seconda del prodotto: i sistemi LVT, SPC e vinile in rotoli hanno ciascuno le proprie istruzioni del produttore, quindi preferisco verificare i requisiti effettivi piuttosto che ipotizzare un intervallo di tempo fisso.
C'è una domanda relativa alla configurazione che gli acquirenti tendono a tralasciare più di ogni altra, ed è proprio quella che in seguito causa il maggior numero di controversie.
Il prototipo appartiene allo stesso lotto del tuo ordine definitivo?
Verifica che il campione utilizzi lo stesso lotto di produzione, lo stesso codice colore e lo stesso strato di usura dell’ordine che stai approvando. Un campione di ottima qualità proveniente da un lotto diverso non garantisce nulla.
Un prototipo dall’aspetto perfetto non ha alcun valore se la produzione in serie proviene da un lotto di tintura o da un lotto di produzione diverso. Annotiamo sempre il numero di lotto, il codice colore e il codice prodotto utilizzati per realizzare il prototipo e confermiamo per iscritto che l’ordine in serie verrà prodotto secondo gli stessi standard. È proprio questo singolo passaggio che consente di ritenere il fornitore responsabile qualora la spedizione finale presentasse variazioni di colore: senza un riferimento documentato al lotto, non c’è modo di dimostrare che il materiale sia cambiato.
L'abbinamento in lotti garantisce la qualità dei materiali. Il sistema di installazione merita lo stesso livello di attenzione.
Il modello utilizza il sistema di installazione effettivo?
Verificate che il campione sia stato realizzato utilizzando esattamente l’adesivo, la spatola dentata e il metodo di applicazione specificati per il vostro progetto. Un campione incollato in modo diverso rispetto al lavoro vero e proprio non fornisce informazioni significative.
Si tratta di una lacuna che riscontro spesso. Un fornitore realizza un bellissimo campione, ma utilizza un adesivo diverso, una spatola con dentatura di dimensioni diverse o un tempo di lavorabilità diverso rispetto a quelli che verranno effettivamente utilizzati nel progetto completo. Prima di approvare il lavoro, mi assicuro che il campione utilizzi:
- La marca e il prodotto adesivo specificati per il progetto
- La corretta dentatura della spatola e la quantità da stendere
- The manufacturer’s specified open time before laying
- Il metodo corretto di rullatura o pressatura dopo la posa
- Installazione alle condizioni di temperatura e umidità previste in loco
If any of these differ from the mock-up to the real job, the mock-up’s value drops sharply, since adhesion and seam behavior depend heavily on this system.
Una volta verificato il sistema di posa, è opportuno esaminare attentamente il sottofondo, poiché è proprio da lì che hanno origine la maggior parte dei problemi legati al PVC.
Quali condizioni del sottofondo è necessario verificare?
Verificare l'umidità, il pH, la planarità e la presenza di contaminanti, oltre alla compatibilità con il primer e lo stucco livellante. La maggior parte dei difetti nei pavimenti in PVC ha origine sotto la superficie, non su di essa.
Considero il sottofondo, il primer, il composto livellante, l’adesivo e il pavimento come un unico sistema integrato, piuttosto che come elementi separati. Sul modello di prova, verifico:
| Articolo relativo al sottofondo | Cosa controllo |
|---|---|
| Umidità | Risultati delle prove di umidità relativa / umidità |
| pH | Within the adhesive manufacturer’s acceptable range |
| Piattezza | Nessun avvallamento o rialzo oltre i limiti di tolleranza |
| Crepe | Nessuno visibile o trattato adeguatamente |
| Contaminazione | Assenza di polvere, olio o residui prima della posa |
| Primer | Compatibile con il sottofondo e l'adesivo |
| Stucco livellante | Compatibile con l'intero sistema |
Trascurare anche solo uno di questi aspetti può compromettere un prodotto per pavimenti altrimenti perfetto, poiché le prestazioni del pavimento soprastante dipendono interamente da quelle della superficie su cui poggia.
Una volta verificata la correttezza del sistema del sottofondo, la domanda successiva è semplice: il prototipo ha l’aspetto che ti aspettavi?
Quali controlli visivi ed estetici dovresti effettuare?
Verificare il colore in condizioni di illuminazione reali, il realismo delle venature sulle singole doghe e l'uniformità della trama superficiale. Questi tre aspetti determinano la prima impressione dell'intero pavimento.
Color is the most common source of disputes I see, and it almost always comes down to metamerism — a color matching under one light source and shifting under another. I inspect the mock-up under natural daylight, then again under the project’s artificial lighting, at morning, noon, and evening if possible. A shade that looks perfect at noon can look grey or yellow by evening.
Il realismo del motivo è il passo successivo. Il PVC effetto legno o pietra deve presentare una variazione delle venature sufficiente tra le singole doghe, in modo che non si ripeta in modo evidente ogni poche piastrelle. Controllo anche la nitidezza della stampa e la variazione di tonalità da una doga all’altra. Infine, la texture della superficie: le finiture con goffratura in registro (EIR) dovrebbero allineare la texture fisica con le venature stampate, e il livello di lucentezza dovrebbe corrispondere a quanto richiesto dall’ambiente.
L'aspetto è solo metà della storia. La serie di controlli successiva ti dirà se il pavimento è strutturalmente solido.
Come si verifica la precisione dimensionale e strutturale?
Misurare lo spessore totale con uno spessimetro calibrato e verificare che lo strato di usura corrisponda a quanto indicato nella documentazione del produttore. Controllare la tenuta delle giunture in base al metodo di posa specifico.
I measure total thickness with a calibrated thickness gauge or caliper against the contract specification. Wear layer thickness is a bit different — on a finished product, especially heterogeneous sheet or LVT, a standard caliper cannot always give a fully accurate reading, so I verify wear layer against the manufacturer’s technical data sheet, certification, or a cross-sectional sample where required.
I controlli delle giunture dipendono dal tipo di installazione:
- Click-lock (SPC/LVT): resistenza di innesto dei chiavistelli, scheggiature dei bordi, fessure nelle giunture, fessure di dilatazione lungo il perimetro
- Posa a secco/incollaggio: tenuta delle giunture, fuoriuscita di adesivo
- Vinile in rotoli: qualità e allineamento dei cordoni di saldatura a caldo o a freddo
Inoltre, faccio scorrere una riga lungo i bordi delle assi e delle piastrelle, poiché le piccole imprecisioni ai bordi si accumulano su un ampio pavimento aperto e finiscono per diventare uno scostamento visibile lungo la parete opposta.
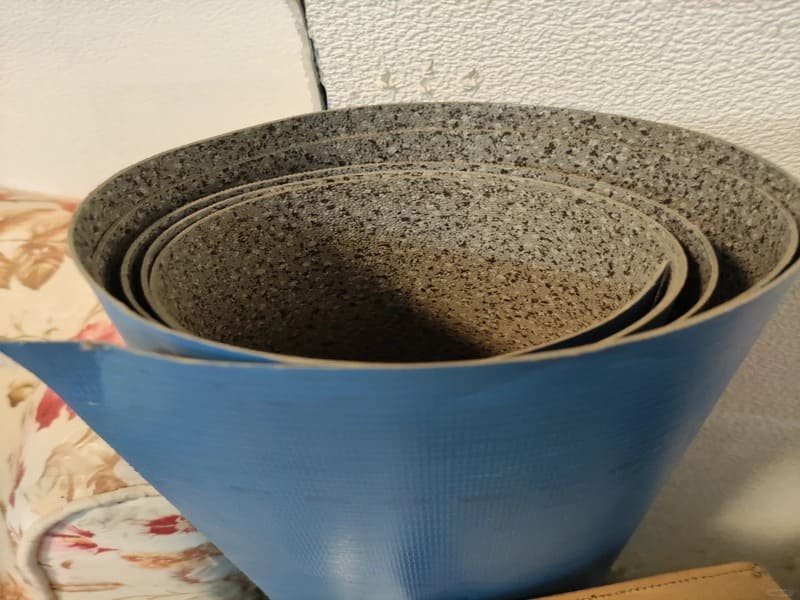
Per quanto riguarda in particolare il vinile in rotoli, esistono alcuni controlli che vanno ben oltre una semplice ispezione delle giunture.
Quali controlli aggiuntivi sono previsti per la posa del vinile in rotoli?
Controllare attentamente la qualità delle saldature, la copertura e gli angoli interni. Negli ospedali, nei laboratori e nelle scuole, questi dettagli sono più importanti di un semplice test di resistenza ai graffi.
Le cuciture saldate a caldo richiedono un’attenta ispezione:
- Abbinamento cromatico delle bacchette di saldatura all'ambiente circostante
- Profondità e uniformità della saldatura lungo l'intero cordone
- Qualità del rifilaggio e allineamento delle cuciture
- Eventuali segni di bruciatura o scolorimento in corrispondenza della saldatura
Per i progetti che richiedono la posa di profili a incavo — comuni in ospedali, laboratori e aree di ristorazione — controllo anche il profilo di formatura, la striscia di copertura, il rialzo a muro e le saldature degli angoli interni ed esterni. È proprio in questi dettagli che le pose di vinile in rotoli falliscono più spesso l’ispezione, anche quando la superficie piana appare impeccabile.
Sia le prestazioni in campo uniforme che i dettagli ai bordi sono importanti, ma i punti in cui si verificano più spesso dei problemi sono le transizioni, non il campo aperto.
Quali aspetti relativi alla transizione e ai dettagli dovrebbe includere il modello?
Includere nel modello almeno una soglia di porta, un punto di giunzione con la parete o una striscia di transizione. I bordi, gli angoli e le porte presentano guasti molto più spesso rispetto alla parte centrale del pavimento.
Un buon modello di progetto raramente consiste semplicemente in uno spazio aperto e piatto. Chiedo ai fornitori di includere almeno uno dei dettagli che caratterizzeranno il progetto reale, ad esempio:
- Soglia della porta
- Giunzione con la parete o linea del battiscopa
- Passaggio di colonne o tubazioni
- Profilo di transizione tra piastrelle e moquette
- Giunto di dilatazione
- Bordo della scala, se presente
I problemi si concentrano in questi punti molto più che al centro di una stanza, quindi un installatore che riesce a realizzare un taglio netto e dritto ma ha difficoltà con lo stipite di una porta ti sta dando un’indicazione importante su come si presenterà il lavoro nel suo complesso.
Le prestazioni di guida su strada rappresentano l’ultimo test fisico prima di passare ai criteri di superamento o bocciatura.
Quali aspetti occorre valutare in termini di comfort sotto il piede e prestazioni nell'uso quotidiano?
Esaminare il modello, verificare la presenza di imperfezioni del sottofondo e eseguire rapidi test di resistenza ai graffi e all’acqua. È a questo punto che la scheda tecnica non è più sufficiente.
Cammino sul modello indossando scarpe vere per verificare la presenza di suoni cavi, il rumore dei passi e l’ammortizzazione sotto il piede, e ispeziono attentamente per individuare eventuali segni del sottofondo — qualsiasi protuberanza o traccia di spatola proveniente dal basso che traspaia dalla superficie. Eseguo inoltre rapidi test sul campo non distruttivi: sfregamento con le scarpe per verificare la resistenza ai graffi, una prova di carico rotante, un controllo a campione con prodotti chimici per la pulizia e una prova dell’acqua in corrispondenza delle giunture, poiché le fuoriuscite di liquido tendono a penetrare proprio da lì per prime. L’arricciamento dei bordi viene controllato durante un ciclo termico, poiché il sollevamento o l’espansione nelle prime fasi costituiscono un forte segnale di allarme.
Tutte queste verifiche portano a una domanda che ogni acquirente finisce per porsi: come faccio a sapere se il prodotto supera effettivamente i controlli?
Quali sono i criteri di superamento/insuccesso per ciascuna voce del modello di valutazione?
Confronta ogni elemento con uno standard di accettazione chiaro, non solo con un’impressione generale. Una lista di controllo priva di criteri di superamento o insuccesso lascia troppo spazio all’interpretazione.
Utilizzo una tabella come questa con ogni acquirente con cui lavoro, perché "controllare il colore" non ha molto senso senza uno standard di riferimento.
| Articolo | L'acquirente dovrebbe accettare solo se |
|---|---|
| Colore | Corrisponde al campione approvato in condizioni di illuminazione previste dal progetto |
| Cuciture | Assenza di aperture visibili, contaminazioni o disallineamenti |
| Superficie | Assenza di bolle, ammaccature, graffi o effetti di trasparenza |
| Bordi | Non piegare né sollevare |
| Adesione | Nessuna zona vuota o allentata |
| Saldatura | Continuo, a filo, privo di segni di bruciatura |
| Layout | È conforme al disegno approvato e alla direzione del motivo |
| Pulibilità | Segni rimovibili senza danneggiare la superficie |
Sapere come si presenta un “pass” significa anche sapere esattamente cosa dovrebbe bloccare il progetto prima che proceda oltre.
Quali sono i motivi per cui un acquirente dovrebbe rifiutare un campione di pavimento in PVC?
Rifiutare un prototipo in caso di discrepanze evidenti nel colore, giunti aperti, bordi arricciati, saldature difettose o qualsiasi deviazione dalle specifiche approvate. Rifiutare il prodotto in fase iniziale è di gran lunga più economico che sostituire un pavimento già posato.
Consiglio a ogni acquirente di rinunciare a un modello se presenta una delle seguenti caratteristiche:
- Evidente discrepanza cromatica rispetto al campione approvato
- Motivo ripetuto o mal allineato
- Cuciture aperte o irregolari
- Arricciatura dei bordi
- Bolle o cavità
- Effetto “telegrafico” visibile del substrato
- Saldature difettose o non uniformi
- Contaminazione da adesivo sulla superficie
- Eccessiva indentazione sotto carico
- Transizione non corretta o lavorazione inadeguata degli angoli
- Macchie che non si riescono a rimuovere
- Materiale o sistema di installazione che si discosta dalle specifiche approvate
Se uno qualsiasi di questi difetti viene individuato su un modello di prova, è segno che lo stesso problema si ripeterà su tutta la superficie, ed è di gran lunga più economico individuarlo in questa fase piuttosto che dopo l’installazione.
Una volta che un prototipo supera tutti i controlli, diventa qualcosa di più prezioso di un semplice campione: diventa il vostro standard di riferimento.
Come si procede alla documentazione e all'approvazione del modello?
Fotografare ogni elemento approvato e scartato, conservare un campione di riferimento firmato e mettere per iscritto le azioni correttive prima dell'avvio della produzione in serie.
Creo un registro fotografico che riporta sia gli elementi approvati che quelli respinti del prototipo, datati ed etichettati chiaramente, insieme al numero di lotto e al codice colore confermati in precedenza. Le sezioni approvate diventano il “campione di riferimento”: vengono firmate, datate e conservate come parametro di riferimento rispetto al quale vengono controllate la spedizione in serie e l’installazione finale. Se qualcosa non è conforme, metto per iscritto la discrepanza e la invio al produttore o all’appaltatore prima che inizi la produzione o l’installazione su larga scala.
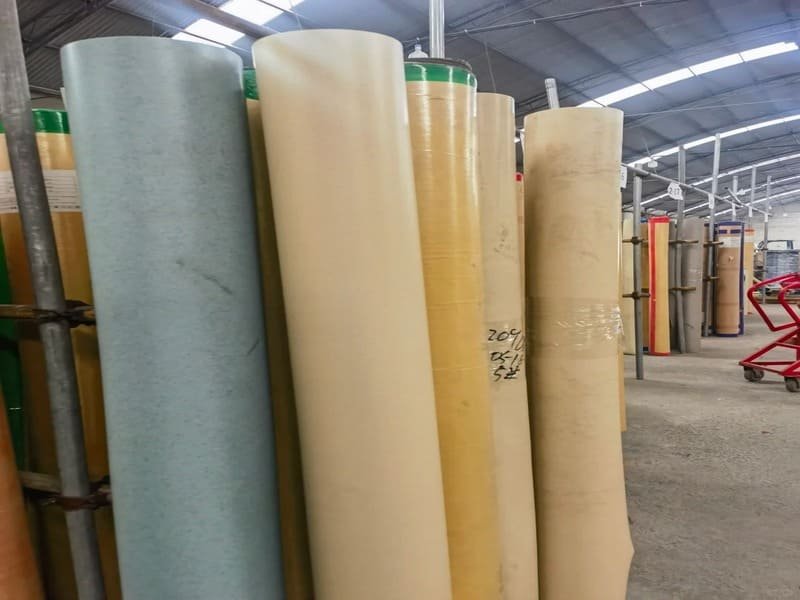
Conclusione
Un prototipo non comporta costi aggiuntivi. È una garanzia contro ritardi, discrepanze cromatiche e costosi interventi di riparazione.
| Categoria | Controlli fondamentali |
|---|---|
| Configurazione e sistema | Corrispondenza dei lotti, caratteristiche dell’adesivo, condizioni del sottofondo |
| Visivo | Colore, motivo, trama, lucentezza |
| Strutturale | Spessore, giunture, rettilineità |
| Prestazioni | Telegrafia, acustica, acqua, curling |
| Lastre di vinile | Saldature, modanature, angoli |
| Accettazione | Criteri di superamento/bocciatura, condizioni di rifiuto |
Sull'autore
Lavoro come specialista del controllo qualità nel settore della produzione di pavimenti in PVC e ho un’esperienza pratica quotidiana nell’ispezione della produzione di SPC, LVT, vinile in rotoli omogeneo ed eterogeneo per ordini personalizzati e all’ingrosso destinati a diversi settori industriali. Mi occupo principalmente del controllo dei processi produttivi, della verifica delle prestazioni dei materiali e della collaborazione con gli acquirenti sin dalle prime fasi di progettazione, al fine di individuare eventuali problemi prima che la produzione entri a pieno regime.
Se stai organizzando una revisione del prototipo o hai bisogno di aiuto per interpretare i risultati dei test, non esitare a inviarmi un messaggio diretto.