L'accettazione di un progetto di pavimentazione in gomma comporta un'ispezione sistematica delle giunture, dell'adesione e della finitura prima di firmare. È necessario verificare l'integrità strutturale, documentare i difetti attraverso una lista di controllo e assicurarsi i documenti di garanzia per proteggere l'investimento e garantire prestazioni a lungo termine.
L'installazione di pavimenti in gomma è un investimento importante per palestre commerciali, spazi industriali o parchi giochi. Il processo di consegna è il punto di controllo finale per garantire la qualità della costruzione. In qualità di direttore dell'installazione, vedo spesso i proprietari delle strutture sentirsi sotto pressione durante questa fase, perché gli appaltatori vogliono semplicemente finire il lavoro e andarsene. Tuttavia, l'accettazione del progetto significa che vi assumete la piena responsabilità legale e finanziaria del pavimento. Se non si notano difetti tecnici ora, si pagheranno in seguito con il proprio budget. Dobbiamo guardare oltre l'aspetto estetico e verificare l'esecuzione tecnica. L'adesivo poliuretanico si è indurito correttamente? Le barriere antiumidità del sottofondo sono intatte? Il materiale sintetico emette normalmente gas? Suddividendo l'ispezione in una lista di controllo tecnica strutturata, si protegge la struttura. Dovete controllare la tempistica e richiedere un'ispezione approfondita con l'appaltatore principale. Questa guida vi fornisce il quadro tecnico per valutare il lavoro, gestire le controversie in modo professionale e garantire che il vostro pavimento funzioni bene per decenni in condizioni di uso intenso.
Iniziamo a considerare il periodo più critico subito dopo la fine del lavoro della squadra di installazione.
Qual è il periodo di attesa d'oro prima della visita guidata?
Il periodo di attesa d'oro è costituito dalle 48-72 ore obbligatorie dopo l'installazione, in cui il traffico pedonale è severamente vietato.
| Azione | Scopo |
|---|---|
| Limitare l'accesso | Previene la rottura del legame adesivo. |
| Manutenzione di HVAC | Blocca l'espansione o la contrazione termica. |
Gestione del tempo di polimerizzazione
Il primo grande errore che commettono i gestori delle strutture è quello di calpestare immediatamente la pavimentazione in gomma incollata. L'adesivo poliuretanico ad alta resistenza ha bisogno di 48-72 ore per raggiungere la completa reticolazione chimica. Se si applica il peso troppo presto, si rompe il delicato legame adesivo, causando bolle permanenti e piastrelle allentate. Il controllo della temperatura è altrettanto importante durante questa fase. La gomma reagisce fortemente alle variazioni di temperatura dell'ambiente. È necessario mantenere il sistema HVAC a una temperatura costante per evitare che il materiale si espanda o si restringa prima che la colla si solidifichi. Se l'ambiente diventa troppo freddo, la gomma si restringe e si stacca dalle giunture. Se invece fa troppo caldo, il materiale si espande e si deforma verso l'alto. Pertanto, è necessario programmare il sopralluogo finale solo dopo la chiusura di questa finestra di indurimento, possibilmente durante le ore diurne, in modo da poter individuare le ombre proiettate dalle superfici irregolari.
| Fattore tecnico | Requisiti | Conseguenza del fallimento |
|---|---|---|
| Polimerizzazione dell'adesivo | 48-72 ore traffico zero | Cedimento permanente del legame, punti vuoti |
| Temperatura | Costantemente a 68°F - 74°F | Formazione di lacune, instabilità del materiale |
| Tempi di percorrenza | Dopo il tempo di polimerizzazione, alla luce del giorno | Mancanza di difetti visivi critici |
Al termine del periodo di attesa, il passo successivo è un controllo visivo dettagliato dell'intera superficie.
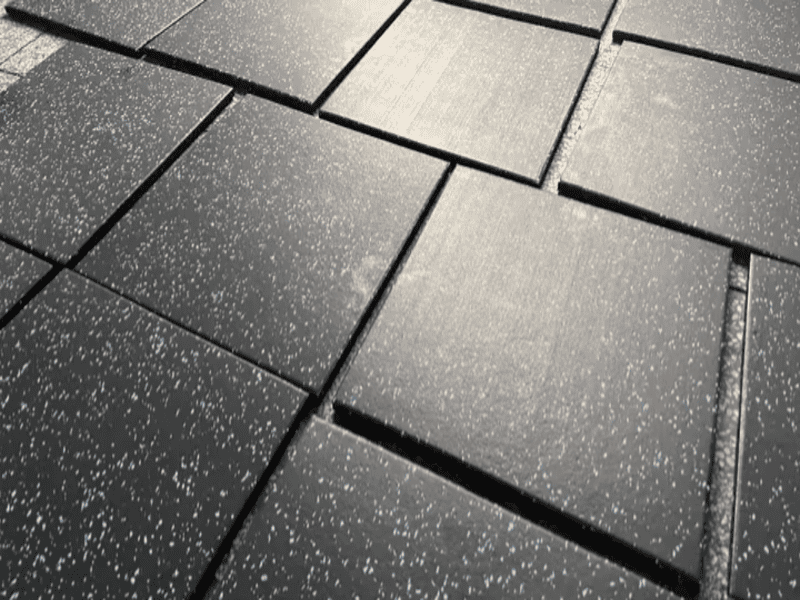
Come si effettua un'ispezione visiva completa?
L'ispezione visiva riguarda l'estetica della superficie e l'allineamento strutturale. È necessario verificare la continuità dei giunti, la coerenza dei colori e la pulizia dei bordi delle pareti.
| Area di ispezione | Focus chiave |
|---|---|
| Cuciture | Non ci sono spazi vuoti o sovrapposizioni. |
| Colore | Lotti di tintura abbinati. |
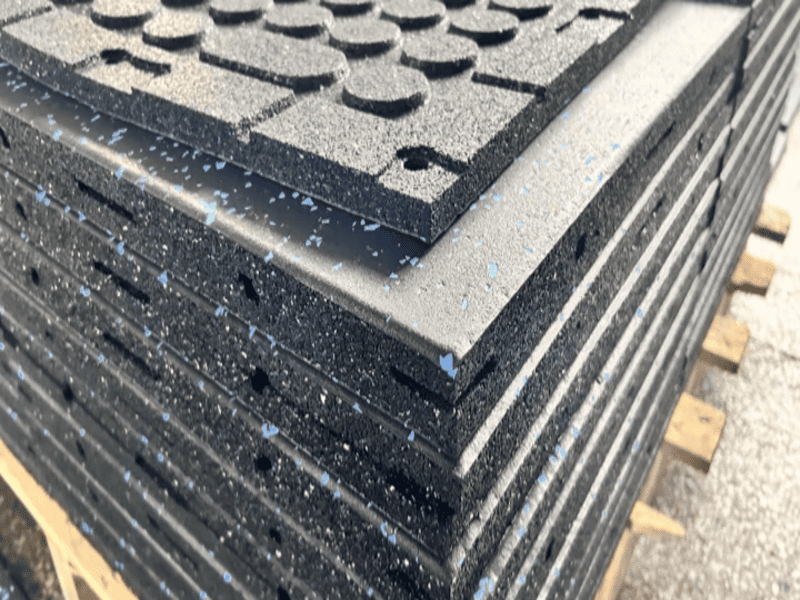
Identificazione dei difetti visivi
Durante la verifica visiva, è necessario prestare particolare attenzione alle giunture e alle transizioni. I rotoli o le piastrelle di gomma devono essere perfettamente in piano l'uno rispetto all'altro. Le altezze irregolari tra i pezzi, note come lippage, creano gravi rischi di inciampo e si consumano molto più rapidamente in caso di traffico pedonale intenso. Consiglio sempre ai clienti di controllare la consistenza del colore in tutta la stanza. I lotti di tintura non corrispondenti si verificano quando i produttori mescolano lotti di produzione diversi, facendo apparire il pavimento come una trapunta patchwork invece che come una superficie unitaria. Quindi, ispezionate il perimetro esterno. I tagli lungo i battiscopa delle pareti devono essere netti e stretti per evitare che il liquido si infiltri sotto il pavimento. Gli installatori devono anche pulire l'adesivo in eccesso, le linee di gesso e la polvere di costruzione. Se il pavimento è sporco, non è possibile ispezionarlo correttamente e i residui di colla possono macchiare in modo permanente lo strato di usura superiore se non vengono rimossi rapidamente.
| Tipo di difetto | Metodo di ispezione | Perché è importante |
|---|---|---|
| Lacuna / Lippage | Controllo visivo dei giunti | Pericolo di inciampo, punto debole della struttura |
| Disadattamento del colore | Scansione ad ampio raggio | Scarsa finitura estetica, errore di lotto |
| Tagli perimetrali | Controllo accurato delle pareti | Punti di ingresso dell'umidità, finiture scadenti |
I controlli visivi sono solo la prima parte; successivamente, è necessario usare i piedi e le mani per testare l'integrità fisica del pavimento.
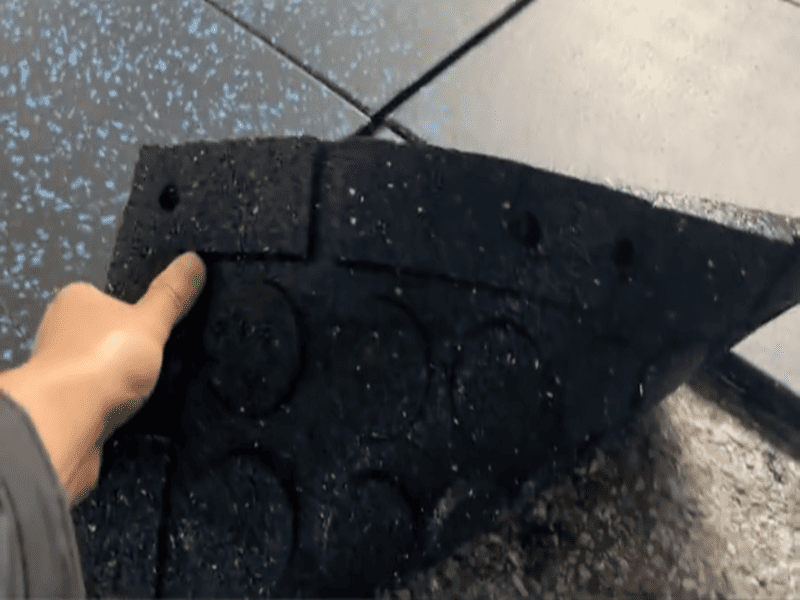
Che cosa si deve rilevare durante l'ispezione fisica e tattile?
L'ispezione fisica utilizza il tatto e il peso per trovare i difetti nascosti. È necessario camminare sul pavimento per individuare l'aria intrappolata, l'adesione debole e i bordi allentati.
| Metodo di prova | Difetto riscontrato |
|---|---|
| Test del piede | Bolle e punti vuoti. |
| Tiro dal bordo | Articolazioni di curvatura e sollevamento. |
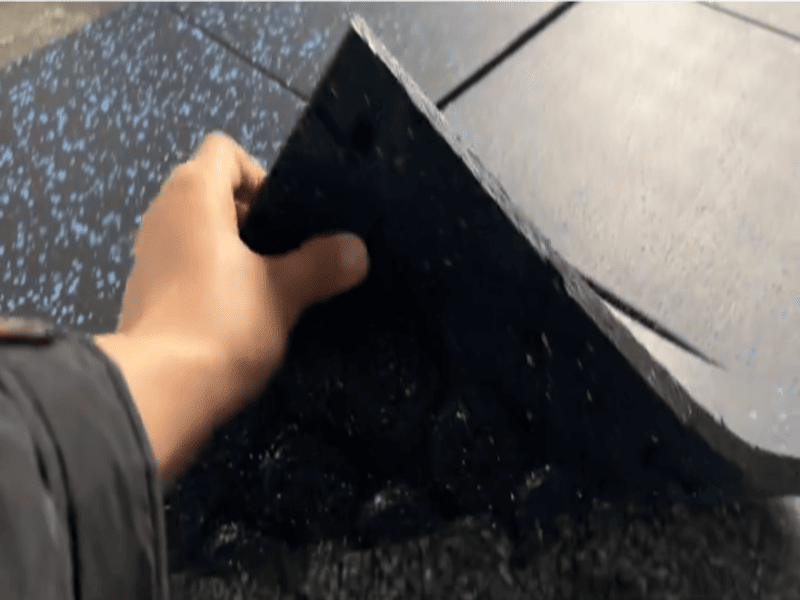
Esecuzione del test del piede
Non ci si può affidare solo agli occhi per individuare i difetti dell'adesivo. È necessario eseguire la "prova del piede" camminando lentamente su tutta l'area del pavimento, esercitando una pressione decisa con i passi. Ascoltate e sentite se ci sono punti vuoti o bolle d'aria intrappolate sotto le scarpe. Queste aree vuote significano che l'adesivo non si è trasferito correttamente sul retro della gomma durante l'installazione. Con il tempo, questi punti secchi si staccano o si rompono sotto gli attrezzi da palestra pesanti. Verificate gli angoli e le porte tirando leggermente i bordi. Se la gomma si solleva facilmente, l'installazione non è riuscita in un punto critico di sollecitazione. Per gli spazi commerciali, assicuratevi che tutte le strisce di transizione in metallo o gomma siano avvitate o incollate saldamente per soddisfare gli standard di sicurezza. Se si utilizzano tessere di puzzle a incastro invece di rotoli incollati, i denti devono essere completamente a filo senza tirare, incurvarsi o tendersi.
| Controllo fisico | Tecnica di test | Implicazioni ingegneristiche |
|---|---|---|
| Macchie cave | Camminare con una pressione decisa | Mancanza di copertura dell'adesivo |
| Arricciatura dei bordi | Sollevamento manuale degli angoli | Incollaggio perimetrale fallito |
| Strisce di transizione | Spinta sui bordi del riduttore | Non conformità ai codici di sicurezza |
Mentre si controlla l'installazione fisica, è probabile che si noti un forte odore, il che ci porta a preoccuparci della qualità dell'aria.
Come si affrontano i problemi di odore e di qualità dell'aria?
I nuovi pavimenti in gomma emettono composti organici volatili (VOC) che causano un odore distinto. È necessario separare i normali gas di scarico dalle reazioni chimiche improprie.
| Fonte dell'odore | Azione richiesta |
|---|---|
| Gomma normale | Aumentare la ventilazione della stanza. |
| Colla chimica | Controllare che non vi siano cedimenti dell'adesivo. |
Gestione degli odori post-installazione
L'odore di "pavimento nuovo" è uno dei principali problemi per i proprietari di strutture. Questo odore proviene dal rilascio di VOC ed è una parte normale del processo di indurimento dei materiali sintetici freschi. Tuttavia, un odore chimico acuto e aspro potrebbe indicare una cattiva reazione con l'umidità del sottofondo o una miscelazione impropria dell'adesivo. È necessario implementare immediatamente una forte strategia di ventilazione. Mantenete il sistema HVAC in funzione con l'ingresso di aria fresca, installate ventilatori industriali da pavimento per impieghi gravosi e aprite le porte per far passare l'aria esterna nella stanza. Di norma, l'odore di gomma standard si attenua notevolmente entro le prime due o tre settimane. Se l'odore provoca mal di testa o persiste pesantemente dopo un mese, è possibile che si tratti di un problema più ampio di compatibilità dei materiali che richiede un intervento tecnico e un'analisi dell'umidità.
| Fase di mitigazione | Strumento utilizzato | Tempistica prevista |
|---|---|---|
| Circolazione dell'aria | Ventilatori a pavimento, finestre aperte | Funzionamento continuo giornaliero |
| Controllo del clima | Sistema HVAC dell'edificio | Funziona 24 ore su 24, 7 giorni su 7, durante il periodo di cura |
| Monitoraggio | Tracciamento del profumo | Riduzione importante in 14-21 giorni |
Quando si riscontrano difetti o problemi durante i controlli, è necessario un modo formale per registrarli prima di pagare l'appaltatore.
Come si crea e si gestisce una Punch List?
Una punch list è un documento formale che riporta tutti i difetti che l'appaltatore deve risolvere prima del pagamento finale.
| Passo | Azione |
|---|---|
| Contrassegnare i difetti | Utilizzare il nastro da pittore blu. |
| Documento | Scattare foto con la data. |
Documentazione delle correzioni del contraente
La gestione dei difetti è un processo aziendale critico. Non affidatevi ad accordi verbali per risolvere i difetti. È necessario utilizzare una lista di riparazione. Prendete del nastro adesivo blu da imbianchino e segnate direttamente sul pavimento tutte le lacune, le bolle o i tagli sbagliati. Scattate foto chiare e datate di ogni singolo problema. Questo fornisce una prova concreta dello stato dell'installazione. Comunicate con l'appaltatore con fermezza e professionalità, utilizzando i dati documentati per richiedere le correzioni. Evitate le argomentazioni emotive e concentratevi esclusivamente sulla mancata conformità tecnica agli standard di installazione del settore. La prassi standard consente di trattenere il pagamento finale - di solito circa il 10% del costo totale - fino a quando tutti gli elementi della lista di riparazione non sono stati risolti. In questo modo l'appaltatore è motivato a far tornare la squadra e a completare il lavoro correttamente senza ritardi.
| Strumento di documentazione | Scopo | Valore ingegneristico |
|---|---|---|
| Nastro blu | Marcatore fisico sul pavimento | Guida visiva chiara per gli addetti alle riparazioni |
| Foto | Disco digitale | Prova della condizione di difetto |
| Ritenuta sulla retribuzione | Leva finanziaria | Assicura la conformità della qualità finale |
Una volta completato l'elenco delle riparazioni, siete pronti a finalizzare i documenti del progetto e ad assumerne la totale responsabilità.
Quali sono i documenti e le garanzie finali da raccogliere?
Prima di firmare il certificato di collaudo finale, è necessario ritirare la garanzia del produttore, la garanzia di lavorazione dell'installatore e il manuale di manutenzione ufficiale.
| Documento | Copertura |
|---|---|
| Garanzia del produttore | Difetti del materiale nel tempo. |
| Garanzia di lavorazione | Errori di installazione. |
Protezione della documentazione del progetto
Non firmate il certificato di accettazione finale del progetto prima che tutti i documenti siano nelle vostre mani. La firma di questo documento sposta tutte le responsabilità legali dall'appaltatore a voi. Sono necessarie due garanzie distinte: la garanzia del produttore, che copre il materiale in gomma contro l'usura prematura, e la garanzia di manodopera, che copre la manodopera di installazione. Richiedete poi il manuale ufficiale di manutenzione. L'uso di prodotti chimici per la pulizia sbagliati fa decadere immediatamente la garanzia e rompe i leganti di gomma. Infine, chiedete sempre all'appaltatore di lasciare le "scorte di soffitta", ovvero le piastrelle o i rotoli di scarto. Avrete bisogno di questi pezzi esattamente corrispondenti per le future riparazioni se una sezione viene danneggiata da un peso caduto in futuro.
| Articolo richiesto | Scopo | Evitare i rischi |
|---|---|---|
| Doppia garanzia | Protegge dai guasti futuri | Evita le spese di riparazione |
| Guida alla manutenzione | Indirizza i metodi di pulizia sicuri | Previene l'annullamento accidentale della garanzia |
| Stock in soffitta | Materiale di ricambio per le riparazioni | Assicura l'esatta corrispondenza dei colori in seguito |
Una volta firmati i documenti, per i primi giorni di utilizzo del nuovo spazio dovrete seguire regole precise.
Come si mantiene il pavimento nelle prime 72 ore dopo l'accettazione?
Nelle prime 72 ore, non lavare il pavimento con l'acqua e pianificare attentamente lo spostamento di attrezzature pesanti sulla superficie.
| Azione | Regola |
|---|---|
| Pulizia | Solo spazzare a secco, senza acqua. |
| Spostamento dell'attrezzatura | Utilizzate il compensato sotto gli oggetti pesanti. |
Linee guida operative del 1° giorno
Le prime 72 ore di utilizzo attivo richiedono una gestione attenta. Anche se l'adesivo primario si è indurito, non è consigliabile passare immediatamente uno straccio bagnato. L'acqua può infiltrarsi nelle cuciture fresche e causare problemi di umidità sotto la superficie. Per la pulizia iniziale, limitarsi a spazzare o aspirare a secco. Quando è il momento di spostare le macchine o i mobili pesanti nello spazio, è necessario proteggere la superficie di gomma fresca. Non trascinate mai le attrezzature sul pavimento per non provocare profonde scalfitture non riparabili. Utilizzate fogli di compensato spessi per creare un percorso duro per far rotolare gli oggetti pesanti fino al loro posto finale. L'adozione di queste semplici precauzioni consente di non danneggiare l'integrità strutturale del pavimento fin dal primo giorno.
| Attività del 1° giorno | Le migliori pratiche | Danni evitati |
|---|---|---|
| Pulizia iniziale | Solo vuoto a secco | Contaminazione da umidità delle cuciture |
| Macchine in movimento | Percorsi in compensato | Scorrimento superficiale profondo |
| Posizionamento | Sollevare e impostare, mai trascinare | Strappo dello strato di usura superiore |
Il controllo di queste fasi finali assicura che il progetto si concluda senza intoppi e che vi assicuri un successo a lungo termine.
Conclusione
Un processo di ispezione approfondito protegge il vostro investimento. Grazie all'applicazione di standard tecnici e di una documentazione adeguata, la vostra nuova pavimentazione in gomma garantirà risultati sicuri e performanti per molti anni.