Yes, rubber playground tiles are an excellent choice for safety and durability. They provide certified fall protection, are easy to maintain, and suit both professional and DIY installations. This makes them a top-tier surfacing option for most modern play areas.
As a process engineer, I oversee how these tiles are made, from raw recycled rubber to the finished, high-impact safety surface. You need a safe playground, but you also have to manage a budget and think about long-term durability. You have questions about how thick the tiles need to be, what they will cost, and if you can install them yourself. People worry if the tiles will get too hot or crack in the cold. This guide will give you clear, straightforward answers. We will cover the technical details you need to know to select the right rubber playground tiles, plan your budget accurately, and ensure your play area is safe for years to come.

Let’s look at the specifics of these products.
What Exactly Are Rubber Playground Tiles?
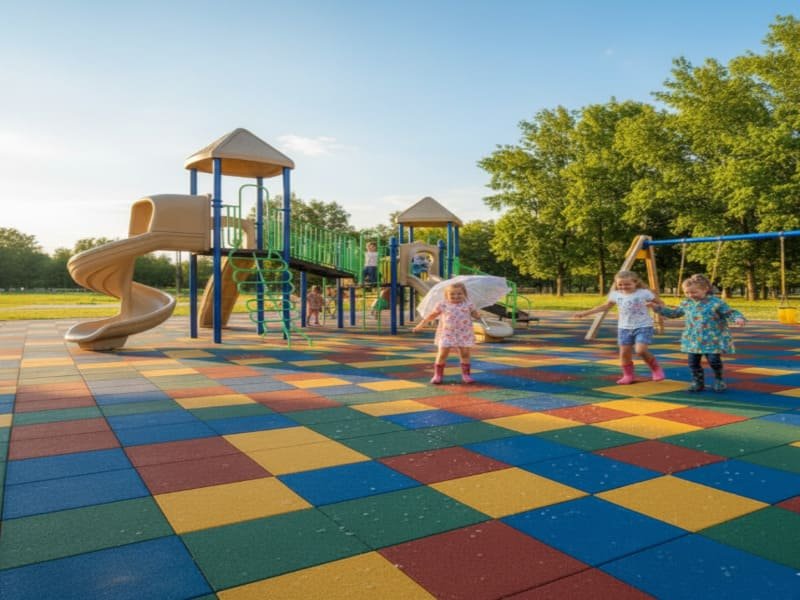
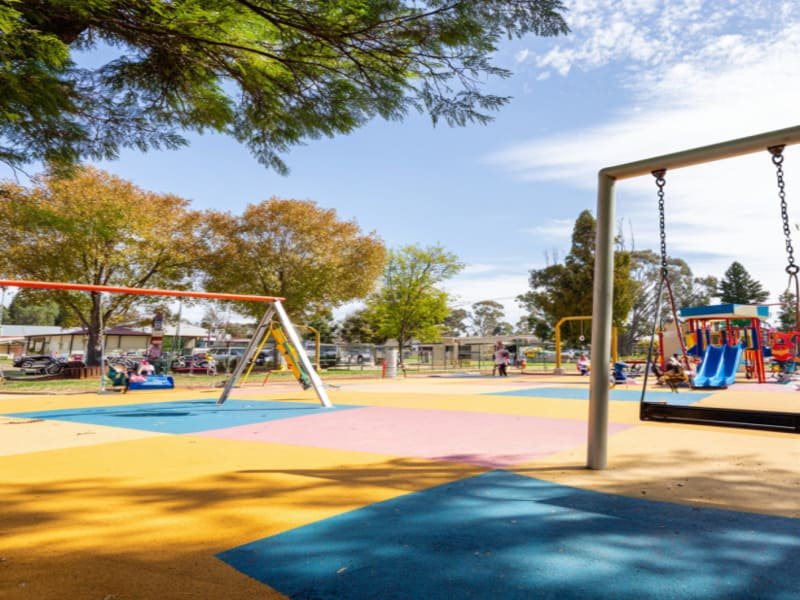
Rubber playground tiles are dense, shock-absorbent squares made from recycled SBR or virgin EPDM rubber. Their primary function is to cushion falls. The main types are DIY-friendly interlocking tiles and professionally installed straight-edge tiles, each offering unique benefits.
The manufacturing process is key to their performance. We start with shredded rubber granules, which are then carefully mixed with a polyurethane binder. This mixture is placed into a mold and compressed under immense pressure and high heat. This process, called compression molding, fuses the rubber granules together into a solid but porous tile. The density is precisely controlled to provide the right amount of shock absorption. This is why a 3.5-inch tile can protect a child from a fall of 8 feet. From my experience, the two biggest decisions you will make are the connection system and the type of rubber material used.
Interlocking vs. Non-Interlocking Systems
Interlocking tiles are the most common choice for a reason. They have puzzle-piece edges or use plastic dowel pins to connect to each other. This design makes installation much simpler, especially for DIY projects over a solid base like concrete. Straight-edge tiles have no connection system and must be glued down, which is why they are typically used by professionals who want to ensure a permanent, completely secure installation.
SBR vs. EPDM Material Choices
The rubber itself also matters. Standard tiles use SBR (Styrene-Butadiene Rubber), which comes from recycled tires. It’s extremely durable and cost-effective. The top layer can be colored, but the base is always black. EPDM (Ethylene Propylene Diene Monomer) is a premium synthetic rubber that is colored all the way through. It offers superior resistance to UV fading and does not leach black carbon residue, which makes it ideal for high-end projects with vibrant color schemes.
Understanding the materials is the first step. Next, we need to talk about safety.
How Safe Are Rubber Playground Tiles?
Rubber tiles are extremely safe when their thickness corresponds to the playground equipment’s height. Safety is measured by the Critical Fall Height (CFH) rating, which is certified under the ASTM F1292 standard. Thicker tiles provide certified protection for higher falls.
As an engineer, safety is about data, not guesswork. The safety of a rubber tile is not just an opinion; it is a measurable, scientific fact determined by its Critical Fall Height (CFH). This is the single most important metric for playground safety. It is determined through a series of controlled drop tests where an instrumented headform is dropped from various heights onto the tile. We measure the force of the impact to ensure it stays below the threshold for a critical head injury. The tile’s thickness and density are engineered precisely to absorb that impact. A thicker tile has more material to compress, which allows it to absorb more energy and protect from a higher fall. This is why a 1.75-inch tile is not safe for an 8-foot slide—it simply cannot absorb enough force.
How to Match Tile Thickness to Your Equipment
| You must match the tile’s CFH rating to the highest designated play surface on your equipment. | Épaisseur du carreau | Typical Critical Fall Height (CFH) | Meilleur pour |
|---|---|---|---|
| 1.75 inches | 4 feet | Toddler play structures, small slides | |
| 2,5 pouces | 6 feet | Standard backyard swing sets, school equipment | |
| 3.5 inches | 8 feet | Taller climbing structures, public park equipment |
Key Safety Standards (ASTM)
Always verify that the tiles are certified to ASTM F1292. This is the US standard that governs impact attenuation and proves the product has been tested and meets safety requirements. For public spaces, also look for ASTM F1951, which certifies the surface is firm and smooth enough to be accessible for wheelchairs.

Safety is paramount, but cost is always a factor.
How Much Do Rubber Playground Tiles Really Cost?
The rubber tiles themselves typically cost between $10 and $18 per square foot. The total project cost is significantly higher because it must include sub-base preparation ($4-$12/sq ft), adhesive, shipping, and ADA-compliant edging.
Many people are surprised by the total cost because they only budget for the tiles. From my experience, the biggest "hidden" cost is always the sub-base. You cannot install rubber tiles directly on dirt or grass. The ground is unstable and will shift, causing the tiles to become uneven and create dangerous trip hazards. You must have a solid, level foundation. This usually means installing a 4-inch deep base of compacted crushed stone or pouring a concrete slab. This site preparation can easily cost as much as the tiles themselves, so you must factor it into your budget from the start.
Breaking Down the Tile Cost
The price of the tiles varies for a few key reasons.
- Épaisseur : More material means a higher price. An 8-foot fall-rated tile costs more than a 4-foot one.
- Matériau : Premium EPDM rubber is more expensive than standard SBR rubber due to raw material costs.
- Color: Bright colors and custom designs cost more to produce than standard black or earth tones.
Other Essential Costs
Beyond the tiles and the sub-base, remember to budget for adhesive if you are gluing the perimeter or using straight-edge tiles. Also, these tiles are heavy, so freight shipping can be a substantial cost. Finally, for a safe and accessible playground, you will need rubber ramps and transition edges to eliminate any trip hazards where the tiles meet another surface.
Once the budget is set, you need to think about the actual work.
What Is the Installation and Maintenance Commitment?
Interlocking tiles can be a DIY project if you have a perfectly flat, hard base like concrete. Any groundwork requires a professional. Long-term maintenance is low, involving routine sweeping or hosing to keep the surface and seams clear of debris.
The decision to install yourself or hire a professional comes down to one thing: the sub-base. If you have an existing concrete patio that is perfectly level, you can likely install interlocking tiles yourself. The key is to fit them together tightly. If you are starting on an area with grass or dirt, you need a professional. The job requires specialized equipment to excavate, level the ground, and properly compact the aggregate base. A poor installation will lead to curled seams, uneven surfaces, and poor drainage, which will ultimately ruin the entire project and void the warranty.
Long-Term Maintenance and Simple Repairs
Once installed correctly, rubber tiles are very easy to care for.
- Nettoyage de routine : Use a leaf blower or a broom to remove leaves, dirt, and other debris. This prevents the porous surface from clogging.
- Washing: You can use a garden hose to wash away dirt. Avoid using a high-pressure power washer, as it can damage the tile surface and seams.
- Repairs: One of the best features of interlocking tiles is the ease of repair. If one tile is damaged, you can simply remove it and replace it with a new one.
Lifespan and Durability Factors
A high-quality rubber tile surface that is installed correctly can easily last 10 to 15 years. The lifespan is influenced by factors like direct sun exposure (EPDM holds its color better) and the volume of foot traffic. However, the number one factor in ensuring a long life for your playground surface is a properly installed, stable, and well-draining sub-base.
Conclusion
The best rubber tile has the correct fall height rating for your equipment and is installed on a properly prepared, stable base.
Ready to build a safer play space? Contact our team for a free quote or to request a sample. We’ll help you find the perfect ASTM-certified rubber playground tiles for your project’s specific safety needs.