


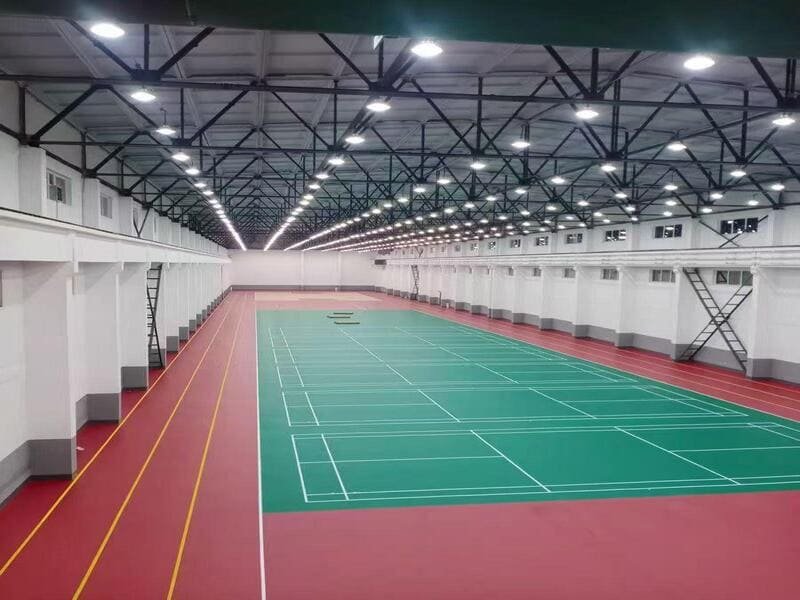
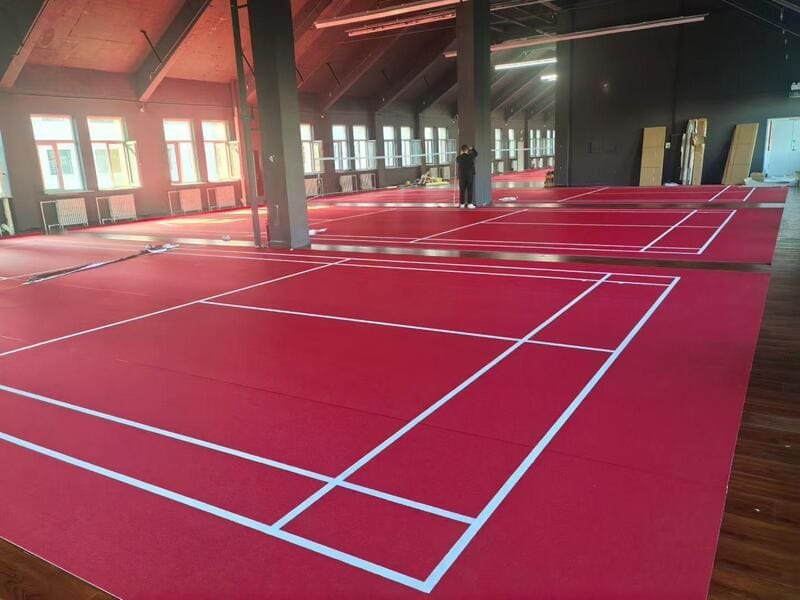
Les entrepreneurs doivent prévoir le traçage des lignes de terrain avant le début de la pose du revêtement de sol en vinyle, et non après. Cela implique de vérifier les exigences sportives, d’examiner la disposition du revêtement, de s’assurer de la compatibilité des matériaux et d’intégrer un plan de marquage dans les plans de pose dès le premier jour.
J’ai posé des revêtements de sol sportifs dans le cadre de projets où le tracé des lignes de terrain avait été considéré comme un détail secondaire, et j’ai également réalisé des projets où ce tracé avait été planifié dès le départ. La différence se remarque très vite. Lorsque la planification du tracé est effectuée en amont, les joints s’alignent parfaitement sur le tracé, les couleurs restent homogènes et les contrôles sont validés sans qu’il soit nécessaire de refaire le travail. Lorsque cela se fait tardivement, j’ai vu des équipes tracer des lignes directement sur des joints de soudure, ne pas respecter les largeurs de lignes prévues par les normes officielles, et repeindre certaines sections parce que la peinture n’adhérait pas à la couche d’usure en PVC. La planification des lignes de terrain n’est pas une simple question de décoration. Elle fait partie intégrante du système de revêtement de sol et doit être traitée comme telle dès la première visite sur site.
Ce guide explique en détail comment je planifie le tracé des lignes de terrain dans le cadre de projets de revêtement de sol en vinyle, depuis la première révision du plan jusqu'à la remise finale des travaux. Si vous posez, concevez ou gérez des projets de revêtements de sol sportifs, les étapes ci-dessous vous aideront à éviter les erreurs qui, par la suite, vous feraient perdre du temps et de l'argent.
Pourquoi le tracé des lignes de jeu est-il important dans les projets de revêtements de sol sportifs en vinyle ?
Une mauvaise planification du tracé des lignes de jeu entraîne des contrôles non conformes, une confusion chez les joueurs et des retouches coûteuses. Une petite erreur de mesure ou un mauvais choix de matériau peut contraindre un entrepreneur à refaire les travaux alors que le revêtement de sol en vinyle est déjà posé.
Je dis la même chose à toutes les équipes : la qualité d’une ligne de terrain dépend entièrement du plan qui la sous-tend. Lorsque j’interviens sur un projet, je coordonne simultanément les dimensions sportives officielles, la disposition du revêtement de sol en vinyle, les exigences multisports, la visibilité des couleurs et la durabilité à long terme. Si l’un de ces éléments fait défaut, cela engendre des problèmes en aval. Une ligne décalée d’un pouce par rapport au centre peut sembler correcte le jour de la pose, mais elle ne passera pas l’inspection de certification. Une peinture choisie uniquement pour sa couleur risque de s’écailler en quelques mois si elle n’a jamais été testée sur une surface en PVC. Ce guide s’adresse aux entrepreneurs spécialisés dans les revêtements de sol sportifs, aux poseurs de vinyle, aux constructeurs de salles de sport et d’installations, aux architectes et aux propriétaires d’installations qui ont besoin d’un processus complet, et pas seulement d’une liste de contrôle, pour tracer correctement les lignes de terrain dès la première fois.
Il est important d'avoir un raisonnement solide, mais cela ne sert à rien si on ne le met pas en pratique. C'est là que commence véritablement la planification.
À quel moment les entrepreneurs doivent-ils commencer à planifier le tracé des lignes de terrain ?
La planification du tracé du terrain doit commencer avant la pose du revêtement de sol en vinyle, et non après. Le fait de confirmer le type de sport pratiqué, d’examiner ensemble les plans du revêtement de sol et de vérifier les conditions du site dès le début permet d’éviter tout conflit entre le tracé et le revêtement de sol une fois posé.
| Étape de planification | Éléments à vérifier | Pourquoi c'est important |
|---|---|---|
| Exigences en matière de sport | Sports de base et de perfectionnement, en compétition ou à titre récréatif | Définit la mise en page à laquelle tout le reste se conforme |
| Plans des sols | Sens d'enroulement, emplacement des joints, joints de soudure | Empêche les lignes de se croiser au niveau des coutures |
| Conditions du site | Emplacement des murs, colonnes, zones de ruissellement | Permet de vérifier que le terrain de jeu s'adapte bien à l'espace disponible |
C’est l’agencement sportif qui doit dicter la conception du revêtement de sol, et non l’inverse. Je commence toujours par vérifier quel est le sport principal pratiqué – qu’il s’agisse de basket-ball, de volley-ball, de badminton, de tennis ou de pickleball –, puis je vérifie si l’espace nécessite des marquages secondaires pour une utilisation polyvalente. À partir de là, j’étudie les plans de pose du revêtement de sol en parallèle avec le tracé du terrain. Si une ligne médiane est prévue pour passer directement sur un joint de soudure, je le signale immédiatement. Les lignes placées sur des joints créent des incohérences visuelles et compliquent les réparations futures. Enfin, je me rends sur place. Un terrain qui semble parfait sur le papier peut s’avérer inadapté dans la pratique si les zones de sécurité, les espaces réservés aux spectateurs ou le stockage du matériel n’ont pas été pris en compte.
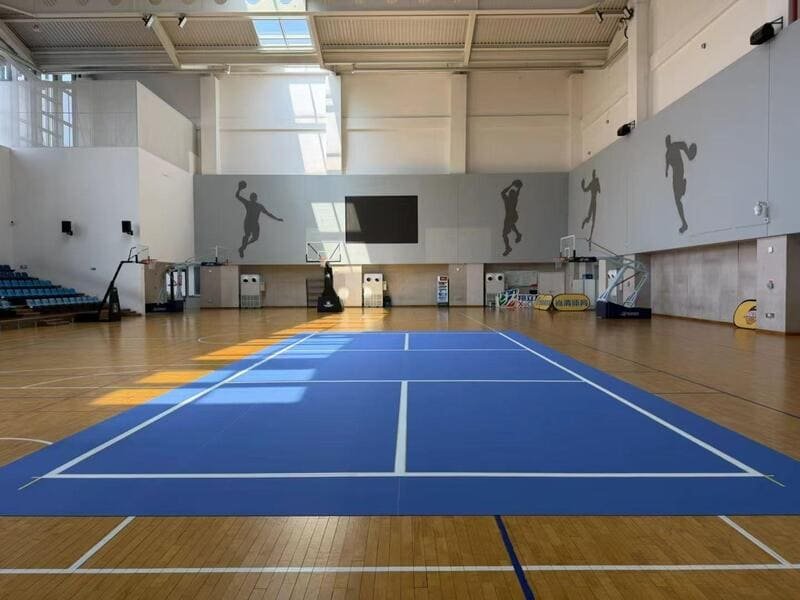
Une fois que le sport, le revêtement de sol et le site sont bien coordonnés, l'étape suivante consiste à déterminer les chiffres avec précision.
Comment mesurer et concevoir correctement l'agencement d'un terrain de sport ?
Pour obtenir des plans de terrain précis, il faut commencer par respecter les dimensions officielles du sport, mesurer correctement la largeur des lignes et vérifier les points de référence. Les entrepreneurs doivent vérifier si les mesures sont prises à partir de l'intérieur, de l'extérieur ou de la ligne médiane de chaque marquage.
Chaque sport a ses propres dimensions et règles de marquage, et les confondre est l’une des erreurs les plus courantes que je constate sur le terrain. Le basket-ball à lui seul présente des exigences différentes selon les normes de la NBA, de la FIBA, de la NCAA et des lycées, tandis que le volley-ball, le badminton, le tennis et le pickleball ont chacun leurs propres spécifications en matière de limites de terrain, de service et de ligne médiane. Au-delà des dimensions globales, je porte une attention particulière aux règles relatives à la largeur des lignes. Une erreur courante consiste à mesurer à partir du mauvais bord d’une ligne, ou à confondre la mesure de la ligne médiane avec celle d’un bord. J’utilise des appareils de mesure laser, des plans CAO et des systèmes de mesure numériques pour éviter cela. Ma méthode de travail standard consiste à déterminer d’abord le point central exact du terrain, à tracer les lignes d’axe principales, à marquer les points de référence de la ligne de fond, puis à vérifier la symétrie et à contrôler les mesures diagonales avant de procéder à la peinture.
Maintenant que les chiffres sont confirmés, le prochain défi consiste à faire cohabiter plusieurs disciplines sportives sur un même étage sans semer la confusion chez ceux qui y mettent les pieds.
Comment les entrepreneurs doivent-ils planifier le marquage au sol d'un terrain multisports ?
Les terrains multisports doivent respecter une hiérarchie claire des couleurs. Le sport principal doit être associé à la couleur présentant le contraste le plus élevé, tandis que les sports secondaires doivent utiliser des couleurs distinctes mais moins marquantes ; le nombre total de couleurs doit rester limité afin d'éviter toute surcharge visuelle.
| Le sport | Couleur de ligne suggérée | Priorité |
|---|---|---|
| Basket-ball | Blanc | Primaire |
| Volley-ball | Jaune | Secondaire |
| Badminton | Bleu | Secondaire |
Les couleurs réelles doivent toujours être choisies en fonction des besoins de l'installation, mais le principe de hiérarchie reste le même. Lorsqu'un gymnase doit accueillir plusieurs sports, je limite le nombre de couleurs utilisées et j'élabore un plan de marquage avant toute application de peinture, en donnant la priorité au sport le plus pratiqué. Un trop grand nombre de lignes qui se chevauchent crée des intersections déroutantes et réduit la visibilité des joueurs, ce qui devient un problème de sécurité lors des phases de jeu rapides. Je tiens également compte de la couleur du revêtement de sol lui-même. Les sols en PVC foncés nécessitent des couleurs de lignes plus vives pour maintenir le contraste, tandis que les sols clairs ont besoin d’un contraste plus marqué pour rester visibles sous différents éclairages et conditions de prise de vue, ce qui est important pour les installations qui enregistrent ou diffusent des matchs.
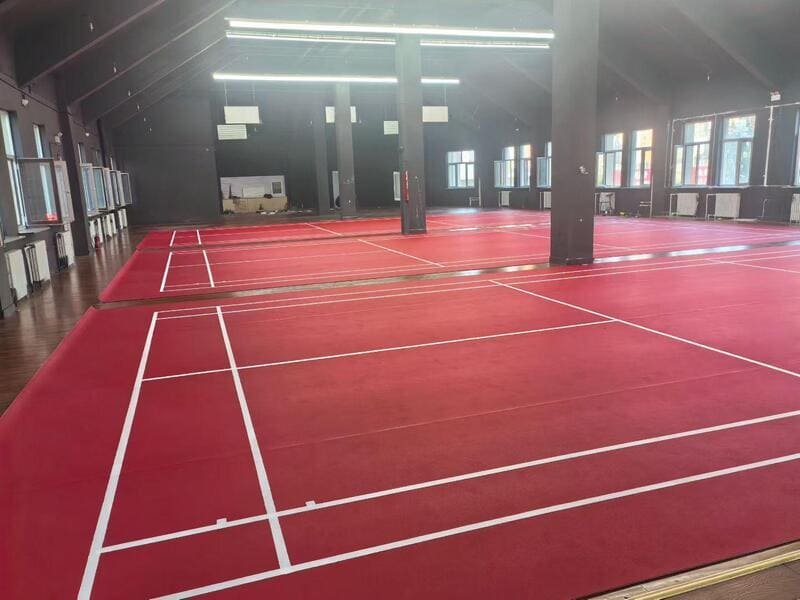
Choisir le bon système de couleurs n'est qu'une partie de l'équation. Choisir la manière dont les lignes seront tracées est la décision suivante qui déterminera l'ensemble du projet.
Quelle méthode de marquage des lignes de terrain choisir : impression en usine ou peinture sur place ?
Les revêtements de sol en vinyle imprimés en usine offrent une plus grande précision dimensionnelle et une meilleure homogénéité, tandis que les lignes peintes sur place offrent davantage de souplesse pour les travaux de rénovation et les agencements sur mesure. Le choix approprié dépend du calendrier du projet, des besoins en matière de souplesse de conception et de la compatibilité des matériaux.
Les revêtements de sol sportifs en vinyle imprimés en usine offrent une grande précision dimensionnelle, un aspect homogène sur l’ensemble du sol et moins d’erreurs de pose, car les lignes sont intégrées au processus de production plutôt que rajoutées par la suite. En contrepartie, cela nécessite une planification précoce et offre moins de flexibilité si la disposition venait à changer à un stade avancé du projet. Les lignes de terrain peintes sur place conviennent mieux aux projets sur mesure et aux travaux de rénovation, où la configuration peut devoir être modifiée ou adaptée aux conditions existantes. Le risque lié aux lignes peintes réside dans la compatibilité des matériaux. Tous les revêtements n’adhèrent pas bien au PVC. Je vérifie toujours le traitement de surface, la compatibilité avec le revêtement protecteur PUR, les performances d’adhérence, la résistance chimique et les exigences en matière de COV avant d’appliquer toute peinture, et j’évite les solvants agressifs ou les revêtements dont l’adhérence n’a pas été testée sur le revêtement de sol concerné.
Une fois la méthode choisie, la mise en œuvre consiste simplement à suivre un processus rigoureux et reproductible.
En quoi consiste le processus étape par étape de marquage des lignes de terrain de sport ?
Le processus de marquage des lignes de terrain comprend cinq étapes : la validation du plan d'implantation définitif, la préparation de la surface en vinyle, le report du plan sur le sol, l'application du masquage et du revêtement, puis le retrait du masquage en vue de l'inspection initiale.
Je ne commence jamais le traçage sans disposer d’un plan d’implantation entièrement validé, confirmant les dimensions du terrain, les couleurs et largeurs des lignes, la hiérarchie des sports et le sens de pose. À partir de là, la préparation de la surface revêt une importance bien plus grande que ce que la plupart des gens imaginent. J’élimine la poussière, j’enlève les salissures et je m’assure que le sol est sec, tout en évitant toute abrasion excessive ou l’utilisation de produits chimiques de nettoyage susceptibles d’endommager la couche d’usure. Ensuite, je reporte le tracé sur le sol à l’aide d’un positionnement laser, de mesures de référence et de lignes de marquage temporaires, en mesurant deux fois avant d’appliquer tout marquage définitif. Vient ensuite le masquage, à l’aide de ruban adhésif de précision pour empêcher la peinture de déborder et garantir une largeur de ligne constante, puis l’application du revêtement à l’épaisseur appropriée. Enfin, je retire le masquage et procède à une première inspection, en vérifiant la netteté des bords des lignes, l’uniformité de la couleur, le positionnement correct et la propreté de la surface avant de considérer la section comme terminée.
Même avec un processus de travail bien rodé, des erreurs peuvent toujours se produire si l'on précipite une étape. Voici celles que je constate le plus souvent.
Quelles sont les erreurs les plus courantes en matière de marquage des lignes de terrain ?
Parmi les erreurs les plus courantes, on peut citer le fait de ne pas tenir compte de l'emplacement des joints du revêtement de sol, l'utilisation de matériaux de marquage incompatibles, l'utilisation de dimensions de terrain incorrectes, une mauvaise planification des terrains multisports et l'endommagement de la surface en vinyle lors de la préparation.
| Erreur | Pourquoi cela arrive-t-il ? | Solution |
|---|---|---|
| Ignorer l'emplacement des coutures | Aménagement prévu indépendamment de la pose du revêtement de sol | Faire correspondre les coutures et les repères lors de la conception |
| Matériaux de marquage incompatibles | Peinture choisie uniquement en fonction de sa couleur | Vérifiez d'abord la compatibilité et l'adhérence |
| Dimensions incorrectes du terrain | Mesures effectuées sans étalonnage | Utiliser les plans approuvés, vérifier toutes les cotes |
| Une mauvaise planification multisports | Chaque sport ajouté sans examen de l'impact visuel | Établir une hiérarchie des couleurs, donner la priorité aux sports principaux |
| Dommages à la surface du vinyle | Méthodes de préparation du béton utilisées sur le PVC | Utilisez des procédures de nettoyage et de préparation adaptées au vinyle |
La plupart de ces erreurs ont la même cause profonde : considérer le marquage des lignes du terrain comme une tâche distincte de la pose du revêtement de sol, au lieu de le considérer comme un processus intégré. Lorsque je coordonne les joints du revêtement de sol et le marquage du terrain dès la phase de conception, que j'effectue des tests de compatibilité avant d'appliquer tout revêtement et que je vérifie les dimensions par rapport aux plans approuvés plutôt que de me fier à des hypothèses, la plupart de ces problèmes ne se posent tout simplement pas.
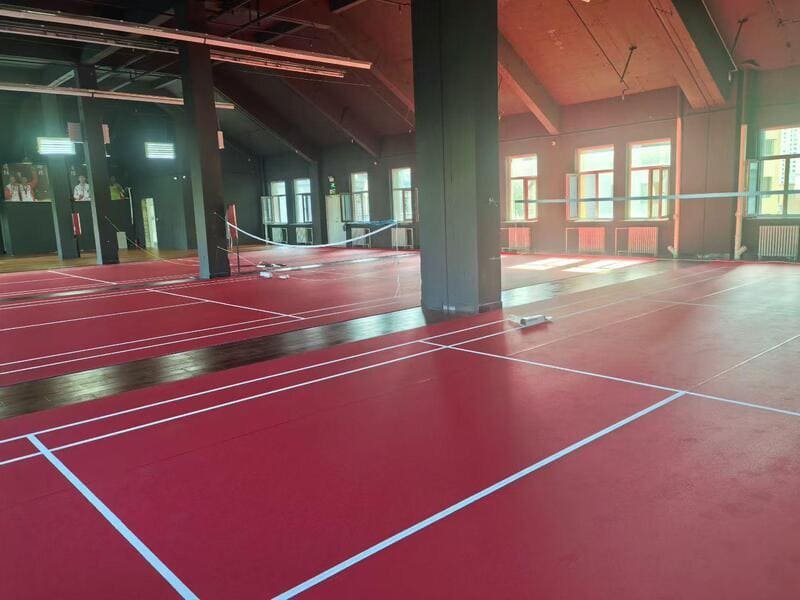
Éviter les erreurs, c'est déjà la moitié du travail. S'assurer que le travail est conforme aux normes avant la remise, c'est l'autre moitié.
Que doivent inclure le contrôle qualité et la passation de service ?
Le contrôle qualité doit vérifier la précision des dimensions, la qualité visuelle et la protection du revêtement de sol, puis être suivi d'une documentation comprenant le plan d'implantation définitif, les informations sur le produit et les consignes d'entretien.
Avant de valider un projet, je vérifie la longueur et la largeur du terrain, ainsi que la position et la largeur des lignes par rapport au plan approuvé. Je procède ensuite à un contrôle de la qualité visuelle : rectitude, netteté des contours, uniformité des couleurs et qualité des intersections à chaque point de croisement des lignes. Je vérifie également le revêtement de sol lui-même afin de détecter d’éventuelles rayures, détériorations de surface ou défauts de revêtement qui auraient pu survenir pendant le processus de marquage. Une fois que tout est conforme, je remets un dossier complet comprenant le plan d’implantation final du terrain, les informations sur le revêtement de sol, les consignes d’entretien, les recommandations de nettoyage et les documents de garantie. Cette étape protège à la fois l’entrepreneur et le propriétaire de l’installation, car elle fournit un compte rendu clair de ce qui a été installé et de la manière de l’entretenir à l’avenir.
Questions fréquemment posées
Peut-on poser des lignes de délimitation sur les joints d'un revêtement de sol en vinyle s'il n'y a pas d'autre solution ?
C'est possible, mais j'évite de le faire autant que possible. Une ligne qui traverse une couture risque davantage de s'user de manière inégale et complique les réparations futures ; je ne procède donc ainsi que lorsque la disposition ne laisse vraiment pas d'autre choix.
Comment savoir si une peinture va adhérer à mon revêtement de sol en vinyle ?
Avant de procéder à une pose complète, je réalise un petit test d'adhérence sur un chutes ou une partie non visible du revêtement de sol, car les revêtements PUR varient d'un fabricant à l'autre.
Les revêtements de sol imprimés en usine sont-ils toujours préférables à la peinture réalisée sur place pour les salles de sport polyvalentes ?
Pas toujours. L'impression en usine offre une plus grande uniformité, mais si un établissement prévoit de modifier la configuration des terrains de sport au fil du temps, les lignes peintes sur place offrent davantage de souplesse pour les mises à jour futures.
Quel est le principal facteur de coût lié aux erreurs de marquage des lignes de terrain ?
Retouches. Corriger des dimensions erronées ou réparer la peinture qui s'écaille après la pose coûte presque toujours plus cher que ce qu'aurait coûté le temps supplémentaire consacré à la planification en amont.
Conclusion
Un marquage professionnel des lignes de terrain commence par la planification, et non par la peinture. En coordonnant les exigences sportives, la conception du revêtement de sol, les matériaux et le contrôle qualité avant le début de la pose, vous réduisez les retouches tout en garantissant un sol qui conservera ses performances pendant des années.
A propos de l'auteur
Je travaille dans la fabrication de revêtements de sol en vinyle sur mesure et en grande série. Je dispose d'une expérience pratique dans l'accompagnement des entrepreneurs et des constructeurs d'installations, notamment en matière de planification de l'agencement des terrains, de sélection des matériaux et de coordination de la pose, tant pour des projets sportifs que commerciaux. Je me concentre sur les connaissances techniques en matière de fabrication qui permettent d'optimiser la conception, depuis la compatibilité des traitements de surface jusqu'à la précision de production des revêtements de sol sportifs imprimés en usine.
Vous prévoyez un projet de marquage de lignes de terrain ? Envoyez-moi un message et nous étudierons ensemble la disposition.