Les rouleaux de caoutchouc conviennent mieux aux grands espaces commerciaux permanents qui exigent un aspect homogène et un bon rapport coût-efficacité, mais nécessitent une installation précise. Les dalles en caoutchouc sont supérieures pour les salles de sport à domicile en raison de leur modularité et de leur facilité d'installation. Ce guide explique comment choisir et, surtout, comment installer les deux options, étape par étape.

Ayant passé des années à gérer les lignes de production où naissent ces deux produits, je vois les revêtements de sol des gymnases différemment. Je ne vois pas seulement une surface noire ; je vois la formulation des granulés SBR et des liants PU. Mais surtout, je vois le processus d'application. Un rouleau de caoutchouc parfait quittant mon usine peut avoir l'air terrible s'il est mal installé, alors qu'une simple dalle peut avoir l'air professionnelle si elle est posée avec soin. Lorsque les utilisateurs demandent "Comment appliquer", ils ont besoin de savoir non seulement ce qu'il faut acheter, mais aussi comment l'appliquer sur le sol.
Dans ce guide, j'associe mes connaissances en matière de fabrication à mon expérience pratique sur le chantier pour vous guider dans le processus de sélection et les étapes détaillées de l'installation des dalles et des rouleaux en caoutchouc.
Partie 1 : La sélection - Rouleaux et carreaux
Avant d'acheter un couteau utilitaire, vous devez vous assurer que vous disposez du matériel adapté aux besoins spécifiques de votre établissement.
Pourquoi le caoutchouc est-il la norme dans l'industrie ?
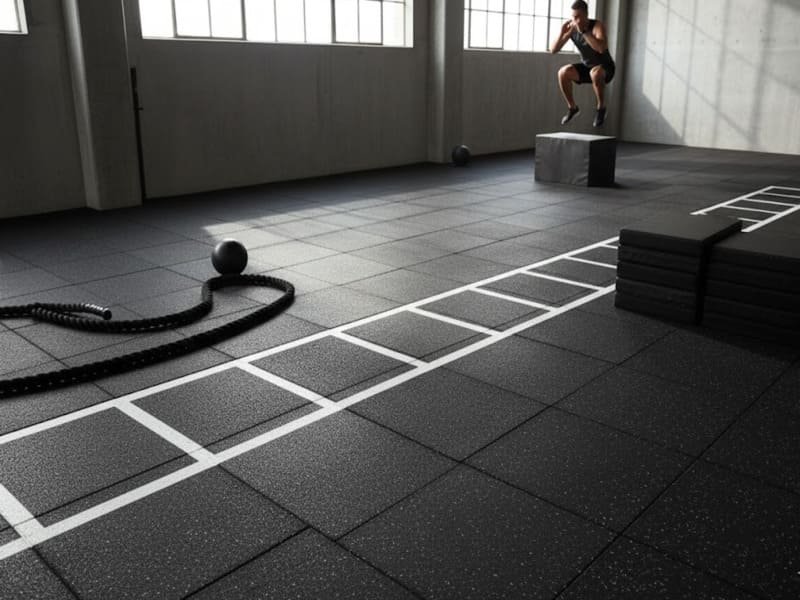
Les revêtements de sol en caoutchouc offrent une absorption des chocs inégalée, protégeant à la fois les sous-sols en béton et les équipements coûteux. Cependant, lorsque les utilisateurs finaux passent des espaces d'entraînement pour adultes aux environnements pour jeunes enfants, l'absorption des chocs ne suffit pas : la pureté du matériau, la sécurité du contact avec la peau et les exigences en matière d'hygiène deviennent des facteurs décisifs. Le TPV et l'EPDM sont évalués différemment pour les revêtements de sol des écoles maternelles..
En usine, nous concevons spécifiquement la densité pour absorber l'énergie cinétique. Un sol trop mou (mousse) crée de l'instabilité. S'il est trop dur (béton), il endommage les équipements. Le caoutchouc atteint le "point idéal".
| Fonctionnalité | Revêtements de sol en caoutchouc | Tapis en mousse/EVA | Béton/bois |
|---|---|---|---|
| Absorption des chocs | Élevée (dissipation d'énergie) | Faible (se comprime trop facilement) | Aucune (transfert à impact élevé) |
| Durabilité | 10+ ans (obligations vulcanisées) | 1-2 ans (se déchire facilement) | Sujet à la fissuration/au fendillement |
| Installation | Nécessite des mesures spécifiques | Peel and stick / Interlock | Construction nécessaire |

Comparaison rapide : Quel format correspond à vos compétences ?
- Rouleaux de caoutchouc : Le choix des "pros". Idéal pour les grands rectangles (plus de 500 m²). Moins de coutures, moins cher au mètre carré, mais lourd (plus de 100 kg) et difficile à couper/manipuler.
- Dalles en caoutchouc : Le choix du "bricoleur". Pour les garages résidentiels présentant des pentes de drainage ou des dalles inégales, l'installation nécessite une planification supplémentaire, qui est abordée ici : Comment traiter un sol de gymnase de garage en pente.
Idéal pour les garages, les sous-sols ou les formes bizarres. Les languettes qui s'emboîtent les rendent faciles à installer seules, mais les coutures sont visibles.
Partie 2 : Préparation - L'étape que la plupart des gens sautent
Le succès ou l'échec se produit avant que vous ne posiez le premier morceau de caoutchouc.
En tant que fabricant, je refuse quotidiennement des demandes de garantie parce que c'est la sous-couche qui était mauvaise, et non le caoutchouc. Ce guide explique exactement quelles couches de base et quels systèmes de sous-couches doivent être utilisés dans les installations commerciales : Que mettre sous le sol d'un gymnase commercial ?.
1. Le support doit être propre et plat
- Béton : Doit être complètement durci (pas d'humidité) et dépoussiéré. La poussière empêche le ruban adhésif/la colle d'adhérer.
- Le bois : Les planches doivent être bien fixées. Les planches mal fixées provoqueront des bulles d'air dans le caoutchouc.
- Moquette : N'installez pas de caoutchouc sur une moquette. Il crée une surface instable pour le levage. Les moquettes industrielles à faible poil sont acceptables pour les dalles, mais pas les rouleaux collés.
2. Liste des outils essentiels
- Couteau utilitaire : Avec de nombreuses lames neuves et robustes (le caoutchouc émousse instantanément les lames).
- Bord droit / Equerre en T : Pour les coupes de guidage.
- Ruban à mesurer et ligne de craie : Pour marquer les lignes d'implantation.
- Ruban adhésif double face pour moquette ou adhésif PU : (Pour les rouleaux).
- Maillet en caoutchouc : (pour les carreaux).
Partie 3 : Comment appliquer (installer) les rouleaux de caoutchouc
Difficulté d'installation : Haut | Le temps : 4-6 heures pour un garage Meilleur pour : 2 personnes
La pose de rouleaux est comparable à la pose d'une moquette murale ; elle nécessite de la patience et la gestion de la "mémoire" du matériau.

Étape 1 : Acclimatation (CRITIQUE)
Lorsque nous enroulons les rouleaux à l'usine, ils sont sous tension. Lorsque vous les déroulez, ils veulent se recourber.
- Action : Déroulez le caoutchouc et laissez-le reposer à plat dans la pièce pendant 24 à 48 heures avant de le couper ou de le coller. Cela permet de relâcher la tension. Si vous ne le faites pas, les coutures se recourberont et s'ouvriront plus tard.
Étape 2 : Pose à sec et coupe grossière
- Déroulez votre première feuille le long du mur droit le plus long.
- Laissez un excédent de matériau de 2 à 3 pouces le long des parois (vous le couperez plus tard pour qu'il soit parfaitement ajusté).
- Dérouler la deuxième feuille à côté.
- Conseil de pro : Faites chevaucher les coutures d'un pouce et coupez deux fois à travers les deux couches pour obtenir une couture parfaitement assortie, ou bordez-les fermement si les bords de l'usine sont droits.
Étape 3 : Adhésion
- Méthode des bandes (gymnases à domicile) : Roulez la moitié de la feuille vers l'arrière. Appliquez du ruban adhésif double face résistant sur le pourtour et le long des coutures. Décoller le support et rouler soigneusement le caoutchouc sur le ruban.
- Méthode de la colle (commerciale) : Appliquez à la truelle de la colle polyuréthane sur le béton. Il s'agit d'une méthode permanente et salissante, qui n'est recommandée qu'aux professionnels.
Étape 4 : Rouler le sol
Utilisez un rouleau à plancher de 75 à 100 livres (que vous pouvez louer) pour presser le caoutchouc dans l'adhésif/la bande. Cela permet d'éliminer les bulles d'air et d'obtenir une surface plane.
Partie 4 : Comment appliquer (installer) les dalles en caoutchouc
Difficulté d'installation : Faible Le temps : 1-2 heures pour un garage Meilleur pour : Bricolage en solo
Poser des carreaux, c'est comme assembler un puzzle géant. Elle est indulgente et rapide.

Étape 1 : Établir votre point de départ
- Début du centre : Trouvez le centre exact de la pièce. Commencez à poser les carreaux à cet endroit et progressez vers l'extérieur. Cela permet de s'assurer que les pièces coupées sur les murs sont égales des deux côtés (aspect professionnel).
- Départ en coin : Commencez par un coin. C'est le plus facile et le plus rapide, mais vous risquez de vous retrouver avec un petit bout de carreau sur le mur du fond.
Étape 2 : Emboîter et tarauder
- Aligner les languettes (forme de flèche/puzzle).
- Ne les forcez pas. Si vous devez les forcer, c'est qu'elles sont mal alignées.
- Utilisez un maillet en caoutchouc pour tapoter doucement les coutures à plat.
- L'orientation est importante : Certaines dalles ont un "grain". Veillez à ce que toutes les dalles soient orientées dans la même direction (souvent indiquée par une flèche sur le fond) pour éviter les différences d'ombres en "damier".
Étape 3 : Découpe des bords
- Lorsque vous atteignez un mur, mesurez l'écart.
- Marquez le carreau à l'aide d'une règle et d'une craie.
- La technique de coupe : N'essayez pas de trancher en un seul passage. Marquez le caoutchouc 3 à 4 fois en exerçant une pression moyenne. Il se séparera proprement. Le fait de plier le caoutchouc sous la ligne de coupe aide à l'ouvrir.
Partie 5 : Scénarios d'application et épaisseur
Maintenant que vous savez comment procéder à l'installation, voici un récapitulatif rapide de ce qu'il faut installer et à quel endroit.

| Scénario | Produit recommandé | Épaisseur | Note d'application |
|---|---|---|---|
| Haltérophilie lourde | Carreaux à haute densité | 15mm - 25mm | Doit protéger le sous-plancher. Installer sur du béton. |
| Espace cardio | Rouleaux de caoutchouc | 6 mm - 8 mm | Une épaisseur plus faible permet une meilleure stabilité de la machine. |
| CrossFit / Luges | Rouleaux (collés) | 8 mm et plus | Les tuiles à emboîtement se détachent sous l'effet de la friction du traîneau. |
| Garage à domicile | Carreaux à emboîtement | 8mm | Facile à enlever en cas de déménagement. |
Partie 6 : Maintenance et entretien
Atténuez l'odeur de "voiture neuve" en ventilant la pièce pendant 2 à 3 jours. Nettoyer chaque semaine à l'aide d'un aspirateur et d'une serpillière humide au pH neutre.
- Nettoyage : Utilisez un nettoyant au pH neutre. N'utilisez jamais de détergents ou de solvants à base d'huile (comme la térébenthine), car ils dissolvent le liant PU qui assure la cohésion de la gomme.
- L'odeur : Il s'agit d'un dégagement gazeux normal. La ventilation est le seul remède. Les capuchons en caoutchouc vierge (EPDM) sentent moins que le SBR standard, principalement en raison de la plus grande pureté du polymère et de l'absence de contenu recyclé à forte teneur en soufre - des avantages qui se traduisent également par des émissions de gaz à effet de serre. meilleure stabilité aux UV, meilleure rétention des couleurs et meilleure consistance de la surface à long terme.
Conclusion
Résumé :
- Choisir les rouleaux pour un sol commercial permanent et sans joint. Appliquer en acclimatant, en collant et en roulant.
- Choisir les carreaux pour une salle de sport flexible et bricolée. Appliquer en pose libre, emboîter et découper pour s'adapter.
Une application correcte est tout aussi importante que la qualité du caoutchouc. Si vous suivez ces étapes, votre sol durera des décennies.
Vous n'êtes toujours pas sûr du processus d'installation ou de l'épaisseur à utiliser ?
Mon équipe d'ingénieurs peut examiner votre plan d'étage et vous suggérer la meilleure disposition. Contactez-nous dès aujourd'hui pour recevoir gratuitement un guide d'installation et un kit d'échantillons.