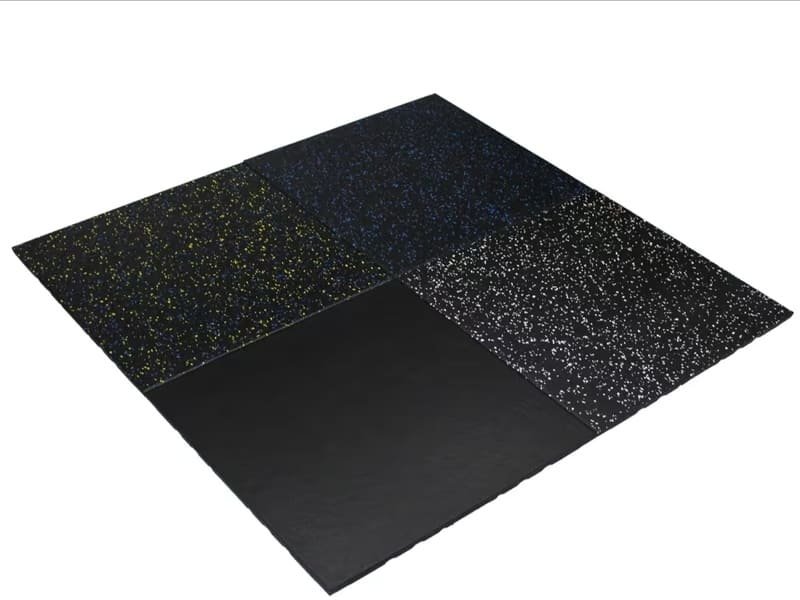
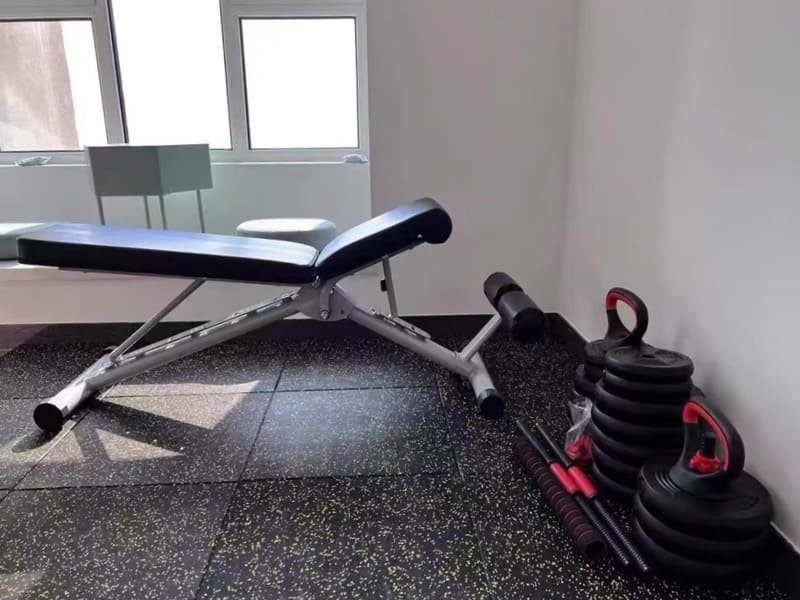
Pour la plupart des salles de sport à domicile, le revêtement de sol en caoutchouc est le meilleur choix possible. Il offre un équilibre idéal entre durabilité, absorption des chocs et protection du sol. Il est suffisamment résistant pour supporter les équipements lourds et les poids qui tombent, tout en offrant une surface stable et antidérapante pour des séances d'entraînement en toute sécurité.
D'après mon expérience en matière de contrôle de la qualité, le sol constitue la base de toute salle de sport sûre et efficace. Choisir le bon matériau est un investissement dans votre maison et votre sécurité. Les revêtements de sol en caoutchouc sont toujours plus performants que les autres matériaux dans les tests critiques. Sa fonction première est d'absorber et de dissiper la force des impacts, ce qui est essentiel pour protéger votre sous-plancher, qu'il soit en béton ou en bois, contre les fissures et les bosses. Le caoutchouc haute densité est conçu pour résister à la pression constante des lourds appareils de cardio et à l'impact répétitif des poids tombés sans se dégrader. Cette durabilité garantit la stabilité et la sécurité du sol pendant des années. Le coefficient de friction élevé inhérent au caoutchouc offre également une adhérence supérieure, une caractéristique de sécurité essentielle que nous testons pour éviter les glissades et les chutes pendant les exercices intenses. Il s'agit d'une décision unique qui s'avère payante à long terme.

Un sol de salle de sport adéquat ne se contente pas de protéger votre maison ; il vous protège et vous permet de mieux vous entraîner. Examinons maintenant les options spécifiques.
Quel est le meilleur matériau pour le sol de ma salle de sport ?
Le matériau le plus approprié dépend de votre style d'entraînement. Le caoutchouc est le meilleur choix pour l'haltérophilie et l'utilisation générale. La mousse convient aux exercices de musculation. Le vinyle est idéal pour les zones cardio. Le gazon est idéal pour les poussées en traîneau et les exercices d'agilité. Chaque matériau présente des avantages spécifiques en termes de performances.
Dans le cadre de mes fonctions, j'analyse quotidiennement ces matériaux. Le choix se résume à l'ingénierie et à l'utilisation prévue. Les performances d'un matériau sont directement liées à ses propriétés physiques, que nous vérifions au moyen d'essais normalisés. L'essentiel est d'adapter le matériau à la force qu'il doit supporter.
| Matériau | Meilleur pour | Pour | Cons |
|---|---|---|---|
| Caoutchouc | Haltérophilie, HIIT, polyvalent | Extrêmement durable, meilleure absorption des chocs, antidérapant | Peut être lourd, peut avoir une odeur initiale, coût plus élevé |
| Mousse haute densité | Exercices au poids du corps, yoga, arts martiaux | Léger, excellent amortissement des articulations, faible coût | Se déforme facilement sous l'effet d'un équipement lourd, ne convient pas à la dépose de poids. |
| Vinyle (PVC) | Aires cardio, salles polyvalentes | Très durable, facile à nettoyer, nombreuses options de couleurs/styles | Moins d'absorption des chocs que le caoutchouc, peut être glissant lorsqu'il est mouillé |
| Gazon artificiel | Poussées en luge, exercices d'agilité, fitness fonctionnel | Durable, adapté à la poussée et à la traction d'équipements lourds | Abrasif pour les exercices au sol, pas idéal pour le levage de charges lourdes |
Le choix du bon matériau est la première étape. Le facteur critique suivant que je vérifie toujours est son épaisseur.
De quelle épaisseur ai-je besoin pour mon sol de salle de sport ?
La bonne épaisseur dépend directement de l'intensité de votre entraînement et du poids que vous soulevez. Une épaisseur de 10 mm est la norme industrielle pour la plupart des salles de sport à domicile où l'on pratique l'haltérophilie de façon modérée. Les haltérophiles qui lâchent des poids lourds ont besoin d'une épaisseur de 20 mm ou plus pour une protection maximale.
En tant qu'ingénieur, je considère l'épaisseur comme la spécification la plus critique pour la protection contre les chocs. L'épaisseur du caoutchouc détermine sa capacité à absorber l'énergie. Un tapis fin ne peut tout simplement pas dissiper la force d'un poids lourd qui tombe, ce qui peut endommager le sous-plancher. Nous testons les lots pour nous assurer que l'épaisseur est uniforme sur chaque carreau. Une épaisseur irrégulière est le signe d'un contrôle de qualité médiocre.
| Épaisseur | Meilleur pour | Niveau de protection du sous-plancher |
|---|---|---|
| 1/4" (6-8 mm) | Yoga, haltères légers, sous les machines cardio. | Minime |
| 3/8" (10mm) | La plupart des salles de sport à domicile, haltérophilie modérée, HIIT | Bon |
| 1/2" (12mm) | Haltérophilie sérieuse, CrossFit, chute fréquente de poids | Excellent |
| 3/4" (20mm+) | Powerlifting, levées olympiques, plates-formes de deadlift | Maximum |
Une fois que vous avez choisi le matériau et l'épaisseur, vous devez décider du format qui convient le mieux à votre espace et à vos capacités d'installation.
Les dalles à emboîtement ou les rouleaux de caoutchouc sont-ils mieux adaptés à mon espace ?
Les dalles à emboîtement conviennent mieux à une installation par des bricoleurs dans des pièces de petite taille ou de forme irrégulière, car elles sont faciles à manipuler et ne nécessitent pas d'adhésif. Les rouleaux de caoutchouc sont plus rentables pour les grandes pièces carrées et offrent un aspect professionnel et sans raccord, mais ils sont lourds et difficiles à installer seuls.
Le choix entre les carreaux et les rouleaux est une décision entre la commodité et l'esthétique.
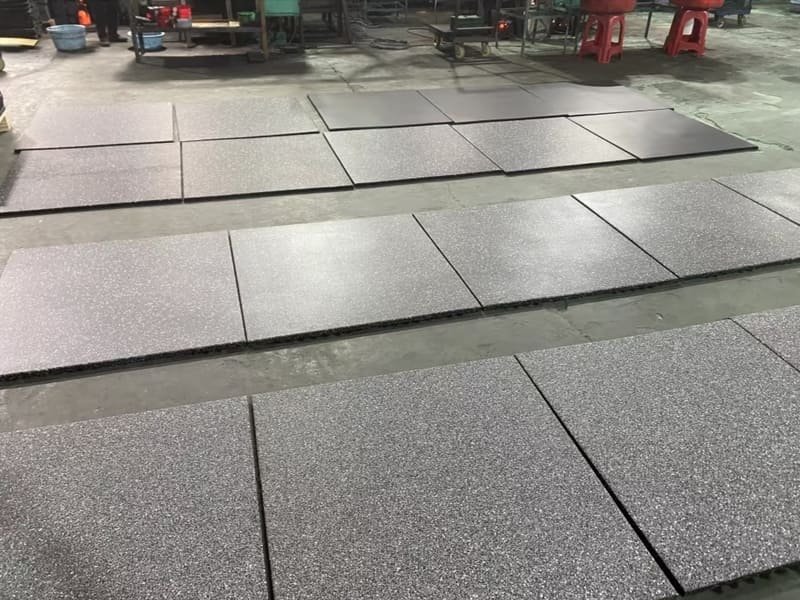
Carreaux à emboîtement
Du point de vue de la qualité, le mécanisme d'emboîtement est essentiel. J'inspecte personnellement les moules et l'équipement de coupe pour m'assurer que les languettes et les fentes sont fabriquées avec une grande précision. Les dalles mal fabriquées présentent des interstices, ce qui crée des risques de trébuchement et une surface instable. L'avantage des dalles est que si l'une d'entre elles est endommagée, il suffit de la remplacer. Cette conception modulaire est pratique pour un usage domestique.
Caoutchouc roulé
Les rouleaux offrent un aspect homogène, c'est pourquoi salles de sport commerciales les préfèrent. Mais l'installation est un défi majeur. Ces rouleaux sont extrêmement lourds et leur déplacement nécessite au moins deux personnes. Ils nécessitent également de l'adhésif pour une installation permanente. Le contrôle de qualité des rouleaux consiste à s'assurer que l'épaisseur et la densité sont constantes sur toute la longueur afin d'éviter les points faibles.

Une installation correcte est tout aussi importante que le produit lui-même pour garantir la sécurité et la longévité.
Comment installer correctement le sol de ma salle de sport ?
Pour poser votre parquet, commencez par une sous-couche propre et plane. Ne posez jamais votre revêtement sur une moquette. Laissez le nouveau revêtement s'acclimater dans la pièce pendant 24 à 48 heures. Pour les dalles à emboîtement, commencez par un coin et reliez-les, en les coupant pour les ajuster aux murs.
Une installation réussie dépend d'une bonne préparation. J'ai vu de nombreux revêtements de sol échouer parce que ces étapes de base n'avaient pas été respectées.
Étape 1 : Préparer l'espace
Vous devez enlever toute moquette existante. La moquette constitue une base souple et instable qui permet au sol du gymnase de se déplacer et de se séparer. Il s'agit d'un risque majeur pour la sécurité. Le sol doit être propre, sec et plat.
Étape 2 : Acclimater le revêtement de sol
Cette étape est essentielle du point de vue de la science des matériaux. Le caoutchouc, comme de nombreux matériaux, se dilate et se contracte en fonction des changements de température. Le laisser reposer dans la pièce pendant 48 heures lui permet d'atteindre l'équilibre thermique. Cela évite que les dalles ne se déforment ou ne se séparent après leur installation.
Étape 3 : Pose des carreaux
Commencez par un coin et progressez dans la pièce. Le système d'emboîtement est conçu pour un ajustement serré. Vous pouvez utiliser un maillet en caoutchouc pour tapoter doucement les joints. Un couteau utilitaire bien aiguisé et une règle sont tout ce dont vous avez besoin pour découper les dalles afin qu'elles s'adaptent parfaitement aux murs.
Même si le produit et l'installation sont parfaits, il se peut que vous ayez encore des questions à poser.
Quel est le moyen le plus simple de se débarrasser de l'odeur de caoutchouc neuf ?
L'odeur dégagée par un nouveau revêtement de sol en caoutchouc est temporaire. La meilleure façon de s'en débarrasser est d'assurer une bonne ventilation et de procéder à quelques nettoyages simples. Passez la serpillière avec une solution d'eau et de savon doux et ouvrez les fenêtres pour aérer la pièce.
L'odeur est le résultat d'un dégagement gazeux provenant des agents de vulcanisation et de liaison utilisés dans la fabrication. Elle n'est pas nocive et est le signe d'un produit nouvellement fabriqué. Du point de vue du contrôle de la qualité, les matériaux qui utilisent un pourcentage plus élevé de certains liants peuvent avoir une odeur initiale plus forte. Nous utilisons des liants à faible teneur en COV (composés organiques volatils) pour minimiser ce phénomène. L'odeur s'estompe complètement au bout d'une semaine ou deux avec une bonne circulation d'air. Le nettoyage à l'aide d'un produit de nettoyage au pH neutre permet d'éliminer tout agent de démoulage résiduel du processus de moulage, ce qui peut également accélérer la dissipation de l'odeur.
En pensant à votre investissement, vous vous assurez d'obtenir un sol qui répond à tous vos besoins pour les années à venir.
Conclusion
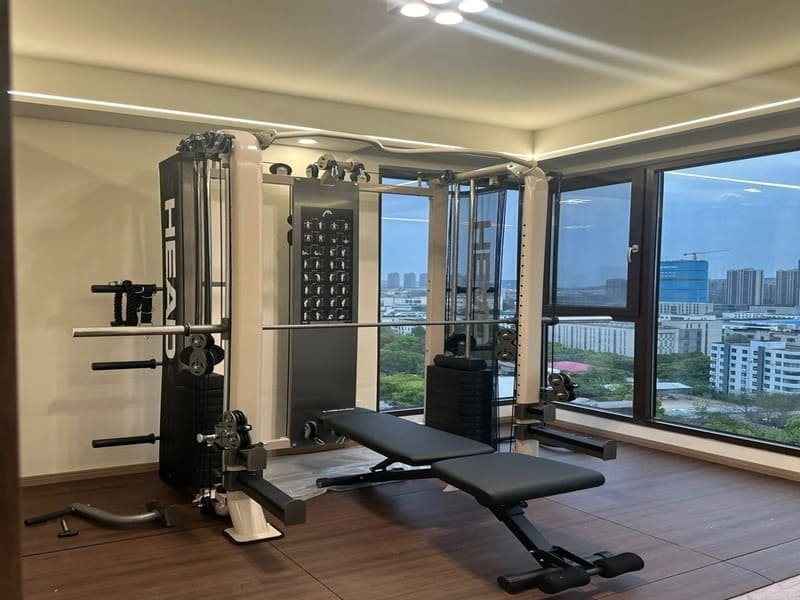
Choisir le bon sol pour la salle de sport à domicile est un investissement clé dans votre parcours de remise en forme. Il protège votre maison, renforce la sécurité et améliore la qualité de l'entraînement.
Une bonne salle de sport à domicile commence par le sol. Investir dans le bon revêtement de sol permet non seulement de protéger votre maison, mais aussi d'améliorer votre sécurité et vos performances. Si vous êtes prêt à créer l'espace d'entraînement idéal ou si vous avez des questions sur vos besoins spécifiques, nos experts en revêtements de sol sont là pour vous aider. Contactez notre équipe dès aujourd'hui pour un devis personnalisé ou pour demander un échantillon gratuit !