Installing rubber flooring rolls involves six key steps: measure the room, acclimate rolls for 24-48 hours, clean the subfloor, dry fit the material, secure with adhesive or tape, and roll the surface for a flat finish. For a professional result, use a sharp utility knife and a soap-water lubricant.
Quick Start: Step-by-Step Installation Checklist
- Measure & Order: Calculate your square footage plus 5-10% for waste.
- Acclimate (24-48h): Unroll the rubber in the destination room to prevent shrinking.
- Preparación del subsuelo: Sweep, mop, and ensure the surface is dry and level.
- Dry Lay & Cut: Position rolls and use the "overlapping cut" for seamless joints.
- Seguro: Apply double-sided tape or polyurethane adhesive.
- Roll & Cure (72h): Use a 100lb roller and wait 3 days before heavy use.
Building a home gym or a commercial facility is an investment in safety. As a customization specialist, I’ve seen that many DIYers fail because they treat rubber like carpet. It’s much heavier and more reactive to temperature. This guide provides the exact engineering steps we use on professional job sites to ensure your floor stays flat and functional for decades.
Before you start, you need to know exactly how much material to order and what it will cost.
How Much Rubber Flooring Do I Need?
To calculate your needs, multiply the room’s length by its width to get the square footage, then add a 5% waste factor for rectangular rooms or 10% for complex layouts with pillars. DIY installation typically costs $2.00 to $8.00 per square foot for materials, saving you $1.50 to $4.00 per square foot in professional labor fees.
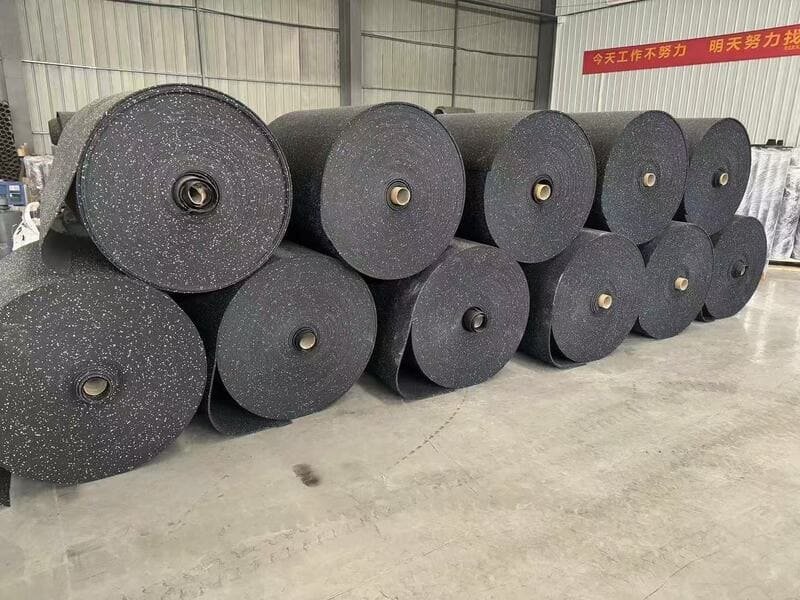
In my experience, ordering the exact square footage is the most common mistake. You will always lose material when trimming the edges against walls or around corners. If you are using 8mm rolls, which weigh about 2.2 lbs per square foot, you also need to plan for the physical labor required to move these rolls into place.
| Project Metric | DIY Estimate | Professional Estimate |
|---|---|---|
| Material Cost (8mm) | $2.00 – $3.50 /sq.ft | $2.00 – $3.50 /sq.ft |
| Coste laboral | $0 (Sweat Equity) | $1.50 – $4.00 /sq.ft |
| Herramientas necesarias | ~$50 (Knife, Tape, Straight-edge) | Included |
| Total Project Cost | Baja | Más alto |
The Value of Professional Density
When calculating, don’t just look at the price. A high-density roll (approx. 60-65 Shore A hardness) may cost more upfront but will not compress permanently under a heavy power rack, saving you money on subfloor repairs later.
Once you have your material, the most critical phase begins before you ever touch the glue.
What Is the "Acclimation" Secret for Rubber Rolls?
Acclimation is the process of letting rubber rolls sit unrolled in the installation room for 24 to 48 hours. This allows the material to reach equilibrium with the room’s temperature and humidity, preventing the rubber from shrinking or expanding after it is secured, which causes gaps or waves.
Rubber is an elastic polymer. If it arrives from a cold warehouse and you glue it down immediately, it will expand as it warms up to room temperature. This creates "bubbles" that are nearly impossible to fix later. I always tell my clients: "If you don’t have time to let it sit, you don’t have time to do it right."
The "White-Glove" Subfloor Prep
Any debris left on the floor will act as a pressure point. Over time, the weight of your equipment will force the rubber down onto that debris, causing a bump on the surface and a weak spot in the rubber.
| Subfloor Material | Acción requerida | Pro Tip |
|---|---|---|
| Hormigón | Patch cracks and level dips | Use a moisture barrier if below grade |
| Madera | Screw down loose boards | Ensure no wax or oil residue remains |
| Alfombra | Remove completely | Rubber over carpet will cause seam failure |
With a clean, acclimated floor, you are ready to use the tools that separate amateurs from pros.
What Tools and Techniques Ensure a Seamless Finish?
Pros use a heavy-duty utility knife with a soap-and-water lubricant and the "overlapping cut" technique. Overlap two rolls by one inch and cut through both layers simultaneously. This ensures that even if your hand shakes, the two edges will mirror each other perfectly for a tight, invisible seam.
Rubber dulls steel blades faster than almost any other building material. I keep a box of 50 blades on hand for every large project. If the knife starts to "pull" or "tear" the rubber rather than slicing it, change the blade immediately. A dull blade is the number one cause of jagged seams.
The Secret Lubricant
I always carry a small spray bottle with water and a few drops of dish soap. Spraying the blade or the cut line reduces friction. This allows you to cut through 10mm or 12mm rubber in two clean passes rather than five difficult ones.
| Paso | Técnica | Por qué funciona |
|---|---|---|
| Marcado | Use white chalk | Easy to see and wipes off easily |
| Corte | Multiple shallow passes | Prevents the blade from wandering |
| Costura | Overlap and double-cut | Guarantees a zero-gap fit |
After cutting your pieces to fit, you must decide how to keep them from moving.
Should You Use Tape or Full-Spread Adhesive?
Use double-sided flooring tape for home gyms and light-traffic areas where you may need to move the floor later. Use a full-spread polyurethane adhesive for commercial facilities, sled tracks, or areas with extreme temperature swings to ensure the floor remains a permanent, immovable surface.
In my role as a project specialist, I usually recommend tape for 90% of home users. It is faster and less messy. However, if your gym has a 20-yard sled turf next to the rubber rolls, the horizontal force of pushing a sled will eventually shift the rubber rolls if they are only taped.
Avoiding the "Air Pocket"
When laying the rubber into adhesive, never let it "flop" down. This traps air. Instead, use a "U-shape" fold. Lay the center first and let the edges follow slowly. Then, use a 100lb floor roller to move from the center outward to push any remaining air to the edges.

Even with a perfect installation, you likely have a few specific questions about your unique space.
Preguntas más frecuentes (FAQ)
Can you install rubber flooring over concrete?
Yes, concrete is the ideal subfloor. Ensure it is fully cured (at least 28 days old) and free of moisture. If the concrete is "dusty," use a primer to help the tape or glue adhere.
Do you need adhesive for rubber rolls?
Not always. In small, confined rooms (under 200 sq.ft.), the weight of the rubber itself (especially 10mm+ thickness) may keep it in place. However, tape is recommended for seams to prevent tripping.
What thickness is best for a home gym?
8mm (approx. 5/16") is the industry standard for home gyms. It handles dropped dumbbells up to 50lbs. For heavy powerlifting, 12mm or 15mm is safer for the subfloor.
¿Cuánto dura la instalación?
A standard 400 sq.ft. two-car garage gym typically takes 4 to 6 hours for a DIYer, excluding the 24-hour acclimation period.
Can rubber flooring get wet?
The rubber itself is water-resistant. However, moisture can seep through the seams and trap mold underneath. In wet areas, use a seam sealer to create a waterproof barrier.
Conclusión
A professional-grade rubber floor depends on patience, acclimation, and using the overlapping cut for seamless joints.
Mis ideas
Having consulted on both residential and commercial projects, I’ve learned that the "small" details—like changing your blade every three cuts—make the biggest difference in the final look. We focus on providing high-density rolls that make this process easier by maintaining their shape during the cut. If you’re unsure about the layout or which thickness suits your specific lifting style, my team and I are here to help.
Need help choosing the right thickness or calculating your layout? Get a free rubber flooring sample or a custom quote today. Our team is ready to help you optimize your space with the right technical specs.