Installing horse stall mats properly is essential for durability and horse safety. Start with a level, compacted base, measure your stall accurately, lay mats from the back corner outward, cut precisely with a utility knife, ensure tight fitting, and consider anchoring options for concrete floors. This creates a stable foundation that will last for years.
When it comes to horse stall flooring, proper installation makes all the difference between a long-lasting solution and constant maintenance headaches. As a production manager at a rubber flooring factory, I’ve seen countless successful installations and unfortunate mistakes. The good news is that with the right preparation and technique, installing horse stall mats is a straightforward process that will provide years of service.
The key to success lies in understanding that these mats are designed to work as a system. Each step in the installation process builds upon the previous one, creating a stable foundation that protects both your horse and your investment. I remember visiting a client’s stable where improperly installed mats had shifted, creating dangerous gaps that collected debris and caused tripping hazards. After guiding them through a proper reinstallation, the difference was remarkable – stable, level flooring that remained in place despite daily use.
Before diving into the specific installation steps, I want to emphasize that taking your time during preparation will save you countless hours of maintenance later. I’ve seen too many rushed installations that required complete do-overs within months. Trust me when I say that following these guidelines will lead to results you’ll be satisfied with for years to come.
What is best to put under stall mats?
The ideal base for horse stall mats is a level, well-compacted surface. For dirt floors, use fine particles no larger than 1/8 inch, compacted to 4-5 inches deep, leaving space for the mat thickness. Concrete bases should be smooth and clean. Crushed stone or decomposed granite works well when properly compacted. Avoid using large gravel or sand, which can shift under pressure.
Creating the perfect foundation for your stall mats is crucial for their performance and longevity. In my years overseeing rubber flooring production, I’ve learned that different base materials require specific preparation techniques.
Base Material Options
When preparing your base, consider these options:
| Base Material | Preparation Required | Pros | Contras |
|---|---|---|---|
| Hormigón | Clean, level, smooth | Extremely stable, easy to clean | Hard, can be cold, needs drainage |
| Compacted Dirt | Add fine particles, compact to 4-5" | Natural, good drainage, affordable | Requires more preparation, can shift |
| Madera | Must be solid, level, non-rotting | Warmer than concrete, good drainage | Can rot if not properly sealed |
| Asfalto | Clean, check for cracks | Durable, level | Can get hot, may off-gas |
| Crushed Stone | Compact thoroughly, use fines as top layer | Excellent drainage, stable | Labor-intensive to level properly |
For dirt floors, which are common in many barns, I recommend using "fines" – crushed stone particles no larger than 1/8 inch in diameter. These should be compacted to a depth of 4-5 inches, but here’s a critical detail many people miss: leave about 3/4 inch less than your mat thickness to account for the final height. Wetting the fines slightly during compaction helps achieve a rock-solid base. Just be sure to let everything dry completely before laying your mats.

Taking the time to properly prepare your base isn’t just about preventing mat shifting – it’s about creating a complete flooring system that will perform as designed. I’ve visited facilities where improperly prepared bases caused premature mat deterioration, wasting thousands of dollars in materials and labor. Don’t make that same mistake in your barn.
How to secure horse stall mats together?
To secure horse stall mats, butt straight-edge mats tightly together, staggering seams between rows for stability. For interlocking mats, align tabs carefully and tap gently to connect. Use mat tape on seams, consider adhesive for permanent installations, or use connector pins for removable setups. Always leave a small perimeter gap (1/4"-1/2") to allow for expansion.
Keeping horse stall mats in place is one of the most common challenges stable owners face. From my experience in manufacturing these products, I can tell you that securing mats properly is both an art and a science.
Securing Methods Comparison
The method you choose depends on your specific needs and mat type:
| Securing Method | Lo mejor para | Installation Difficulty | Permanence |
|---|---|---|---|
| Tight Butting & Staggering | Standard straight-edge mats | Fácil | Moderado |
| Interlocking Tabs | Puzzle or tab-style mats | Medium | Alta |
| Mat Tape | Seams between any mat type | Fácil | Low-Medium |
| Adhesivo | Permanent installations | Difícil | Muy alta |
| Connector Pins | Temporary or modular setups | Medium | Medium-High |
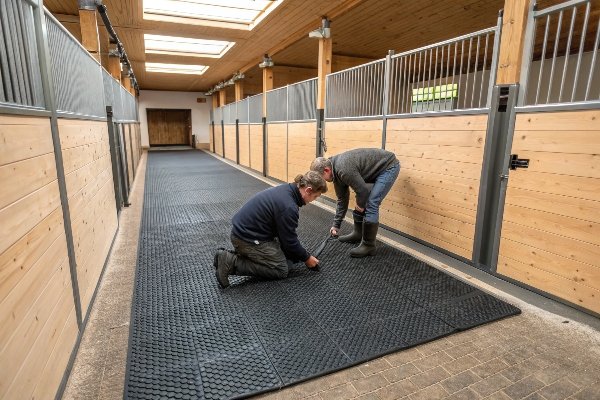
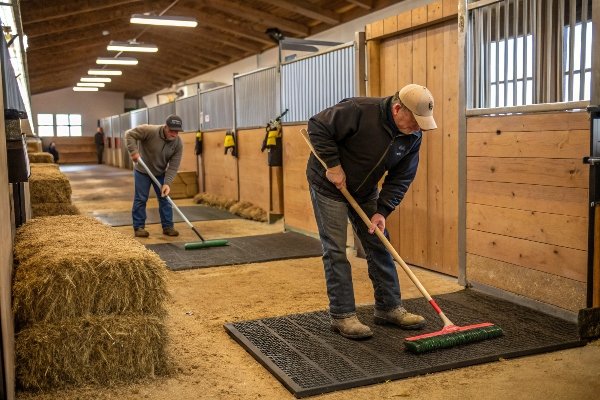
When working with standard straight-edge mats, the most effective approach is to butt them tightly together while staggering the seams between rows – similar to how bricks are laid. This creates a more stable surface as each mat is supported by multiple mats around it. I’ve found that starting from a back corner and working outward produces the best results, as it allows you to make any necessary cuts along walls rather than in high-traffic areas.
For interlocking mats, follow the manufacturer’s instructions carefully. The tabs are designed to fit together precisely, but forcing them can cause damage. I recommend using a rubber mallet to gently tap connections into place, working from one end to the other rather than trying to connect the entire edge at once.
Remember that rubber naturally expands and contracts with temperature changes. One of the most common mistakes I see is installing mats too tightly against walls. Always leave a 1/4 to 1/2 inch gap around the perimeter to prevent buckling during summer months. This small detail can make the difference between mats that stay flat and those that develop dangerous ridges.
What tools do I need to cut horse stall mats?
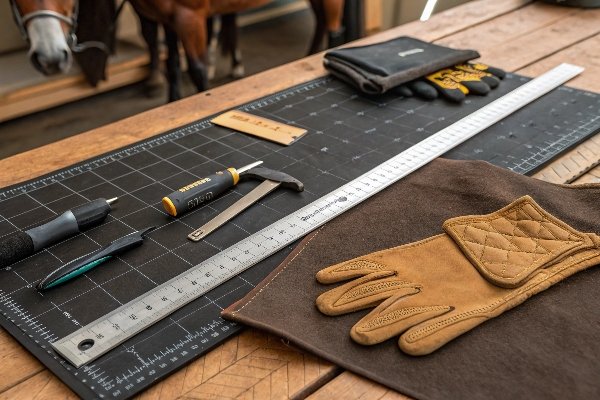
Essential tools for cutting horse stall mats include a sharp utility knife with replacement blades, a sturdy straight edge, measuring tape, chalk line, and a marker. For support during cutting, use a 2×4 board placed under the mat. Optional tools include jigsaw with special blades for thick rubber, tin snips for corners, and a carpenter’s square for perfect angles.
Cutting rubber stall mats correctly requires the right tools and techniques. Having overseen the production of countless mats, I can share some professional insights that will make this challenging task much easier.
Essential Cutting Tools
Here’s what you’ll need for professional results:
| Herramienta | Propósito | Tips |
|---|---|---|
| Utility Knife | Primary cutting tool | Use heavy-duty blades, change often |
| Straight Edge | Guide for straight cuts | Metal preferred over plastic |
| Cinta métrica | Accurate dimensions | Measure twice, cut once |
| Chalk Line | Mark long cut lines | Use bright colors for visibility |
| 2×4 Board | Support under cutting area | Raises mat for easier cutting |
| Marker | Mark cut lines | Use one that won’t rub off easily |
| Jigsaw | Optional for thick mats | Use special rubber-cutting blades |
| Tin Snips | Optional for corners/details | Good for small adjustments |
The most important technique I can share is to never try to cut through a thick rubber mat in one pass. Instead, score the line repeatedly, applying firm pressure each time. I typically recommend placing a 2×4 board directly under your cutting line, as this elevates the mat slightly and creates tension that makes cutting much easier.
For complex cuts around posts or irregular shapes, I’ve found that making a paper template first can save you from costly mistakes. Trace your obstacle onto paper, then transfer that pattern to the mat before cutting. This extra step has saved me from wasting expensive materials countless times.
When handling cut mats, be aware that freshly cut edges can sometimes be sharp. I recommend running your utility knife at a slight angle along the edge to create a small bevel, which reduces the risk of injury to both handlers and horses. This small detail demonstrates the level of care that separates professional installations from amateur ones.
How do I prevent horse stall mats from shifting?
To prevent horse stall mats from shifting, ensure your base is perfectly level and compacted, install mats tightly together, stagger joints between rows, extend mats into doorways, and consider using anchors on perimeter mats. For concrete floors, use specialized anchors through drilled holes in mat edges. On dirt floors, embed the mat edges slightly below surface level.
Mat shifting is one of the most common frustrations I hear about from stable owners. After years in rubber flooring production, I’ve identified the key factors that keep mats firmly in place.
Shifting Prevention Methods
Here are the most effective approaches:
| Method | Effectiveness | Difficulty | Best Surface Type |
|---|---|---|---|
| Level Base Preparation | Muy alta | Medium | All surfaces |
| Staggered Seams | Alta | Bajo | All surfaces |
| Edge Anchoring | Muy alta | Medium-High | Concrete/wood |
| Perimeter Embedding | Alta | Medium | Dirt/gravel |
| Mat-to-Mat Connectors | Medium-High | Bajo | All surfaces |
| Adhesive Application | Muy alta | Alta | Concrete/wood |
The foundation of shift-free mats is, quite literally, the foundation itself. A perfectly level, well-compacted base eliminates the voids that allow mats to move. I’ve visited barns where owners complained about constant shifting, only to discover undulations in their base that created pivot points for movement. Taking the time to level your base properly is the single most important step you can take.
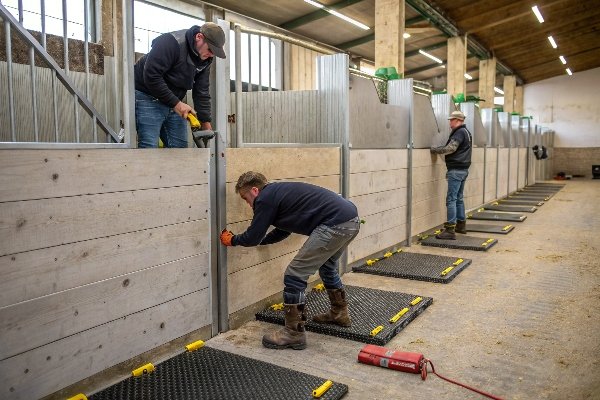
For concrete floors, anchoring provides the most secure solution. I recommend using anchors with metal sleeves that are inserted through drilled holes in the mats and into the floor. A critical detail here: only anchor mats along the edges, never in the middle of mats that are surrounded by other mats or walls. This allows for natural expansion without creating buckles.
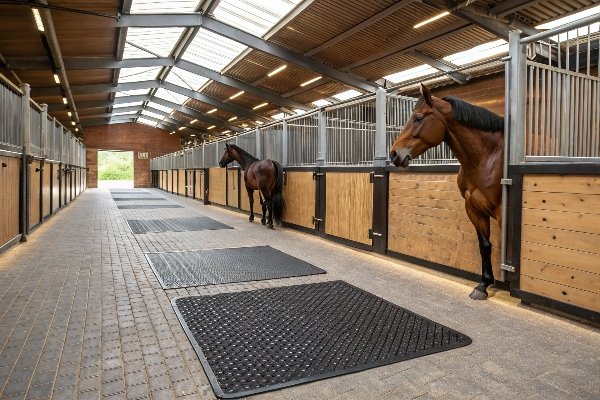
One technique I’ve found particularly effective is extending mats slightly into doorways or thresholds. This prevents horses from pawing at edges, which is a common cause of mat displacement. Combined with staggered seams between rows, this approach creates a remarkably stable installation even without mechanical fasteners.
Can I use horse stall mats over uneven surfaces?
Horse stall mats should not be installed over significantly uneven surfaces. While they can handle minor imperfections of 1/8" or less, larger irregularities will cause premature wear, mat movement, and potential hazards. Always level your base first, using appropriate materials like leveling compound for concrete or fine crushed stone for dirt floors. Patience during preparation prevents problems later.
As someone who has manufactured rubber flooring for years, I can tell you that installing mats over uneven surfaces is one of the quickest ways to ensure disappointment with your investment. Let me explain why leveling is so crucial.
Consequences of Uneven Installation
The impacts of installing over uneven surfaces include:
| Edición | Consequence | Timeframe for Problems |
|---|---|---|
| Mat Bridging | Creates stress points that cause premature cracking | 3-6 months |
| Trapped Moisture | Promotes bacterial growth and odors | Immediately |
| Shifting & Gaps | Creates tripping hazards for horses | 1-3 meses |
| Uneven Wear | Reduces overall lifespan of mats | 6-12 months |
| Poor Drainage | Results in wet stalls and unhealthy conditions | Immediately |
Rubber stall mats are designed to distribute weight evenly across their surface. When installed over bumps or depressions, they’re forced to bridge these gaps, creating tension points that eventually lead to tearing or cracking. I’ve seen premium mats fail in just months when installed over uneven surfaces, while the same products last decades when properly supported.
For concrete floors with minor imperfections, consider using a self-leveling compound to create a smooth surface. For dirt floors, take the time to remove high spots and fill low areas with properly compacted fines. I recommend using a long straight edge to check for levelness across the entire stall, addressing any variations greater than 1/8 inch.
I once visited a stable where the owner had installed expensive mats over a floor with a significant drain depression. Within weeks, the mats had cracked along the depression’s edges, creating dangerous shards of rubber. We ended up having to replace those mats and properly level the floor – a costly lesson that proper preparation would have prevented.
What’s the best way to keep horse stalls dry?
To keep horse stalls dry, install rubber mats with proper drainage slopes (1-2%), use absorbent bedding above mats, create drain channels in concrete bases, install moisture barriers under mats for dirt floors, and establish good ventilation. Regular stall cleaning is essential, as is monitoring for condensation. Some specialty mats offer enhanced drainage features.
Moisture management is critical in horse stalls, and proper mat installation plays a significant role. From my experience in rubber flooring production, I can share some professional insights on keeping stalls dry and healthy.
Moisture Management Strategies
Consider these approaches for maintaining dry conditions:
| Estrategia | Effectiveness | Implementation Difficulty | Mantenimiento necesario |
|---|---|---|---|
| Proper Base Slope | Muy alta | Medium-High | Bajo |
| Absorbent Bedding | Alta | Bajo | Alta |
| Drainage Channels | Alta | Medium | Medium |
| Moisture Barriers | Medium-High | Medium | Bajo |
| Ventilation Systems | Alta | Medium-High | Bajo |
| Specialty Drainage Mats | Alta | Bajo | Medium |
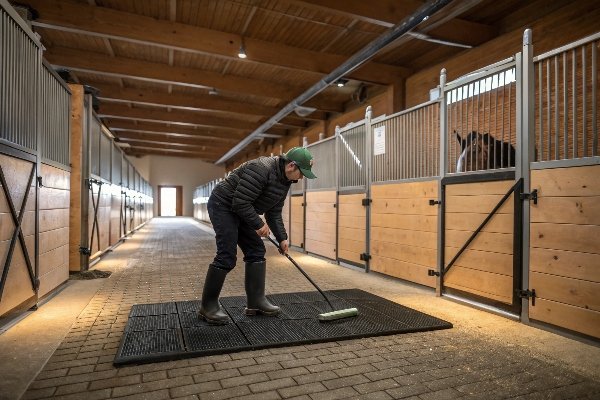
The foundation of moisture control begins with your base preparation. Ideally, stall floors should have a slight slope of 1-2% toward a drain or door. This subtle incline is barely noticeable to horses but makes a tremendous difference in moisture management. When installing mats on concrete, ensure drain paths remain unobstructed – some designs even incorporate channels beneath the mats to direct water flow.
For dirt floors, consider installing a moisture barrier before laying your mats. A commercial-grade geotextile fabric allows some breathability while preventing ground moisture from wicking upward. I’ve seen this simple addition transform chronically damp stalls into dry, healthy environments.
Remember that while mats provide an excellent moisture barrier, they work best as part of a complete system. The combination of proper drainage, quality bedding, and regular maintenance creates the dry environment horses need. I’ve worked with many facilities that struggled with moisture until they addressed all these factors together, rather than expecting mats alone to solve their problems.
How do I attach stall mats to concrete walls?
To attach horse stall mats to concrete walls, use construction adhesive specifically formulated for rubber and concrete, mechanical fasteners like concrete screws with washers, specialized rubber wall base strips, or a combination approach. First, ensure walls are clean, dry and level. For temporary installations, consider pressure-fitting without permanent attachment.
Attaching rubber mats to concrete walls presents unique challenges compared to floor installation. As someone who’s overseen countless rubber flooring installations, I can guide you through the most effective approaches.
Wall Attachment Methods
Consider these options based on your specific needs:
| Attachment Method | Permanence | Difficulty | Best Application |
|---|---|---|---|
| Construction Adhesive | Alta | Medium | Full coverage areas |
| Mechanical Fasteners | Alta | Medium | Spot attachment points |
| Wall Base Strips | Medium | Bajo | Bottom edge only |
| Z-Bar/Channel System | Medium-High | Medium-High | Removable installations |
| Pressure Fitting | Bajo | Bajo | Temporary solutions |
For permanent wall installations, I recommend a high-quality construction adhesive specifically formulated for bonding rubber to concrete. Apply it in a zigzag pattern across the back of the mat, focusing extra adhesive around the edges. This approach provides excellent longevity, but be aware that removal will likely damage the mats if needed later.
When mechanical strength is required, concrete screws with large washers work well for securing mats to walls. I suggest placing these fasteners approximately every 16 inches around the perimeter, keeping them at least 2 inches from the edge of the mat to prevent tearing. Pre-drilling through the rubber creates cleaner holes and reduces stress on the material.
An often-overlooked detail is wall preparation. Concrete walls must be completely clean, dry, and free of dust before attachment. I recommend washing the wall with a degreasing cleaner, rinsing thoroughly, and allowing 24-48 hours of drying time. This small step dramatically improves adhesion and prevents frustrating failures down the road.
Conclusión
Proper installation of horse stall mats requires careful base preparation, precise measuring, appropriate tools for cutting, and effective securing methods. Following these guidelines ensures a safe, comfortable environment for your horse while maximizing the lifespan of your investment.