
To install EPDM rubber flooring effectively, you must first acclimatize the material for 24-48 hours and ensure the subfloor is clean, dry, and level. The process involves precise cutting, applying the correct polyurethane adhesive or tape, pressing the material firmly to remove air pockets, and allowing adequate curing time before use.
Expert Insight: Understanding Material Behavior
As a contractor who has laid thousands of square feet of rubber, I can tell you that EPDM (Ethylene Propylene Diene Monomer) is chosen for its superior vibration dampening and slip resistance. However, the success of the installation relies heavily on understanding the material’s behavior. Rubber expands and contracts with temperature changes. If you skip the acclimatization phase or install it on a damp concrete slab, the floor will eventually bubble or gap.

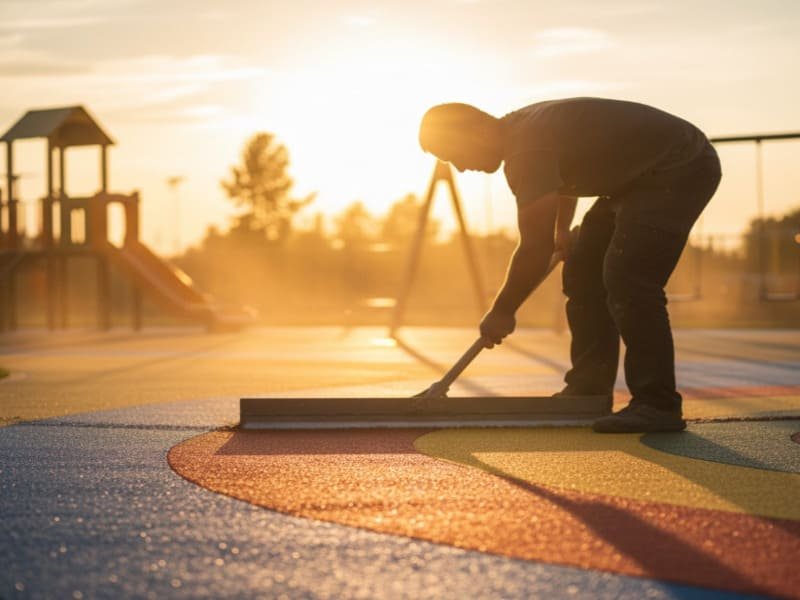
Whether you are installing prefabricated rolls for a gym or a wet-pour surface for a playground, the engineering principles remain the same: proper adhesion requires a chemical bond that can only happen on a prepped surface. In my experience, the difference between a floor that lasts 2 years and one that lasts 20 years is entirely in the prep work, not the price of the rubber.
Gather Your Tools & Materials
Before you start prepping the floor, ensure you have the correct tools. Missing a specific trowel or using a dull blade can ruin the finish.
Essential Toolkit:
- Measurement: Tape measure, Chalk line (for marking straight reference lines), T-Square or Metal Straight Edge.
- Schneiden: Heavy-duty Utility Knife (with plenty of spare hook and straight blades).
- Adhesion: 1/16" V-notch Trowel (for glue-down) or Double-sided Carpet Tape.
- Fertigstellung: 75-100 lb Floor Roller (rental is usually available).
- Sicherheit: Knee pads, safety glasses, and latex gloves (adhesive is sticky).
Pre-Installation Preparation
Preparation is critical because moisture and uneven surfaces are the leading causes of adhesive failure. You must test concrete for moisture using a calcium chloride test, fill any cracks with a cementitious patch, and ensure the room temperature remains above 50°F (10°C) to allow the adhesive to cure properly.
Common Subfloor Pitfalls
I have seen many DIY enthusiasts and even some general contractors rush this stage, only to face costly repairs later. When we talk about subfloor prep, we are essentially creating a stable foundation for a flexible material. If the subfloor has high moisture vapor emission rates (MVER), the rising vapor will get trapped under the non-porous rubber, pushing the adhesive up and creating bubbles. For wood subfloors, you need a Plywood underlayment to prevent the grain from telegraphing through the rubber. Furthermore, any debris left on the floor will show up as a bump in the final surface.
We use a critical checklist in the manufacturing and installation process to ensure the site conditions match the adhesive specifications:
| Unterboden Typ | Schlüsselanforderung | Common Pitfall |
|---|---|---|
| Beton | Fully cured (28+ days), dry, and level. | Ignoring moisture testing (pH/MVER). |
| Sperrholz | Glued and screwed, seams sanded flat. | Using particle board (absorbs moisture). |
| Vorhandene Kacheln | Well-bonded, skim-coated grout lines. | Installing over loose or glossy tiles. |
| Carpet/Grass | DO NOT INSTALL. | Assuming rubber will stabilize soft bases. |
How to Install EPDM Rubber Rolls
Once the subfloor is perfectly prepped, we can move on to the actual installation techniques. This is the most common method for commercial gyms and fitness centers.

Acclimatization & Dry Lay
Unroll the rubber flooring in the room where it will be installed. Let it sit for at least 24 hours. This allows the rubber to relax from the curling caused by being rolled up and adjust to the room’s temperature.
- Profi-Tipp: Cut the rolls slightly longer than the room length (add 3-6 inches) to account for trimming later.
Cutting the Seams
Installing rolls requires squaring the room and cutting the rubber with a fresh utility blade.
- Technique: High-density rubber requires a sharp blade and a "score and snap" technique. Do not try to cut through in one pass; sawing at it will leave jagged seams. Score it deeply, bend the rubber to open the cut, and slice through the remaining material.
Application (Glue vs. Tape)
Choose your method based on usage:
- Option A: Tape (Residential/Light Traffic): Apply double-sided tape around the perimeter of the room and along the seams. Remove the backing and press the rubber firmly down.
- Option B: Full Glue Down (Commercial/Heavy Weights): Fold back the rubber roll halfway. Apply polyurethane adhesive using a notched trowel on the exposed subfloor. Carefully lay the rubber back into the wet adhesive, ensuring no air is trapped.
Rolling the Floor
You must roll the floor with a 75-100 lb roller immediately after gluing (usually within 30-45 minutes). This ensures transfer of the adhesive to the rubber backing and eliminates trapped air bubbles.
How to Install Interlocking Tiles
If you are using interlocking tiles instead of rolls, the process is different. Glue is rarely used, making this a "floating floor" system.

Start from the Corner (or Center)
For most square rooms, start in a corner, leaving a roughly 1/4 inch gap from the wall for expansion. If the room is irregularly shaped, start from the center and work your way out to ensure the cuts at the edges are symmetrical.
Lock the Tiles
Align the tabs (teeth) of the tiles. Use a rubber mallet to gently tap the seams together.
- Warnung: Do not force them. If they aren’t fitting, check for debris in the teeth.
Cut the Edges
Once you reach the walls, measure the remaining gap. Mark your tile using a straight edge and cut firmly. Install the cut piece to finish the row.
Post-Installation Care
- Curing Time: For glued floors, keep foot traffic off for 24 hours and heavy rolling loads (like gym equipment) off for 72 hours.
- Cleaning: Wait 72 hours before using any liquid cleaners. Use a pH-neutral cleaner specifically designed for rubber. Avoid harsh solvents that can break down the EPDM granules.
Ready to Start Your Project?
A successful installation starts with the right foundation—and the right material. If you are still deciding between rolls and tiles, or want to see the quality of our high-density EPDM rubber firsthand, we are here to help.
Feel free to connect with our team to request a complimentary sample kit or a quick, no-obligation estimate for your floor plan. Let’s make sure your project is built to last.