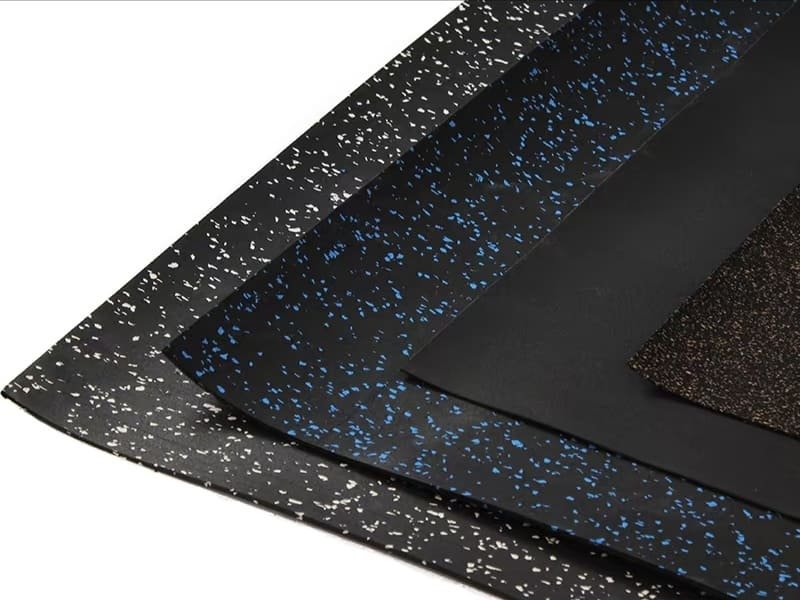
Края резинового напольного покрытия скручиваются в основном из-за неправильной акклиматизации, когда материал пытается вернуться к своей свернутой форме. К другим основным причинам относятся использование неправильного клея, высокая влажность основания и неиспользование 100-фунтового валика для пола, чтобы обеспечить прочное постоянное сцепление при первоначальной укладке.
Очень обидно видеть, как только что уложенный пол в спортзале выглядит волнистым или поднимается по швам. Я провел годы на фабриках и в тренажерных залах в качестве специалиста по контролю качества, и я часто сталкиваюсь с этой проблемой. Скручивание обычно не является дефектом самой резины, а скорее результатом того, что физика и химия работают против вас. Когда резина производится, ее плотно сворачивают для транспортировки, что создает "память материала". Если не дать материалу время расслабиться и забыть об этой изогнутой форме, он будет естественным образом отрываться от пола. Понимание технических причин такого поведения - первый шаг к ровному, профессиональному покрытию. Мы рассмотрим такие основные причины, как тепловое расширение, время схватывания клея и уровень pH основания, чтобы помочь вам решить эту проблему навсегда.
Продолжайте читать, чтобы понять, как простая физика может испортить ваши дорогостоящие инвестиции в напольное покрытие, если вы пропустите небольшие шаги.
Влияет ли наука о "памяти" и акклиматизации на ваш пол?
Да, резина обладает "памятью материала", поскольку на заводе ее плотно сворачивают. Если не дать ей акклиматизироваться в течение 24-48 часов в условиях спортзала, края вернутся к своей изогнутой транспортировочной форме, даже если вы попытаетесь приклеить их сразу же.
При ежедневной проверке качества я измеряю, насколько сильно "расслабляется" рулон после резки. Когда резина прокатывается под напряжением, внутренние полимеры растягиваются. Если вы установите его, пока он еще "напряжен", эти внутренние силы окажутся сильнее многих клеев. Вот почему правило 48 часов является законом в нашей отрасли, а не предложением. Температура также играет огромную роль. Резина - плотный материал, который долго держит холод или тепло. Если вы принесете холодный рулон в теплый зал и сразу же установите его, резина будет расширяться по мере нагревания. Это расширение часто заставляет края прижиматься друг к другу. Понимание почему резиновые полы скручиваются и как принять профилактические меры, чтобы остановить это движение до того, как оно испортит отделку. Чтобы остановить это движение, необходимо развернуть маты и дать им нагреться до температуры окружающей среды в помещении.
| Фактор | Воздействие на материал | Необходимые действия |
|---|---|---|
| Заводская компрессия | Создает "изогнутую" память | Разверните и оставьте на 48 часов. |
| Температура холода | Причины сжатия материала | Акклиматизируйтесь при комнатной температуре (65-75°F) |
| Теплая температура | Вызывает расширение материала | Убедитесь, что система отопления, вентиляции и кондиционирования работает за 48 часов до начала |

Я видел много проектов, которые провалились из-за того, что подрядчик торопился, но резину не волнует ваш график.
Почему нарушение адгезии приводит к скручиванию краев?
Клеящий эффект возникает, когда вы используете неправильный клей, наносите его шпателем неправильного размера или игнорируете "время вспышки". Если связь между резиной и основанием слабая, естественное напряжение в резине легко потянет края вверх.
| Проблема с клеем | Технические последствия | Результат на краях |
|---|---|---|
| Неправильный тип клея | Плохая химическая связь с резиной | Края приподнимаются при легком движении. |
| Пыль/загрязнение | Клей прилипает к пыли, а не к полу | Полное разрушение связей в швах |
| Неправильное время вспышки | Клей слишком мокрый или слишком сухой | Резина скользит или не держится |
Как эксперт по контролю качества, я всегда говорю людям, что клей - это единственное, что борется со стремлением резины к скручиванию. Использование чувствительного к давлению клея, когда требуется полиуретановое соединение, - распространенная ошибка. Также необходимо следить за загрязнением основания. Даже тонкий слой пыли действует как "барьер", поэтому клей прилипает к пыли, а не к бетону. Еще одна большая ошибка - "время вспышки". Если уложить резину слишком рано на влажный клей, влага задерживается и может привести к тому, что резина начнет пузыриться или скручиваться по краям. Если вы будете ждать слишком долго, клей "облезет" и совсем не будет захватывать резиновую основу. Для успешного склеивания необходимо точно соблюдать указанные производителем сроки.
Как подложка и факторы окружающей среды убивают вашу связь
Влажность под полом - "тихий убийца" резиновых полов. Если бетонная плита имеет высокую скорость парообразования, то эта влага проникает вверх. Эта влага часто содержит соли и высокий уровень pH, которые разрушают химическую структуру клея. Я всегда рекомендую проводить тест на содержание хлорида кальция или относительную влажность воздуха перед укладкой. Если уровень pH бетона выше 9 или 10, клей буквально превратится обратно в жидкость или станет хрупким. Кроме того, прямые солнечные лучи через большие окна спортзала могут нагревать резину до высоких температур, вызывая ее расширение и "пики" на швах.
Эту часть процесса часто игнорируют, но именно она является причиной того, что полы выходят из строя через две недели после окончания работ.
Являются ли ошибки в технике монтажа причиной ваших проблем?
Ошибки при укладке, такие как "компрессионная подгонка" (слишком плотное прижатие ковриков) или пропуск 100-фунтового ролика для пола, являются основными причинами скручивания. Без достаточного давления при укладке клей не переносится должным образом на обратную сторону резинового коврика.
Я часто вижу, как установщики пытаются добиться плотного прилегания, сжимая коврики друг с другом. Хотя вам нужны плотные швы, чрезмерное сжатие резины создает напряжение. Это напряжение в конечном итоге находит выход, обычно подталкивая края вверх в виде "палатки" или завитка. Самый важный инструмент в моем наборе для контроля качества - это 100-фунтовый валик для пола. Вы должны прокатывать пол в обоих направлениях, чтобы разрушить клеевые гребни и обеспечить передачу 100% на резину. Без этого валика контакт между клеем и полом составляет всего 50%. Этого никогда не будет достаточно, чтобы удержать края. Кроме того, если вы подрежете резину вровень со стеной, не оставив небольшого зазора для расширения, всему полу некуда будет деваться при расширении. Проконсультируйтесь с руководство по резиновым бортикам для тренажерных залов поможет вам профессионально управлять этими требованиями к периметру и переходным зонам.
Диагностика: определение конкретной проблемы
Чтобы починить пол, сначала нужно понять, что пошло не так. Я использую простой диагностический подход, чтобы помочь клиентам понять, почему их края двигаются. Если скручивание произошло на следующий день, это почти всегда проблема акклиматизации или памяти. Если скручивание произошло через несколько недель, скорее всего, это химический сбой или проблема с влажностью в основании пола.
| Симптом | Вероятная причина | Профессиональный ремонт |
|---|---|---|
| Мгновенная завивка после разворачивания | Отсутствие акклиматизации | Используйте утяжелители или повторно прокатывайте материал |
| Снятие швов спустя 2 недели | Проблема клея/влаги | Влейте свежий клей или проверьте влажность |
| Зазоры + завивка | Тепловое сжатие | Контроль температуры в помещении/HVAC |
Если вы выполните все необходимые действия, то сможете предотвратить ухудшение состояния пола и спасти укладку.
Как исправить скрученные края с помощью плана восстановления?
Незначительное скручивание можно устранить, приложив на 24 часа тяжелые грузы, например мешки с песком. В более серьезных случаях может потребоваться "переклеить" швы, очистив их от старого клея и нанеся полиуретановый клей с высокой степенью схватывания, специально предназначенный для резины.
Если завивка только начинается, то метод с весом - ваш лучший друг. Я предлагаю использовать мешки с песком или тяжелые пластины прямо на швах. Это заставит резину оставаться плоской, пока клей набирает свою силу. Если клей уже разрушился, вам понадобится более агрессивная техника "повторного приклеивания". Необходимо аккуратно приподнять край, соскоблить старый, засохший клей и очистить место с помощью пылесоса. Нанесите свежую шайбу одобренного производителем клея и прижмите ее. В некоторых случаях тепловая пушка может помочь "сбросить" память резины, но вы должны быть очень осторожны, чтобы не сжечь поверхность. Нагрейте резину только настолько, чтобы она стала эластичной, а затем сразу же наложите груз до полного остывания.
Профилактика: Контрольный список установки "золотого стандарта"
Как специалист по контролю качества, я считаю, что профилактика гораздо дешевле ремонта. Мой "золотой стандарт" начинается с правила 48 часов: разворачивайте все, прежде чем даже думать о клее. Во-вторых, всегда проверяйте основание на влажность и pH. Если пол слишком влажный, сначала используйте влагозащитный барьер. В-третьих, подбирайте клей в соответствии с конкретным типом купленной резины. Каучук EPDM и переработанный каучук SBR иногда по-разному реагируют на определенные растворители. И наконец, поддерживайте нормальную температуру в системе отопления, вентиляции и кондиционирования в течение всего процесса. Это предотвратит расширение или сжатие резины, пока клей пытается застыть.
Цель - создать условия, при которых резина будет стремиться оставаться плоской, а не бороться с ней.
Заключение
Подготовка и акклиматизация - это 90% успешной укладки резинового пола.
Если вы испытываете трудности с загибанием краев или хотите, чтобы ваш следующий проект в тренажерном зале был идеальным, отправьте мне личное сообщение для профессиональной консультации.