Rubber flooring curls mainly due to moisture exposure, temperature changes, and improper installation. To prevent this issue, proper subfloor preparation, correct installation techniques, and high-quality materials are essential. Regular maintenance and environmental control also play crucial roles in keeping your rubber flooring flat and functional.
As a production manager at a rubber flooring factory for over 15 years, I’ve seen countless cases of curling and lifting edges. This problem frustrates customers and can create safety hazards, but it’s largely preventable with the right knowledge. The curling phenomenon occurs when different forces act on the rubber material, causing tension that manifests as lifted edges. Understanding these forces is the first step toward preventing the problem.
Moisture is perhaps the biggest culprit. When water seeps beneath rubber flooring, it can weaken adhesives and cause the material to expand unevenly. Similarly, temperature fluctuations make rubber contract and expand naturally, but without proper accommodation for this movement, tension builds up at the edges. Installation errors compound these issues – an uneven subfloor or incorrect adhesive application creates weak points where curling begins.

I’ve visited countless facilities to troubleshoot flooring issues, and I’ve noticed that most curling problems stem from preventable causes. By addressing these factors early, you can save yourself the headache of replacing or repairing your rubber flooring prematurely. Let’s explore the specific prevention methods in more detail.
How do you protect rubber flooring?
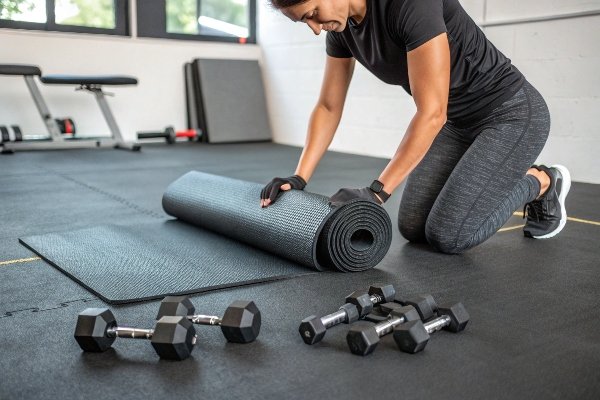
Protecting rubber flooring requires a multi-faceted approach focusing on moisture control, regular cleaning, and proper maintenance. Use entrance mats to reduce dirt and moisture tracked onto the surface, clean with pH-neutral cleaners, and avoid harsh chemicals that degrade rubber. Placing protective pads under heavy furniture prevents indentations and edge stress.
When I visit customer sites, I often find that protection starts before the flooring is even installed. Acclimation is critical – I always recommend unpacking rubber flooring and allowing it to adjust to room temperature for at least 24-48 hours before installation. This simple step reduces internal stresses in the material that might lead to curling later.
Moisture Control Strategies
Moisture is rubber flooring’s greatest enemy. In manufacturing facilities where I’ve consulted, implementing moisture barriers has dramatically reduced curling issues. These barriers can be as simple as polyethylene sheets laid beneath the flooring or as sophisticated as two-part epoxy moisture mitigation systems for concrete subfloors. Regular inspection for water leaks or condensation is also essential, especially in areas prone to moisture like locker rooms or entrances.
Cleaning and Chemical Exposure
I’ve seen perfectly good rubber floors ruined by improper cleaning agents. Harsh chemicals break down the rubber compounds and adhesives, leading to curling edges. I recommend mild, pH-neutral cleaners specifically formulated for rubber surfaces. During factory tours, I always emphasize that prevention includes training maintenance staff on proper cleaning protocols.
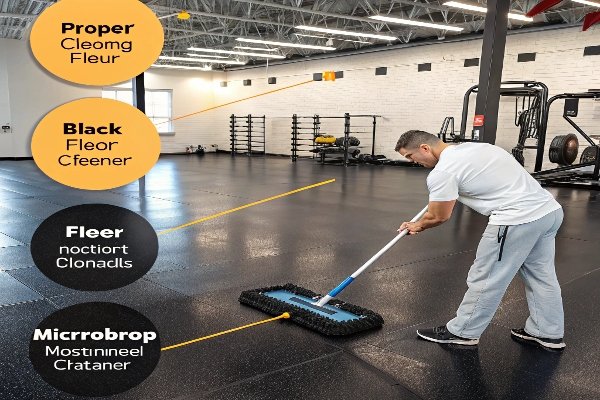
I remember visiting a school gymnasium where the rubber flooring was curling severely at the edges. Upon investigation, I discovered they were using a strong bleach solution for cleaning. After switching to appropriate cleaners and implementing a protection plan, their new flooring installation has remained flat and serviceable for years.
How to prevent floor mats from moving?
To prevent rubber floor mats from moving, use double-sided tape or non-slip backing on the underside of the mat. Heavier, thicker mats naturally resist movement. For mats in high-traffic areas, consider using mat grippers or installing recessed matting systems. Proper sizing ensures mats fit snugly within their intended space without sliding.
Movement is often a precursor to curling. In our testing facility, we’ve found that mats that slide frequently develop stress points that eventually lead to edge lifting. Addressing movement is therefore a key preventive measure.
Effective Mat Securing Methods
From my experience overseeing installations in commercial settings, I’ve found several effective methods to keep mats in place:
- Double-sided tape applied to the perimeter and center of the mat
- Rubber-backed mats with high-friction surfaces
- Mat grippers that work like tiny suction cups on the underside
- Recessed matting systems for permanent installations
The key is matching the securing method to the environment. In areas with heavy cart traffic, for example, I recommend recessed systems that create a flush surface with the surrounding floor.
Sizing and Placement Considerations
I’ve noticed that improperly sized mats are more likely to move and subsequently curl. When mats are too small for their intended area, they shift with foot traffic. When they’re too large, they bunch against walls or furniture, creating stress points. I always advise customers to measure carefully and allow for appropriate clearance around fixed objects.

During a recent factory tour with clients, I demonstrated how our quality control team tests mat stability on various surfaces. This attention to detail helps ensure that the products we manufacture stay put under real-world conditions, preventing the movement that leads to curling and edge lifting.
How to uncurl a rubber mat?
To uncurl a rubber mat, reverse-roll it in the opposite direction of the curl, then place heavy objects on the corners for 24-48 hours. For stubborn curls, apply gentle heat with a hairdryer or heat gun on low setting to make the rubber more pliable. As a last resort, use double-sided tape or adhesive to secure the edges permanently.
In our factory, we sometimes receive returned mats that have developed curls. This has given me firsthand experience with various uncurling techniques. While prevention is always preferable, these methods can salvage mats that have already begun to curl.
Reverse Rolling Technique
The most effective method I’ve found is reverse rolling. If your mat curls upward, roll it tightly in the opposite direction with the top surface facing outward. Secure it with straps or cord, then leave it for 24 hours. This helps retrain the rubber’s memory. However, this technique works best with newer curls; older, set-in curls may require additional measures.
Heat Application Methods
For stubborn curls, controlled heat application can make the rubber more pliable. In our testing lab, we use heat guns on low settings to gently warm the curled areas before flattening them. At home, a hairdryer on medium heat held 6-8 inches away can achieve similar results. Be careful not to overheat, as this can damage the rubber or cause it to become brittle over time.
I once visited a fitness center where all their equipment mats had curled edges, creating tripping hazards. I guided their maintenance team through a systematic uncurling process using reverse rolling and strategic weighting. The improvement was immediate, and by implementing proper cleaning and maintenance afterward, they’ve maintained flat mats for their members’ safety.
How do you fix curled floor mats?
Fix curled floor mats by first cleaning the underside thoroughly and allowing it to dry completely. For permanent fixes, apply construction adhesive or double-sided carpet tape to secure the edges to the subfloor. For temporary solutions, use anti-curl tape along the edges or heavy-duty mat holders designed specifically for preventing edge lifting.
When customers call our factory with curling problems, I often discuss both temporary and permanent fixing methods, depending on their specific situation. The approach varies based on whether the mat is standalone or part of a larger rubber flooring installation.
Adhesive Solutions
For permanent installations, construction adhesive applied in a zigzag pattern under the curled edges provides strong bonding. We manufacture specialized rubber flooring adhesives that allow for natural expansion while maintaining edge integrity. For temporary mats, high-quality double-sided tape designed specifically for rubber flooring works well without leaving residue upon removal.
Edge Treatments and Trim
Some of our most successful installations include beveled edges or transition strips that prevent lifting at vulnerable perimeter areas. These edge treatments distribute force more evenly and provide a smooth transition that’s less likely to catch or lift. For existing installations with curling problems, retrofitting with aluminum or rubber trim can both fix current curling and prevent future issues.
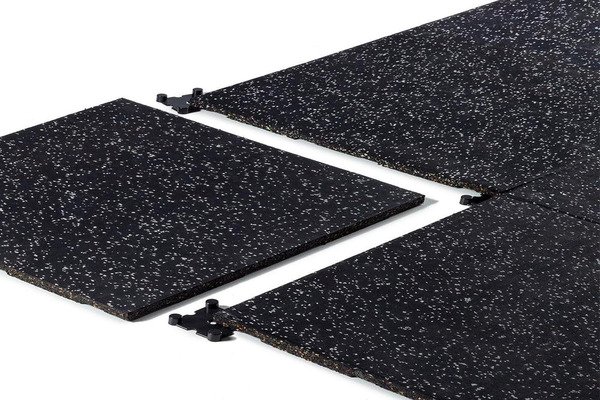
During a recent factory demonstration, I showed clients how our premium rubber flooring includes built-in edge reinforcement to resist curling. This feature has dramatically reduced warranty claims related to edge lifting and has become one of our most popular selling points for commercial installations.
What are the best practices for installing rubber flooring to prevent curling
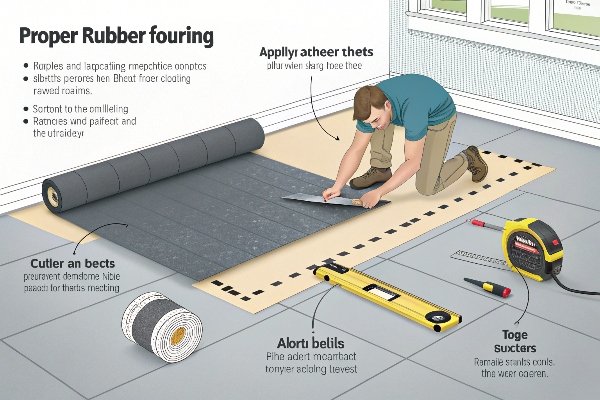
Best practices for installing rubber flooring include thorough subfloor preparation, proper acclimation of materials for 48-72 hours, using manufacturer-recommended adhesives, and leaving appropriate expansion gaps around the perimeter. Install in moderate temperature conditions, apply uniform adhesive, and roll the flooring with a 100-150 lb roller to ensure proper bonding.
In my years overseeing production and quality control, I’ve developed a comprehensive understanding of installation best practices. The foundation of a successful rubber flooring installation that resists curling begins well before the first piece is laid down.
Subfloor Preparation Requirements
I cannot overstate the importance of proper subfloor preparation. In our installation guides, we emphasize that the subfloor must be clean, dry, level, and structurally sound. Any deviation greater than 1/8" over 10 feet can create stress points where curling begins. Concrete subfloors should be fully cured (at least 28 days) and tested for moisture content – ideally below 75% relative humidity for most rubber flooring installations.
Adhesive Selection and Application
Through extensive testing in our factory lab, we’ve determined that adhesive selection is critical to preventing edge curling. Different subfloor materials and environmental conditions require specific adhesives. For areas with temperature fluctuations, we recommend flexible adhesives that accommodate movement. The application method matters too – using the correct trowel size ensures optimal coverage and bonding strength.
Last year, I personally supervised the installation of rubber flooring in a major university athletic facility. By insisting on proper acclimation, subfloor preparation, and adhesive application, we achieved an installation that has remained perfectly flat despite heavy use and varying conditions. The key was attention to detail at every step of the process.
Conclusione
Preventing curling in rubber flooring requires attention to moisture control, proper installation, quality materials, and regular maintenance. By addressing these factors from the beginning, you can ensure your rubber flooring remains flat, safe, and functional for its entire lifespan.