
EPDM (Ethylene Propylene Diene Monomer) adalah sistem lantai karet sintetis premium yang dikenal dengan daya tahan yang luar biasa, ketahanan terhadap sinar UV, dan penyerapan guncangan. Sistem ini terdiri dari struktur tuang basah dua lapis yang dirancang untuk memenuhi standar keamanan Critical Fall Height (CFH) khusus untuk taman bermain, pusat kebugaran, dan ruang komersial.
Dalam peran saya sebagai Spesialis Kontrol Kualitas, saya tidak hanya melihat permukaannya saja; saya menganalisis bahan kimia yang menyatukan lantai. EPDM bukanlah material tunggal; EPDM adalah sebuah sistem. Saya sering melihat klien mengajukan pertanyaan umum seperti "Apakah bagus?" tanpa memahami bahwa lantai EPDM yang dirancang untuk jalan setapak akan gagal total jika dipasang di bawah perosotan taman bermain. Rahasianya terletak pada rekayasa: rasio pengikat, kepadatan lapisan dasar, dan kualitas butiran.
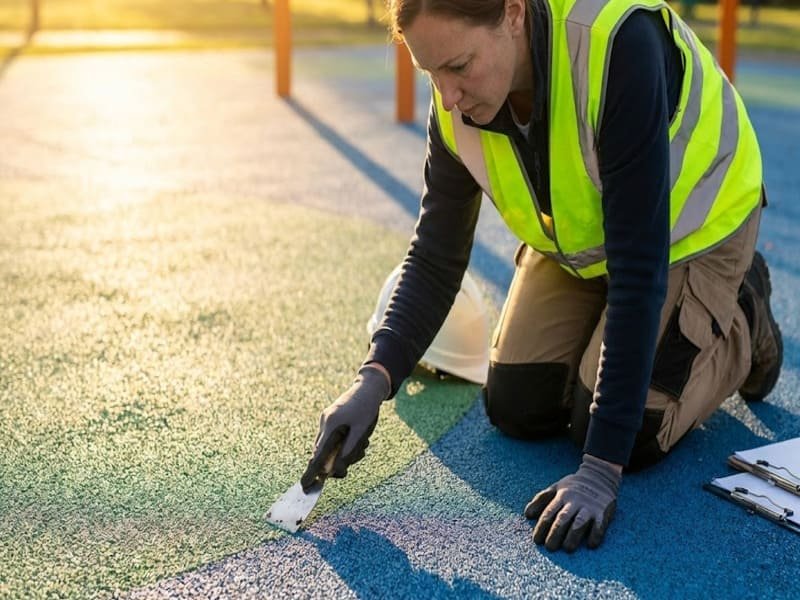
Ketika saya memeriksa sebuah lokasi, saya mencari tiga hal: pemadatan yang tepat (tidak ada butiran yang lepas), pengawetan yang konsisten (tidak ada titik-titik lunak), dan ketebalan yang tepat untuk penggunaan yang dimaksudkan. Banyak instalasi yang murah gagal karena mereka mengambil jalan pintas pada lapisan yang "tidak terlihat" - dasar SBR. Panduan ini membahas lebih jauh mengenai spesifikasi teknis, grafik ketebalan, dan perangkap umum yang tidak akan diberitahukan kepada Anda oleh sebagian besar kontraktor hingga semuanya terlambat.
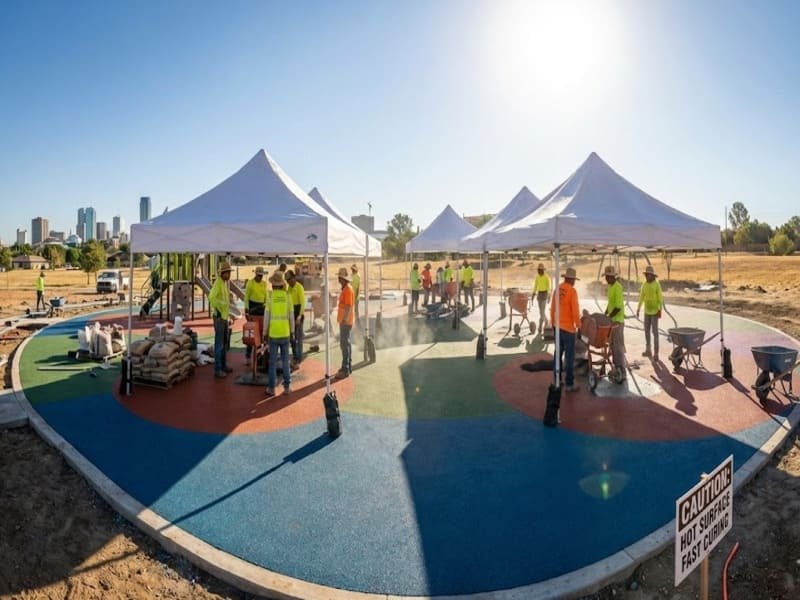
Untuk memahami mengapa lantai ini bekerja dengan sangat baik, Anda harus terlebih dahulu memahami anatominya. Ini bukan hanya lapisan karet; ini adalah sandwich bahan yang diperhitungkan dengan cermat.
Apa yang Dimaksud dengan Struktur Sistem "Tuang Basah"? (Perincian Lapisan demi Lapisan)
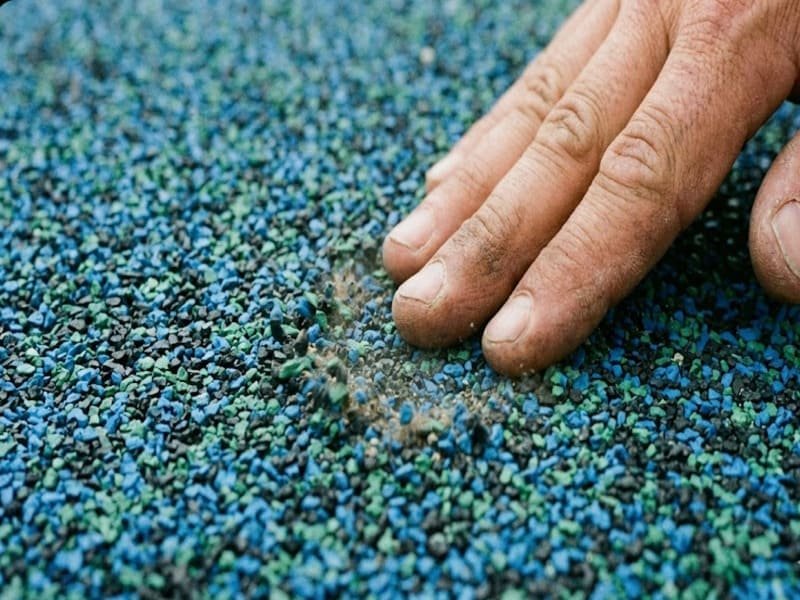
Sistem EPDM Wet Pour biasanya terdiri dari dua lapisan yang berbeda: lapisan dasar yang tebal dari karet SBR daur ulang untuk penyerapan benturan, dan lapisan aus bagian atas (10-15mm) dari butiran EPDM murni berwarna. Keduanya disatukan menggunakan rasio pengikat PU tertentu (biasanya 6-18% tergantung pada lapisannya).
Ini adalah area kebingungan nomor satu bagi para klien saya. Mereka bertanya, "Mengapa saya tidak bisa menuangkan karet berwarna?" Bisa saja, tetapi akan memakan banyak biaya dan menawarkan lebih sedikit pantulan.
Sistem ini bergantung pada Sub-pangkalanbiasanya berupa beton, aspal, atau batu pecah yang dipadatkan (untuk drainase). Di atasnya terdapat Lapisan Dasar (SBR). Ini terbuat dari ban daur ulang. Warnanya hitam, murah, dan berfungsi sebagai pegas. Di laboratorium, kami menguji lapisan ini untuk mengetahui "ruang kosong"-lapisan ini harus cukup berpori agar air dapat masuk, tetapi cukup padat untuk menopang berat.
Terakhir, bagian Lapisan Atas (EPDM) adalah bagian yang mahal. Bagian ini memberikan warna dan ketahanan terhadap sinar UV. Yang terpenting, rasio pengikat berubah di sini. Lapisan dasar mungkin menggunakan pengikat 6-8%, tetapi lapisan atas membutuhkan pengikat 18-20% untuk mencegah butiran terlepas. Jika kontraktor mencoba menggunakan pengikat 10% pada lapisan atas untuk menghemat uang, saya akan langsung gagal dalam inspeksi tersebut.
Anatomi Lantai Standar
| Lapisan | Bahan | Ketebalan Khas | Rasio Pengikat | Fungsi |
|---|---|---|---|---|
| Atas | Virgin EPDM | 10mm - 15mm | 18% - 20% | Estetika, Perlindungan UV, Ketahanan Aus |
| Dasar | SBR daur ulang | 10mm - 100mm+ | 6% - 8% | Penyerapan Dampak (Bantalan), Penghematan Biaya |
| Sub-pangkalan | Beton / Batu | Bervariasi | N/A | Stabilitas, Drainase |

Setelah Anda memahami strukturnya, pertanyaan logis berikutnya adalah: "Seberapa tebal lapisan dasar yang dibutuhkan?" Keputusan ini secara langsung berdampak pada keselamatan dan biaya.
Berapa Ketebalan Lantai EPDM yang Anda Butuhkan? (Bagan Pakar)
Ketebalan yang dibutuhkan sepenuhnya tergantung pada "Ketinggian Jatuh Kritis" (CFH) peralatan di atasnya. Jalan setapak standar hanya membutuhkan 15-20mm, sementara taman bermain dengan bingkai panjat tinggi mungkin membutuhkan ketebalan total 40mm hingga 100mm untuk memenuhi standar keselamatan seperti EN 1177.
Saya tidak bisa cukup menekankan hal ini: Ketebalan sama dengan Keamanan. Di fasilitas pengujian saya, kami menjatuhkan instrumen bentuk kepala khusus ke lantai untuk mengukur benturan G-force. Jika lantainya terlalu tipis, dampaknya bisa fatal.
Untuk Gym atau Lintasan LariAnda tidak khawatir akan jatuh dari ketinggian 3 meter; Anda khawatir akan benturan pada sambungan. Di sini, sistem 15mm-20mm (EPDM padat atau campuran SBR/EPDM tipis) sudah cukup.
Namun, untuk Taman bermainAnda harus melihat titik tertinggi yang dapat dipijak oleh seorang anak. Jika platform tersebut setinggi 1,5 meter, Anda secara hukum membutuhkan lantai yang dapat menyerap benturan tersebut.
Realitas Biaya: Setiap tambahan ketebalan 10mm akan menambah biaya karena Anda menggunakan lebih banyak bahan dan tenaga kerja. Desain cerdas melibatkan penggunaan bantalan yang lebih tebal hanya di bawah peralatan yang tinggi dan meruncing ke lapisan yang lebih tipis di zona pejalan kaki.
Panduan Pemilihan Ketebalan
| Aplikasi | Ketebalan Total yang Direkomendasikan | Pemisahan Lapisan (Atas / Dasar) | Sasaran Keselamatan |
|---|---|---|---|
| Jalan Setapak / Teras Golf | 15mm - 20mm | EPDM 10mm / SBR 5-10mm | Anti selip, estetika |
| Area Berat Badan di Gym | 20mm - 25mm | EPDM 10mm / SBR 10-15mm | Perlindungan peralatan, pengurangan kebisingan |
| Taman Bermain (Perlengkapan rendah) | 40mm | EPDM 15mm / SBR 25mm | CFH sekitar 1,2 meter |
| Taman Bermain (Perlengkapan tinggi) | 60mm - 100mm | EPDM 15mm / SBR 45-85mm | CFH > 1,8 meter (Keamanan Maksimal) |

Memilih ketebalan yang tepat sangat penting, tetapi bahkan ketebalan yang sempurna pun bisa gagal jika Anda melakukan kesalahan material atau pemasangan yang umum terjadi. Mari kita bahas apa saja tidak yang harus dilakukan.
Apa Saja Kesalahan Umum Saat Memilih Lantai EPDM? (Wajib Dibaca)
Kesalahan yang paling sering terjadi adalah menggunakan pengikat "Aromatik" dengan warna terang (menyebabkan kekuningan), mengabaikan drainase sub-dasar (menyebabkan lecet), memasang di tempat yang sangat panas, dan memilih kepadatan butiran yang salah untuk lalu lintas yang dituju.
Saya telah melihat taman bermain biru yang indah berubah menjadi hijau/kuning dalam waktu dua minggu. Kenapa? Efek "Ambering". Ada dua jenis lem PU: Aromatik (lebih murah, berubah menjadi kuning di bawah sinar UV) dan Alifatik (mahal, tetap jernih). Jika Anda memilih lantai berwarna biru muda atau abu-abu dan menggunakan lem yang murah, warna kuning dari lem akan bercampur dengan karet biru, menciptakan warna hijau. Selalu tentukan pengikat Alifatik untuk warna-warna terang.
Mimpi buruk lainnya adalah Tekanan Hidrostatik. Jika Anda memasang EPDM di atas beton yang menampung air, matahari akan memanaskan air yang terperangkap, mengubahnya menjadi uap. Uap tersebut mendorong ke atas, menciptakan gelembung-gelembung besar atau "lecet" di lantai Anda.
Jebakan "Ekonomi": Beberapa pembeli meminta "hanya satu lapis EPDM" langsung di atas beton tanpa dasar SBR untuk menghemat biaya. Hal ini menciptakan permukaan yang keras dan tak kenal ampun yang cepat aus karena tidak memiliki "daya dukung" atau elastisitas dari sistem lapisan ganda.
Tabel Pencegahan Jebakan
| Kesalahan | Konsekuensi | Solusi QC |
|---|---|---|
| Lem yang Salah (Aromatik) | Biru berubah menjadi Hijau; Putih berubah menjadi Kuning. | Gunakan PU Alifatik untuk warna-warna cerah/terang. |
| Sub-dasar yang buruk | Gelembung, pengangkatan, dan genangan air. | Pastikan beton memiliki kemiringan atau gunakan dasar batu yang permeabel. |
| Panas Instalasi | Permukaan tidak rata; sambungan terlihat. | Jangan memasang di atas suhu 30°C; lem akan mengering terlalu cepat sehingga sulit untuk diketam. |
Setelah kita membahas risiko teknis yang penting, mari kita lihat Pro dan Kontra yang lebih luas untuk membantu Anda membuat keputusan akhir.
Apa Saja Kelebihan dan Kekurangan Sistem EPDM yang Sebenarnya?
Keuntungan utamanya adalah peringkat keamanan terverifikasi (CFH), ketahanan terhadap cuaca ekstrem, dan fleksibilitas desain. Kekurangannya termasuk investasi awal yang lebih tinggi dibandingkan dengan timbunan lepas (pasir/serpihan kayu), kebutuhan instalasi profesional, dan potensi perbaikan jika dirusak.
Dari perspektif kualitas, EPDM adalah standar emas karena suatu alasan, sentimen yang digemakan oleh para ahli yang membahas apa saja keuntungan dari lantai karet EPDM dalam desain fasilitas modern.
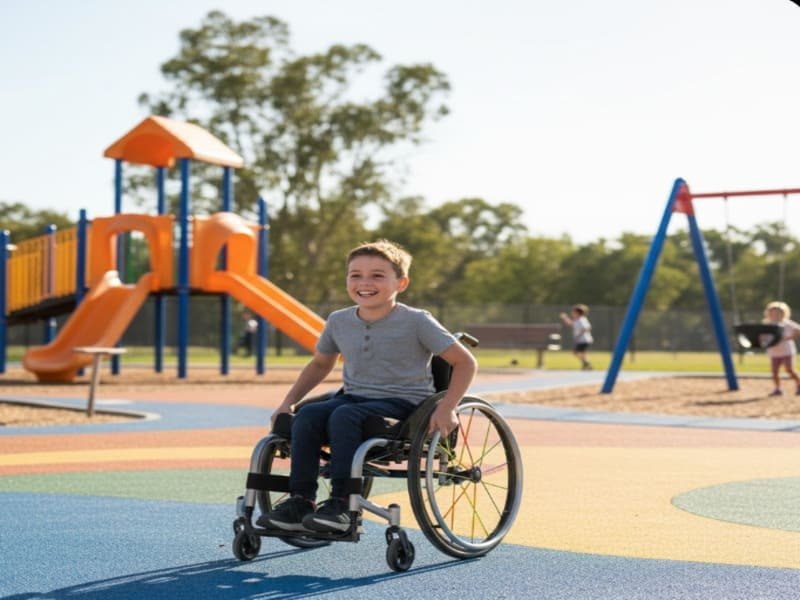
The Pros: Dapat diakses oleh kursi roda (sesuai dengan ADA), tidak seperti pasir atau serpihan kayu. Tidak licin, yang berarti tidak ada bahaya tersandung. Menciptakan lingkungan yang hidup dan menstimulasi.
Kekurangannya: Memang mahal di awal. Namun, saya selalu memberi tahu klien untuk menghitung Total Biaya Kepemilikan. Serpihan kayu perlu diisi ulang setiap tahun; EPDM bertahan 10-15 tahun.
Satu batasan yang jujur adalah Vandalisme. Meskipun tahan lama, orang yang nekad dengan pisau atau korek api dapat merusaknya. Kabar baiknya, EPDM mudah ditambal. Kami cukup memotong bagian yang rusak dan menuangkan karet baru.
Jika Anda telah memutuskan bahwa EPDM adalah bahan yang tepat, Anda perlu mengetahui cara merawatnya agar dapat bertahan selama 15 tahun.
Bagaimana Anda Memelihara EPDM untuk Memastikan Umur Panjang?
Perawatan rutin melibatkan penggunaan peniup daun untuk kotoran dan pencucian bertekanan rendah dengan sabun pH netral untuk pembersihan mendalam. Hindari pelarut yang keras, cairan berbasis minyak, dan alat berujung logam, karena dapat merusak pengikat dan butiran.
Pemeliharaan adalah hal yang menentukan masa pakai lantai. Ikatan kimiawi dalam lem PU memang kuat, tetapi memiliki kryptonite: Pelarut. Bensin, terpentin, atau pembersih yang mengandung asam kuat akan memakan lem, menyebabkan butiran-butirannya mengendur.
Untuk taman bermain di luar ruangan, masalah terbesar adalah pembusukan organik. Daun-daun berguguran, membusuk di pori-pori, dan lumut mulai tumbuh. Hal ini membuat lantai menjadi licin dan merusak drainase.
Saran QC saya:
- Mingguan: Bersihkan dedaunan dan puing-puing.
- Tahunan: "Pencucian lembut" (bukan tekanan tinggi) untuk membersihkan pori-pori-sebuah teknik yang dirinci dalam artikel kami tentang cara membersihkan lantai karet EPDM: panduan utama untuk alat dan tips.
- Musim dingin: Gunakan sekop plastik untuk salju, jangan gunakan sekop logam. Tepi logam akan mengiris lapisan atas seperti pisau.
Kami telah membahas lapisan, ketebalan, kesalahan, dan perawatannya. Mari kita rangkum semuanya ke dalam sebuah keputusan akhir.
Kesimpulan
Lantai EPDM adalah investasi teknik. Dengan memilih ketebalan yang tepat untuk kebutuhan keselamatan Anda, bersikeras pada kimia pengikat yang tepat (Alifatik vs Aromatik), dan memahami struktur lapisan ganda, Anda menjamin permukaan yang menawarkan keamanan dan daya tarik visual selama lebih dari satu dekade.
Tentang Penulis
Spesialis Kontrol Kualitas Anda
Saya adalah Spesialis QC yang berdedikasi dalam industri lantai karet, yang berspesialisasi dalam sistem tuang basah dan formulasi pengikat. Pekerjaan sehari-hari saya melibatkan pengujian kekuatan tarik, menganalisis rasio pengikat, dan memastikan kepatuhan terhadap CFH. Tujuan saya adalah menjembatani kesenjangan antara manufaktur kimia dan kesuksesan proyek Anda.
Tidak yakin tentang ketebalan atau pengikat yang tepat untuk proyek Anda?
Jangan mengambil risiko instalasi yang gagal. [Hubungi tim saya hari ini] untuk konsultasi teknis gratis, bagan ketebalan khusus untuk situs Anda, atau kit sampel untuk merasakan sendiri kualitasnya.