As a seasoned installation director, I have overseen countless gym turf installations across various facilities. The key to successful installation lies in understanding the critical tools, materials, and proven techniques that ensure long-lasting performance. Proper preparation and the right equipment make the difference between a professional installation and costly rework.
After managing over 200 gym turf installations in my career, I have learned that success depends heavily on three factors: thorough preparation, quality materials, and precise execution. Each installation presents unique challenges, from concrete foundations to wooden substrates, requiring specific approaches and tools. The following comprehensive guide outlines everything distributors need to know about professional gym turf installation.

Through years of hands-on experience, I have seen how the right knowledge can transform challenging installations into smooth operations that exceed client expectations.
Installation Preparation & Foundation Requirements: The First Step to Quality Installation?
Proper foundation preparation determines installation success. Clean, level, and dry surfaces with controlled temperature and humidity create optimal conditions for adhesive bonding and long-term performance. Foundation quality directly impacts the turf’s lifespan and user safety.
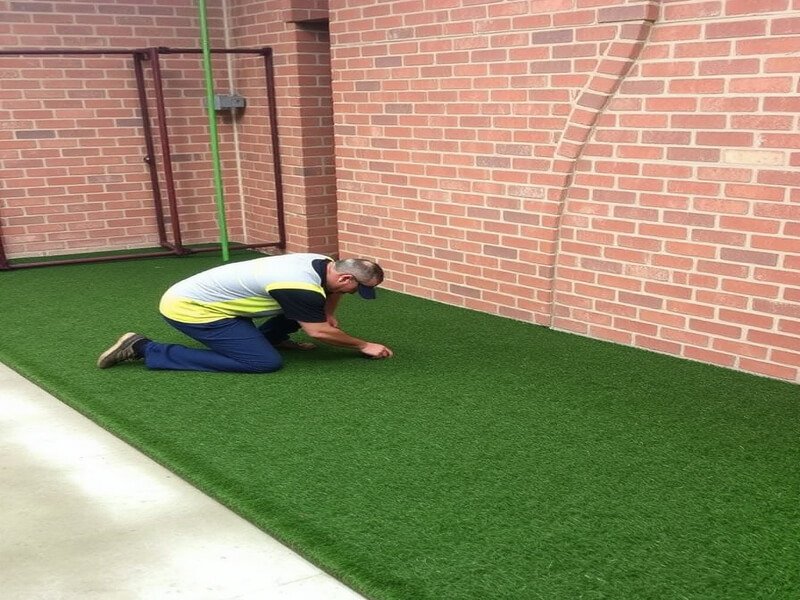
Foundation preparation cannot be overlooked as it forms the backbone of every successful gym turf installation. In my experience working with facilities ranging from school gymnasiums to professional training centers, I have observed that 90% of installation failures stem from inadequate foundation preparation rather than material defects.
Ground Foundation Treatment: Flatness, Cleanliness, and Dryness Are Key
Different foundation types require specific treatment approaches that I have refined through extensive field experience. Concrete foundations, the most common in commercial installations, must cure for a minimum of 28 days before turf application. I always conduct moisture tests using electronic meters to ensure readings below 4% relative humidity at the surface level.
For concrete surfaces, I recommend grinding any high spots and filling low areas with approved self-leveling compounds. The surface should not exceed 3mm deviation over a 3-meter straightedge. Ceramic tile foundations require thorough degreasing and light abrasion to promote adhesion. I use 80-grit sandpaper or grinding discs to create the necessary surface profile without damaging the substrate.
Wooden floor installations present unique challenges due to dimensional movement. I ensure moisture content stays below 12% and address any squeaks or loose boards before proceeding. Plywood subfloors must be at least 19mm thick with proper structural support underneath.
| Foundation Type | Key Requirements | Treatment Method |
|---|---|---|
| Hormigón | Cured 28+ days, <4% moisture | Grinding/leveling compound |
| Ceramic Tile | Clean, abraded surface | Degreasing + light sanding |
| Wood Floor | <12% moisture, structurally sound | Moisture barrier + preparation |
Environmental controls play a crucial role in preparation success. I maintain installation areas between 18-27°C for 48 hours before, during, and after installation. Relative humidity should not exceed 85%, and I use dehumidifiers when necessary to achieve optimal conditions.

Temperature fluctuations during the critical bonding period can cause adhesive failure and material distortion that becomes apparent months later.
Professional Tool & Core Material List
Having the right tools readily available prevents delays and ensures installation quality meets professional standards. My essential tool kit has evolved through years of field experience, focusing on equipment that delivers consistent results across various installation scenarios.
Essential Installation Tools:
- Precision cutting knife with replaceable blades (Japanese steel preferred)
- 50kg weighted roller for proper material compression
- Professional measuring tools including 30-meter steel tape and laser level
- Industrial vacuum cleaner with HEPA filtration capability
- Squeegee or window wiper for adhesive application
- Sharp utility knives for detailed trimming work
The cutting knife represents the most critical tool in any installation. I prefer Japanese steel blades that maintain sharpness throughout large installations. Dull blades create ragged edges that compromise seam quality and overall appearance.
Core Installation Materials:
- High-performance polyurethane adhesive (environmental-friendly, high-bond strength)
- Professional seaming tape designed for synthetic turf applications
- Double-sided mounting tape rated for permanent installation
- Primer solutions for challenging substrates
Adhesive selection significantly impacts installation longevity. I exclusively use single-component polyurethane adhesives that cure through moisture reaction. These provide superior bond strength compared to water-based alternatives and maintain flexibility throughout temperature cycles.
| Material Category | Especificación | Método de aplicación |
|---|---|---|
| Adhesivo | Single-component PU, 3-4kg/10m² | Notched trowel application |
| Seaming Tape | 150mm width, pressure-sensitive | Hand pressure + roller |
| Primer | Substrate-specific formulation | Brush or spray application |
Material quantity estimation requires precise calculation to avoid shortages during installation. I calculate adhesive coverage at 350-400g per square meter for standard applications, increasing to 500g for challenging substrates. Seaming tape consumption averages 1.2 meters per linear meter of seam when accounting for waste and overlap requirements.

Quality materials cost more initially but prevent expensive callback visits and warranty claims that damage business reputation.
Standard Installation Process & Technical Guidance: Details Determine Success?
Successful gym turf installation follows a systematic seven-step process: measurement, material acclimatization, cutting, adhesive application, placement, rolling, and final inspection. Each step requires specific timing and techniques to achieve professional results that last for years.
The installation process I have developed represents the culmination of hundreds of successful projects and lessons learned from early career mistakes. This systematic approach ensures consistent quality regardless of project size or complexity.
Detailed Installation Step Analysis
Phase 1: Site Measurement and Planning
Accurate measurement forms the foundation of every successful installation. I use laser measuring devices to create detailed floor plans, marking any obstacles, drains, or irregular features. Material layout planning occurs during this phase, optimizing roll placement to minimize waste and seam locations.
I always add 5% to calculated square footage to account for cutting waste and potential repairs. This buffer has saved countless projects from material shortages that could delay completion by weeks.
Phase 2: Material Acclimatization and Pre-installation Preparation
Gym turf materials must acclimate to installation environment temperature for minimum 48 hours before installation begins. I unroll materials completely and allow natural relaxation for at least 2 hours, preferably overnight. This step prevents bubbling and distortion that occurs when materials installed too quickly after delivery.
During acclimatization, I inspect each roll for manufacturing defects, color consistency, and dimensional accuracy. Any issues discovered at this stage can be resolved with suppliers before installation begins.
Phase 3: Precision Cutting and Seam Preparation
Sharp cutting tools are essential for clean, straight edges that create invisible seams. I use straightedges and chalk lines to guide cuts, ensuring perfect alignment between adjacent pieces. All cuts are made from the backing side to prevent pile damage.
For complex shapes around equipment or architectural features, I create cardboard templates first. This approach eliminates expensive mistakes and ensures perfect fit on the first attempt.
Phase 4: Adhesive Application and Curing Management
Proper adhesive application requires consistent coverage and timing control. I use notched trowels to achieve uniform adhesive thickness of 2-3mm across the entire substrate surface. Working temperature must remain between 18-27°C during application and initial curing period.
I apply adhesive in sections that can be covered within the working time window, typically 45 minutes for polyurethane adhesives. Rush applications lead to poor bonding and future performance problems.
Phase 5: Material Placement and Initial Positioning
Turf placement requires careful coordination to avoid trapping air bubbles underneath the material. I position one edge first and gradually work across the surface, maintaining consistent pressure to ensure complete contact with the adhesive layer.
Heavy weights or sandbags hold the material in position during the critical bonding period. Movement during this phase can create permanent wrinkles or bonding failures that require complete reinstallation.
Phase 6: Rolling and Compression Techniques
Professional rolling ensures complete adhesive contact and eliminates air pockets that compromise installation integrity. I use a 50kg roller, making overlapping passes that cover 100% of the installed area. Extra attention goes to seam areas and perimeter edges where lifting is most likely to occur.
Rolling must be completed within 2 hours of material placement for optimal results. Delayed rolling allows partial curing that prevents proper compression and bonding.
Phase 7: Final Inspection and Quality Control
Thorough inspection identifies any issues that need immediate attention before adhesive fully cures. I check for bubbles, lifting edges, seam alignment, and overall appearance. Minor adjustments can still be made during the first 24 hours after installation.
Documentation includes photographs of completed installation and any warranty-relevant details for future reference.
Systematic installation processes eliminate guesswork and ensure consistent professional results that meet client expectations every time.
Common Installation Problems and Solutions
Installation challenges arise predictably in certain situations, and I have developed specific solutions for each common problem encountered in the field.
Bubbling and Edge Lifting Prevention:
These issues typically result from inadequate surface preparation or environmental factors during installation. I combat bubbling by ensuring complete adhesive coverage and proper rolling technique. Edge lifting occurs when insufficient adhesive is applied to perimeter areas or when temperature changes cause material movement.
My solution involves applying extra adhesive within 150mm of all edges and using weighted strips during curing. For persistent bubbling, I inject additional adhesive through small punctures and re-roll the affected area.
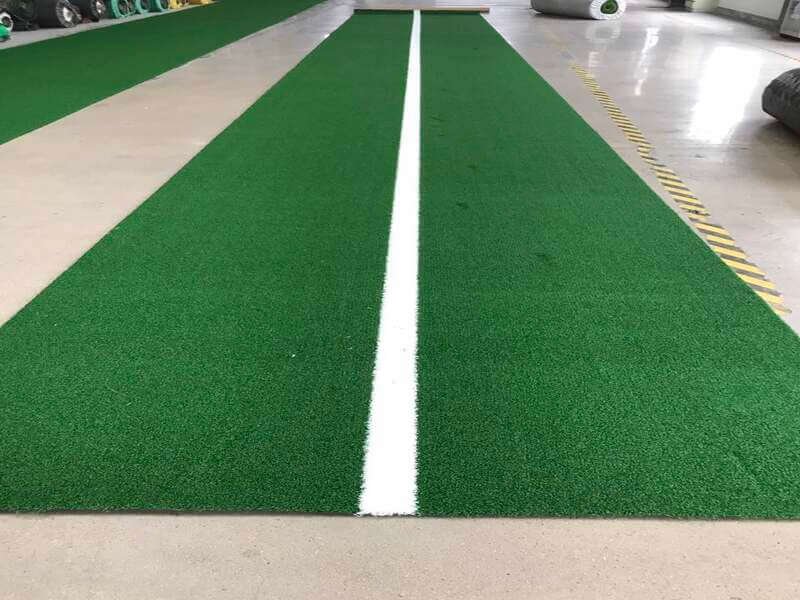
Seam Alignment and Flatness Issues:
Perfect seams require meticulous attention to pile direction and edge preparation. I always ensure pile runs in the same direction on adjacent pieces and use seaming tape that extends 75mm on each side of the joint. Weighted objects hold seams flat during the critical curing period.
Seam problems often stem from rushed cutting or inadequate edge preparation. I take time to create perfectly straight cuts and test-fit pieces before applying any adhesive.
Irregular Edge and Column Challenges:
Complex architectural features require careful templating and gradual cutting approaches. I create relief cuts in backing material to allow conforming around curves while maintaining pile integrity. Multi-piece installations around columns use planned seam locations that blend naturally with the overall design.
| Problem Type | Primary Cause | Prevention Method |
|---|---|---|
| Burbujeante | Poor adhesive coverage | Complete trowel coverage + rolling |
| Edge Lifting | Insufficient perimeter adhesive | Extra adhesive + weighted curing |
| Seam Visibility | Pile direction mismatch | Consistent pile orientation |
| Wrinkles | Material movement during cure | Proper weighting and positioning |
Temperature control during installation prevents many common problems. I monitor ambient conditions continuously and adjust work schedules to maintain optimal installation environment throughout the project.
Experience teaches that preventing problems costs less than fixing them after installation is complete.
Supplier Installation Support Services
Professional distributors should provide comprehensive installation support that goes beyond simply delivering materials to job sites. My experience working with various suppliers has taught me which support services truly add value to installation success.
Detailed Installation Documentation:
Quality suppliers provide step-by-step installation manuals with photographs showing proper techniques for each phase. These manuals should include troubleshooting guides for common problems and contact information for technical support during installation.
The best manuals I have used include material-specific guidance, environmental requirements, and tool recommendations based on actual field experience. Generic installation guides often miss critical details that affect real-world performance.
Remote Technical Guidance and On-site Training:
The best suppliers offer telephone support during installation and can provide on-site training for new installation teams. This support prevents costly mistakes and builds confidence in installation crews facing challenging projects.
Video consultation capabilities allow experienced technical representatives to observe installation progress and provide real-time guidance when problems arise. This service has saved several of my projects from expensive rework when unexpected site conditions required modified installation approaches.
Quality suppliers maintain technical hotlines staffed by experienced installation professionals who understand field conditions and can provide practical solutions quickly. Response time for technical inquiries should not exceed 4 hours during normal business hours.
Training Program Availability:
Comprehensive training programs should cover material properties, installation techniques, troubleshooting methods, and quality control procedures. I prefer suppliers who offer both classroom instruction and hands-on practice opportunities.
Certification programs that document installer competency add value for contractors bidding on large projects where installation expertise is a key selection factor.
Strong supplier relationships built on reliable technical support create competitive advantages for installation contractors and ensure customer satisfaction.
Product Specifications & Performance Standards: Understanding Material Quality?
Professional gym turf requires specific technical characteristics including 15mm pile height, 63,000 stitches per square meter density, and 2,800g total weight for optimal performance. These specifications directly impact installation methods, durability, and user safety in demanding fitness environments.
Understanding technical specifications helps distributors match products to specific applications and set proper client expectations. My experience with various product grades has taught me which specifications matter most for different installation environments.
Critical Technical Parameters
Pile Construction and Density:
Quality gym turf uses 100% polyethylene monofilament construction with 15mm pile height that provides optimal balance between performance and durability. The 63,000 stitches per square meter density ensures consistent surface characteristics and prevents premature wear in high-traffic areas.
Lower density products may cost less initially but require replacement sooner and can create safety issues when pile wears unevenly. I only specify products meeting minimum 60,000 stitches per square meter for commercial installations.
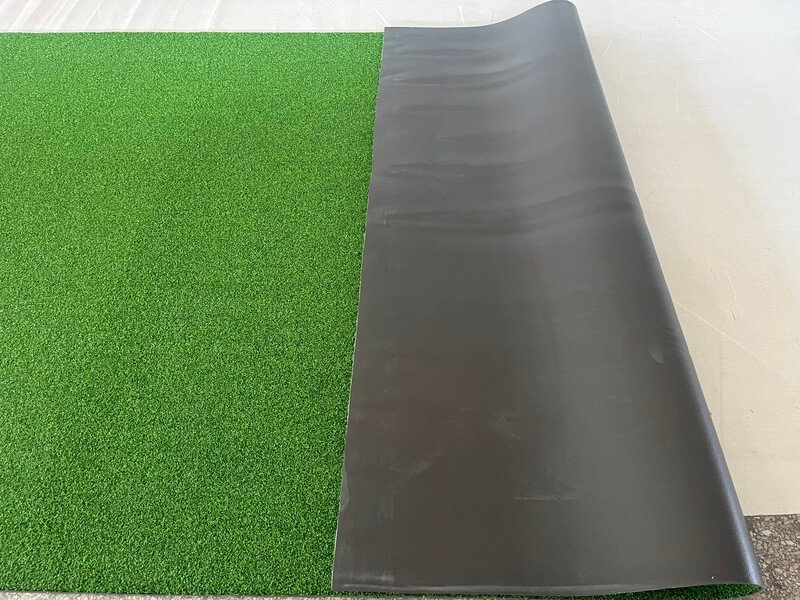
Backing System Design:
Professional products feature multi-layer backing systems including primary polypropylene base cloth, secondary net grip layer, and polyurethane coating for dimensional stability. Total product weight of 2,800g per square meter indicates substantial backing that resists stretching and distortion during installation and use.
Lightweight products often lack adequate backing support and can develop waves or wrinkles that compromise appearance and performance over time.
Color Options and UV Stability:
Available colors include green, black, blue, red, grey, and white to match facility design requirements. All colors must meet UV stability standards to prevent fading in areas with natural light exposure.
I specify products with UV inhibitors rated for minimum 6-year performance to ensure color consistency throughout the warranty period.
| Especificación | Standard Value | Performance Impact |
|---|---|---|
| Altura de la pila | 15 mm | Optimal comfort and durability |
| Stitch Density | 63,000/m² | Consistent surface characteristics |
| Total Weight | 2,800g/m² | Dimensional stability |
| Backing Layers | 3-layer system | Installation and long-term performance |
Quality specifications cost more initially but deliver superior long-term value through extended service life and reduced maintenance requirements.
Distributors who understand and communicate technical specifications build trust with professional installers and end users.
Conclusión
Professional gym turf installation success depends on proper preparation, quality materials, and systematic execution of proven techniques that deliver lasting results.
Ready to Get Started?
Contact our team today for detailed product specifications, installation support, and free samples of our professional-grade gym turf materials. Our technical experts are standing by to help you select the perfect products for your next installation project.
📞 Call Now: Request immediate consultation and free sample kit
📧 Email Us: Get detailed specifications and pricing within 24 hours
🔗 Visit Our factory: See our complete range of gym turf solutions
Don’t let installation challenges compromise your project success – partner with experienced professionals who deliver results you can trust.