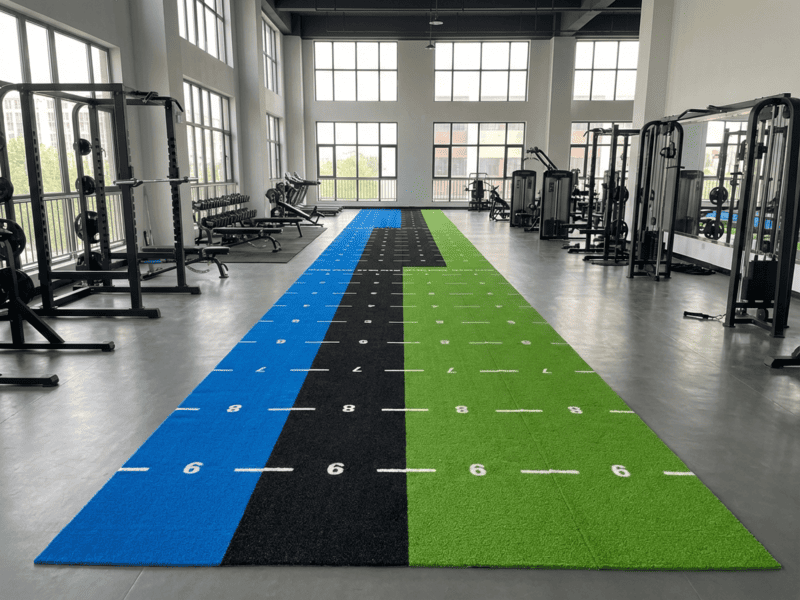
To fix curling gym turf, you must clean the subfloor, neutralize the backing’s physical memory with a heat gun (50°C-60°C), and apply a high-shear bonding agent like moisture-cured urethane or 15cm wide reinforced turf tape. Secure the edge with 20kg+ weights for a full 24-hour cure cycle to ensure a flat, safe surface.
Curling is a mechanical failure caused by "creep" or thermal contraction in the turf’s secondary backing. When synthetic turf is manufactured, the fibers are tufted into a primary backing and then locked in with a secondary layer, usually SBR latex or Polyurethane (PU). If this material is rolled tightly for shipping or installed without acclimation, internal stresses remain. In a gym environment, the friction from sled pushes and lateral sprints pulls against these stresses, causing the edges to lift. As a Technical Director, I have analyzed countless failures where owners simply "re-glued" cold turf. Without heating the backing to its glass transition temperature—making it pliable again—the internal tension will simply pull the glue off the floor again within weeks. You are not just sticking grass to the floor; you are performing a thermal reset of a multi-layer polymer system.
You must first diagnose the severity of the curl to determine if a simple tape fix is sufficient or if a full chemical bond is required.
How Do I Determine the Correct Repair Method for My Gym?
The repair strategy depends on the subfloor material and the "shear force" expected in that area. For home gyms with low-impact use, heavy-duty tape is sufficient, but for commercial sled tracks on concrete, only a liquid urethane adhesive can provide the 300+ PSI bond strength needed to prevent recurring curling.
Different scenarios require different "holding power." For instance, a garage gym on unsealed concrete faces hydrostatic pressure (moisture rising from the slab), which destroys standard carpet tape. In contrast, a commercial facility with a plywood subfloor allows for mechanical fastening, which is the most reliable method available.
| السيناريو | الطابق السفلي | Recommended Bond | Tool Required |
|---|---|---|---|
| Home Garage (Low Traffic) | الخرسانة | 15cm Double-Sided Tape | مسدس حراري |
| Commercial Sled Lane | الخرسانة | Moisture-Cure Urethane | مجرفة مسننة |
| Functional Zone | طبقة تحتية مطاطية | PSA (Pressure Sensitive) | Weighted Roller |
| Professional Sports Field | Wood/Plywood | Seam Plates + Screws | Impact Driver |
If you are a facility manager, you must consider "Down Time." A tape repair allows athletes back on the floor in 4 hours. A urethane glue repair requires a hard 24-hour lockout. I often see gyms fail because they allow sled work too soon, breaking the chemical "cross-linking" of the glue before it reaches full Shore A hardness. If the backing is brittle or "white" and flaking, the polymers have oxidized; in this case, no adhesive will work, and that specific 1-meter section must be cut out and replaced with a fresh inlay to maintain safety standards.
Once you have selected your materials, follow this rigorous technical sequence to ensure the edge never lifts again.
What is the Step-by-Step Professional Repair Protocol?
The professional repair protocol involves five stages: Contaminant Removal, Expansion Trimming, Thermal Resetting, Bonding, and Compression. Failure to complete the 24-hour compression stage is the most common reason for repair failure in high-traffic functional fitness zones.
1. Subfloor and Backing Preparation
Peel the turf back at least 30cm. Use a wire brush or scraper to remove old, crystallized glue or tape residue. Clean the subfloor with 70% Isopropyl Alcohol to remove oils. If the turf has "grown" due to heat expansion and is hitting a wall, use a sharp utility knife to trim a 5mm gap. If there is no gap, the turf will "bridge" and curl again immediately.
2. Thermal Reset (The 50°C Rule)
Use an industrial heat gun. Apply heat to the الجانب السفلي of the turf (the black or green backing). You want the material to reach approximately 50°C to 60°C until it feels like a soft noodle. While warm, roll it against the curl (Reverse Rolling). This neutralizes the "latent tension" from the manufacturing process.
3. Application of Bonding Agent
For commercial use, spread a 15cm wide path of urethane adhesive using a 3mm x 3mm notched trowel. This ensures 100% "wet-out" coverage on the textured backing of the turf. If using tape, apply the tape to the floor first, use a hand roller to secure it, then peel the top liner and lay the turf.
4. Controlled Compression
Place 20kg bumper plates edge-to-edge along the repair. Do not leave gaps. The weight must stay for 24 hours. This forces the adhesive into the "valleys" of the turf backing, creating a mechanical lock.
5. Transition Protection
For the ultimate fix, install an aluminum transition strip over the edge. This costs approximately $15-$25 per meter but prevents sleds from ever hitting the turf edge directly. This moves the failure point from the "edge" to the "surface," which is much more durable.
Prevention is always more cost-effective than constant repairs, especially when considering the liability of a trip-and-fall accident.
How Do I Prevent Future Curling and When is it Time to Replace?
Preventing curls requires a 48-hour pre-installation acclimation period and strict moisture control. If the turf shows "waves" in the center or the backing has separated from the fibers (delamination), the material has reached its end-of-life and must be replaced to meet safety compliance.
Acclimation and Environmental Control
Most curling occurs because turf is installed "cold" from a delivery truck. In our factory, we recommend unrolling the turf and letting it sit in the gym’s ambient temperature for 48 hours. This allows the plastic fibers to reach dimensional stability. Furthermore, never "wet-mop" the edges. Water seeping under the edge is the primary cause of tape failure. Use a vacuum or a dry-foam cleaner for the perimeter.
Cost vs. Value Analysis
A DIY tape repair costs less than $50. A professional urethane repair with transition strips might cost $200-$500 depending on the length. However, a single injury lawsuit from a tripped client can cost thousands. If you see "fiber shedding" (balding) along the curled edge, the structural integrity is gone. Replace that section immediately.
- Check edges every Monday morning during facility inspection.
- Ensure your cleaning crew knows not to spray water directly into the seams.
- Maintain a consistent humidity level to prevent the backing from becoming brittle.
الخاتمة
Heat the backing to reset memory, then glue and weight for 24 hours.
Need a technical assessment for your facility’s flooring?
If your current turf is failing or you are planning a high-traffic sled lane and want to avoid these issues from day one, send me a private message. I can provide specific material data sheets and custom installation guides to ensure your floor stays flat under the toughest conditions.