
To plan a gym layout with turf and rubber zones, you must follow a 7-step process: measure your space, define functional zones, match material thicknesses, and execute a flush-mount transition. Integrating a dedicated sled runway with a high-impact rubber lifting area ensures maximum safety and equipment durability.
Planning a functional hybrid gym is a balancing act between physics and flow. As an installation director, I’ve seen many owners treat turf and rubber as separate projects, leading to uneven floors and dangerous edges. A truly professional layout relies on the "Level-Plane" principle—ensuring the high-density rubber tiles and the synthetic turf sit at the exact same height on the subfloor. You must account for the specific "pile height" of the turf and the "compression rate" of the rubber under heavy loads. If you use a 15mm rubber tile next to a 10mm turf without a 5mm underlay, you create a permanent tripping hazard. My goal is to guide you through the mechanical integration of these surfaces so your athletes can transition from a heavy squat to a sprint without a single stutter in their stride.
Success in gym planning isn’t just about how it looks on day one; it’s about how the seams hold up after 10,000 sled pushes. Let’s break down the exact engineering steps to get this right.
What is the Step-by-Step Guide to Planning a Turf and Rubber Gym Layout?
The most effective planning follows a linear 7-step sequence: 1. Measure total space, 2. Map training zones, 3. Select rubber thickness (15mm+ for weights), 4. Choose turf density, 5. Calculate traffic flow, 6. Match floor heights with shims, and 7. Execute the final flush-mount installation.
| الخطوة | بند العمل | Critical Engineering Goal |
|---|---|---|
| الخطوة 1 | Space Measurement | Account for perimeter expansion gaps (approx. 5-10mm). |
| الخطوة 2 | تعريف المنطقة | Separate "High-Impact" (Rubber) from "Dynamic" (Turf). |
| الخطوة 3 | اختيار المواد | Match heights (e.g., 15mm Rubber to 10mm Turf + 5mm Pad). |
| الخطوة 4 | تدفق حركة المرور | Keep sled lanes clear of doors and water stations. |
| الخطوة 5 | تجهيز الأرضية السفلية | Ensure a moisture-sealed, level concrete base. |
In my experience, Step 3 is where most designs fail. Owners often pick turf and rubber independently based on price, ignoring the vertical height difference. To solve this, I use a "Shim and Level" strategy. If your rubber is thicker than your turf, you must install a high-density foam or rubber underlayment beneath the turf zone to bring it flush. This creates a seamless transition that doesn’t require ugly, dangerous metal transition strips. Additionally, when mapping Step 2, you must ensure your "Sled Lane" isn’t a dead end. It needs clear start and stop "buffer zones" to prevent sleds from crashing into walls or expensive glass partitions.
Once you have the steps down, you need to look at a concrete example of how these dimensions actually fit into a real-world facility.
Can you provide a typical Example Hybrid Gym Layout Plan?
A balanced 600 m² gym layout typically allocates 65% to rubber lifting zones and 15% to a turf runway, with the remaining 20% dedicated to traffic paths and a "buffer zone." This ratio ensures that heavy equipment remains stable while providing ample room for explosive sled work.
Example Layout: 600 m² Professional Facility
- Total Rubber Zone (400 m²): Used for power racks, machines, and free weights.
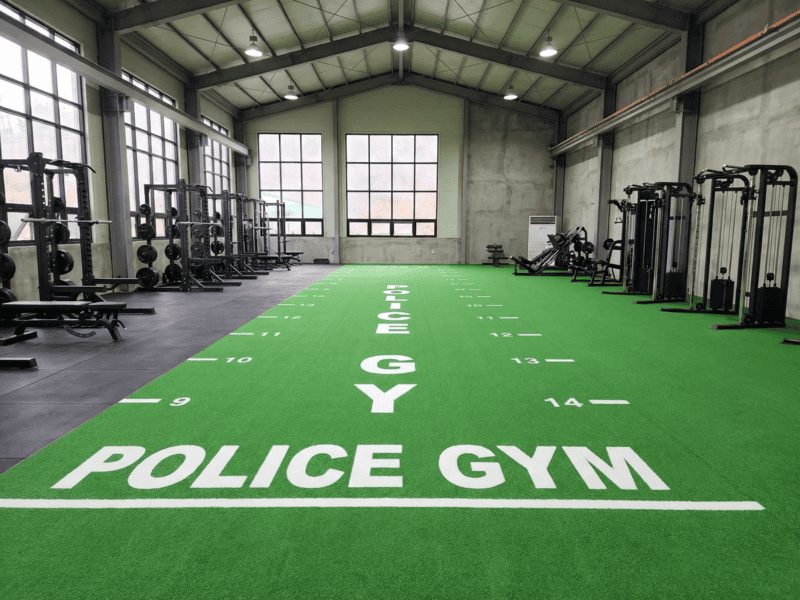
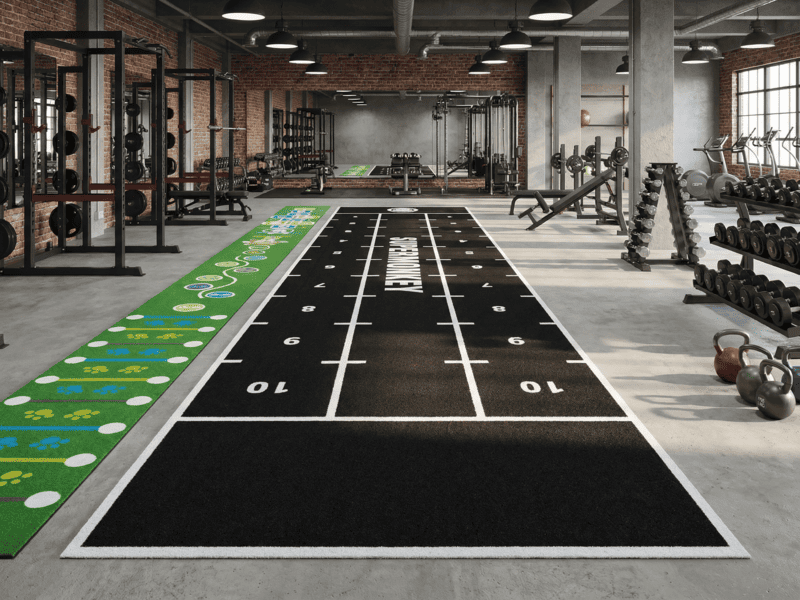
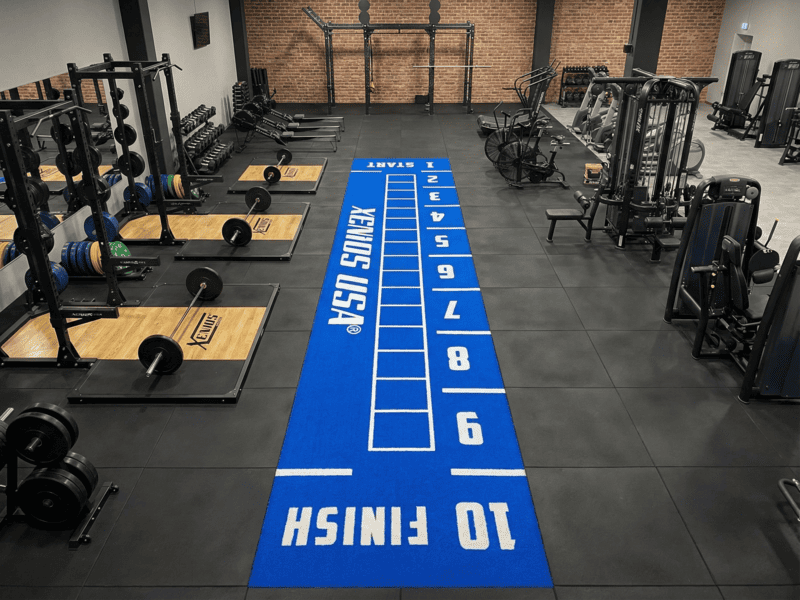
- Turf Runway (30m x 1.8m): A dedicated "Speed Lane" positioned along the longest wall.
- Buffer Zone (1m Border): A rubber strip surrounding the turf to protect it from stray dumbbells.
- Traffic Paths (1.2m Width): Clear walkways that prevent members from crossing active sled lanes.
| Zone Category | حجم المساحة | Material Recommended |
|---|---|---|
| Lifting/Drop Zone | 250 m² | 20mm-30mm High-Density Rubber Tiles |
| اللياقة البدنية العامة | 150 m² | 8mm-10mm Rubber Rolls |
| Functional Turf | 54 m² | 12mm PE Turf + 5mm Shock Pad |
| Circulation/Path | 146 m² | 8mm Rubber (Standard) |
I always recommend the "Runway" approach for turf. Placing turf in the center of the gym (the "Island" layout) looks great in photos but is a nightmare for traffic management. By placing a 1.8-meter wide turf lane along a wall, you create a "high-speed corridor" that stays out of the way of people moving between weight machines. I also insist on a 1-meter "Buffer Zone" of rubber around the turf. Why? Because members will inevitably drop a 20kg plate near the edge. Rubber can absorb that impact; turf cannot. This layout logic extends the life of your turf by 30-40% by preventing edge damage and fiber crushing from heavy equipment leaks.

Even with a great layout plan, there are several "invisible" mistakes that can ruin a high-end installation during the construction phase.
What are the Common Mistakes when designing Turf and Rubber Gym Zones?
Common mistakes include ignoring subfloor moisture, using inconsistent material thicknesses, placing turf in high-traffic walking paths, and choosing "cheap" polypropylene turf that melts under sled friction. Failing to use polyurethane adhesive leads to seam separation and "bubbling" within months.
| الخطأ الشائع | التبعات التقنية | How to Fix It |
|---|---|---|
| Mismatched Heights | 5mm-10mm trip hazard | Use shim underlayments to level the floor. |
| Wrong Turf Material | Turf "melts" or tears from sleds | Use Polyethylene (PE) fibers, not PP. |
| Standard Glue | Seams "creep" and separate | Use 2-part Polyurethane adhesive only. |
| Poor Traffic Flow | Members walk across sled lanes | Designate 1.2m clear walking paths. |
The most expensive mistake I see is the "Cheap Turf Trap." Many owners buy residential-grade turf for a commercial gym. When you push a 150kg sled across it, the friction creates heat. Cheap plastic (PP) will literally melt or "scar," leaving permanent bald spots. I only install high-density PE turf because it’s engineered for friction. Another critical error is ignoring "The Creep." Rubber expands when it gets warm. If you don’t leave a 5mm expansion gap hidden under your baseboards, the rubber will have nowhere to go but لأعلى, creating bubbles in the center of your floor. Finally, stop using transition strips. They are the hallmark of a lazy installation. If you plan your heights correctly in the design phase, the transition should be 100% flush and bonded with industrial adhesive for a permanent, professional finish.
الخاتمة
A 100% successful gym plan requires a 7-step logic: matching material heights, creating dedicated sled runways with buffer zones, and using industrial-grade PE turf.
Planning a hybrid layout can be complex, but you don’t have to do it alone. If you need a technical floor plan review or a custom material specification to ensure your turf and rubber are perfectly flush, private message me today.